Assets Import
Introduction
Assets Import allows you to utilize the power of importing a .csv file on Assets Management. By doing so, you not only save valuable time but also ensure the consistency and accuracy of your asset information.
Usage
Performing the Assets Import involves two essential steps: Structuring the .csv file and Importing your Assets .csv file by navigating through Conviso Platform.
Structuring the .csv file
To begin, create a .csv file with the requested data outlined below. It is crucial to adhere to specific rules when importing asset CSV files into the Conviso Platform.
Below there are the column names with the values that must be in the file, as well as the possibilities of the fields to be filled in; otherwise, the assets will not be created automatically.
-
name: asset name (mandatory);
-
url: asset URL (optional);
-
description: asset description (optional);
-
technologies: ruby, java, php, ruby, jquery, frameworks, mobile, none, etc. (optional);
-
type: none, client_server, API, progressive_web_app, web, native_mobile, hybrid_mobile database, dmz, legacy, cluster node (optional);
-
architecture: none, monolithic, microservices, serverless (optional);
-
criticity: none, critical, high, medium, low (optional);
-
development_team: none, internal, external, internal_and_external (optional);
-
development_model: none, agile, waterfall, third_party (optional);
-
audience: none, internal, external, internal_and_external (optional);
-
teams: assigned team for asset access (optional);
-
integrations: fortify, nessus, sonarqube, none (optional). The system integration must exist before filling in the integrations field.
-
data_classification: none, public, non-confidential, confidential (optional)
-
environment: none, amazon-aws, microsoft-azure, google-cloud, ibm-bluemix, on-premise, another-cloud (optional)
-
life_cycle: none, production, homologation, certification, discontinued (optional)
-
tags: to assist you when searching (optional)
-
scan_type: none, server, container, SAST, DAST (optional)
You may also use this Template to assist you on creating the .csv file. Below, an example:

When populating the CSV file, ensure that all values are in English and lowercase. In the case of optional fields, even if you wish to leave them blank, it is essential to indicate this by filling them with "none".
By following these guidelines, you maintain a standardized format and facilitate seamless importation.
Importing your Assets CSV file
To import your assets using a CSV file, follow these simple steps:

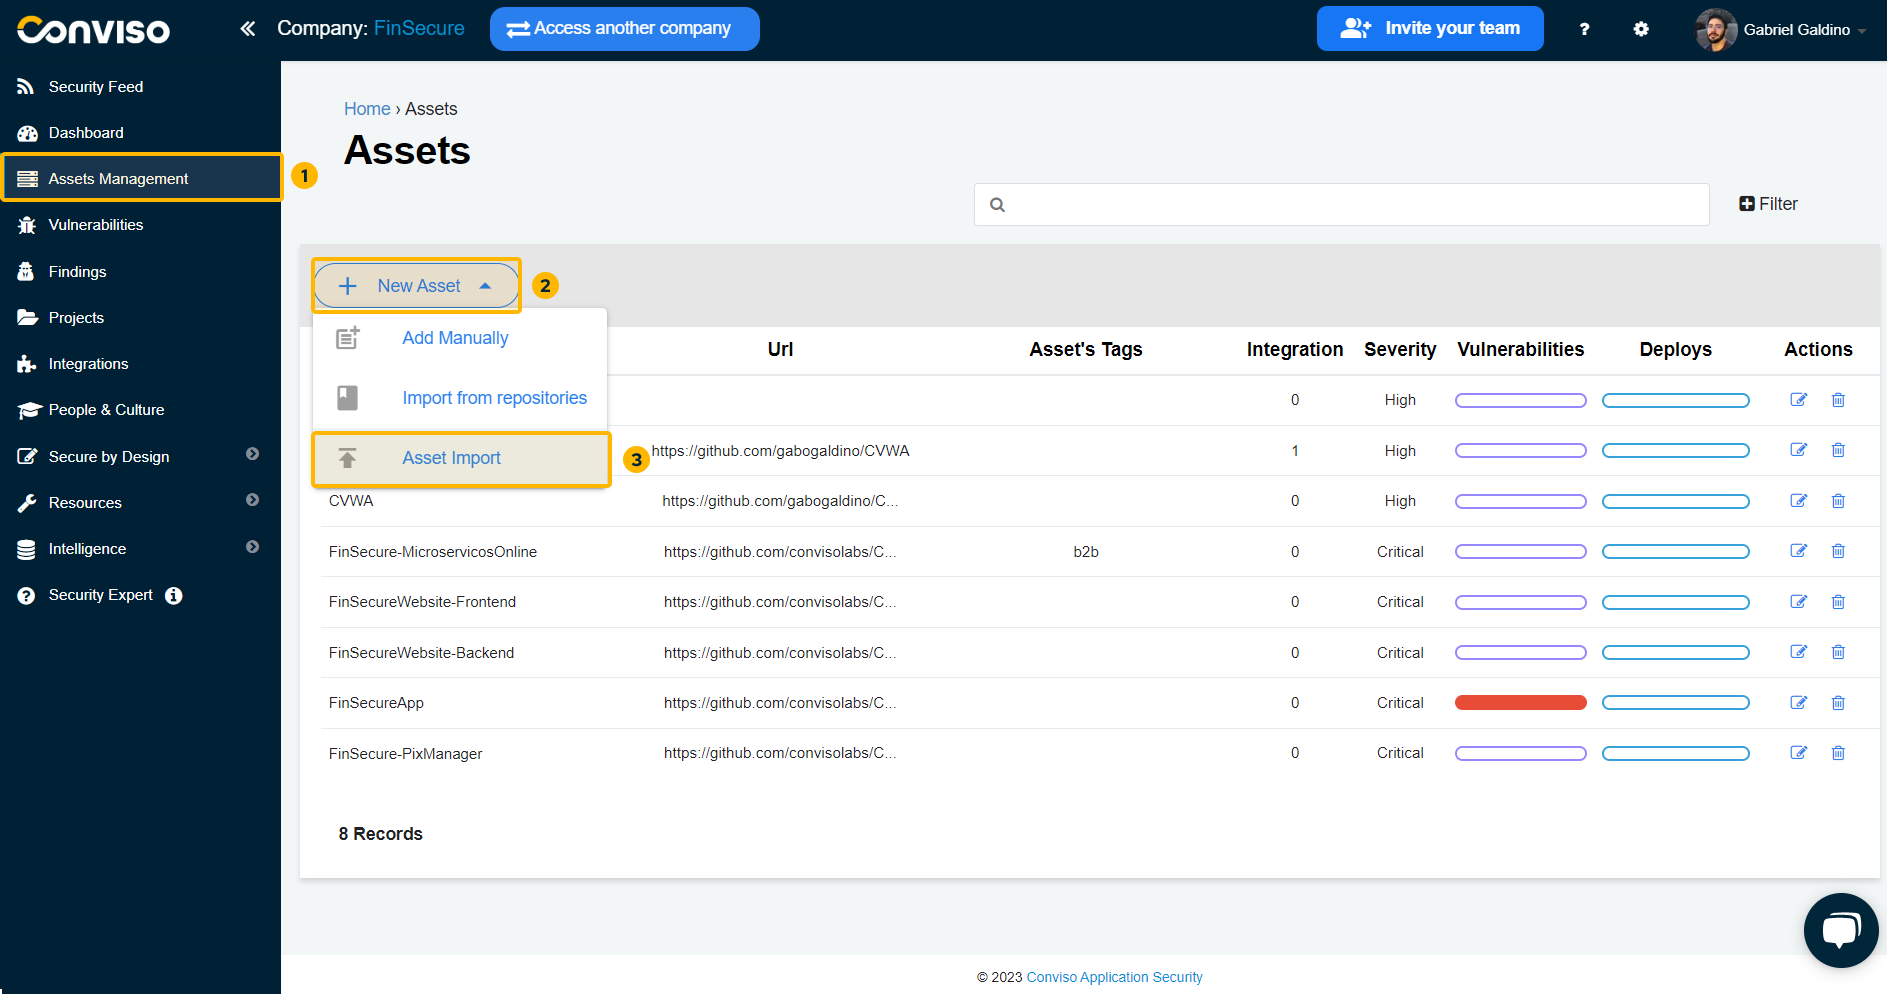
Step 1 - From the main menu on the left-hand side, click on "Assets Management".
Step 2 - In the right panel, click the "New Asset" button, and then select the "Asset Import" option from the drop-down list.
Step 3 - In the modal window, click the "Select File" button to browse for your custom .csv file and choose it from your local storage.

Step 4 - Step 4: Select the .csv file containing your asset data.
Step 5 - Click "Send" to initiate the asset import process. Conviso Platform will start importing the assets based on the data in your CSV file.
By utilizing the import feature, you can effortlessly add multiple assets in one go, saving valuable time and effort. Ensure that your CSV file adheres to the specified structure and guidelines to ensure an accurate asset creation process.
Support
If you have any questions or need help using our product, please don't hesitate to contact our support team.
Resources
By exploring our content, you'll find resources to help you understand assets management:
Continuous monitoring and management of the application: The monitoring and validation of findings from analyzes performed – whether through dynamic tests (DAST), interactive tests (IAST), or Network Scans need to be monitored and maintained in a centralized and organized way by the teams involved in the process.
Security Risk Management - Best Practices and Processes: In this article, we will discuss the importance of security risk management and share best practices for effectively executing this process.
