First steps with the Conviso Platform
Introduction
Hello, if you're reading this, it means you've just received your first access to the Conviso Platform!
Let's go through the initial steps for a great experience in secure development.
Step 1 - Login to Conviso Platform
If you are entering for the first time, the following screen will appear for you to register on the platform:
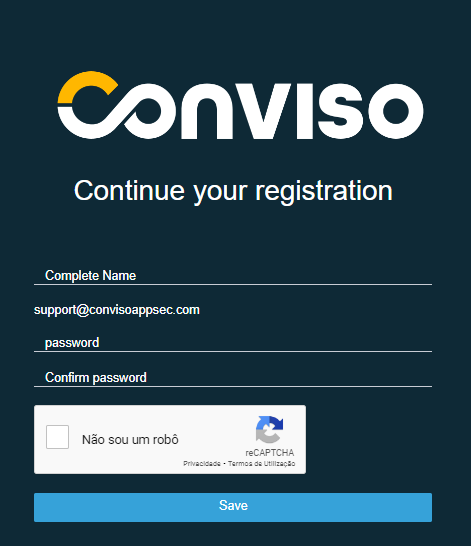
On the screen above, you can set your name and password. Then you can configure a Multi-Factor Authentication (MFA).
To perform this configuration, click on Setup now and follow the steps shown in the image. Use your phone's camera to scan the code and authenticate:
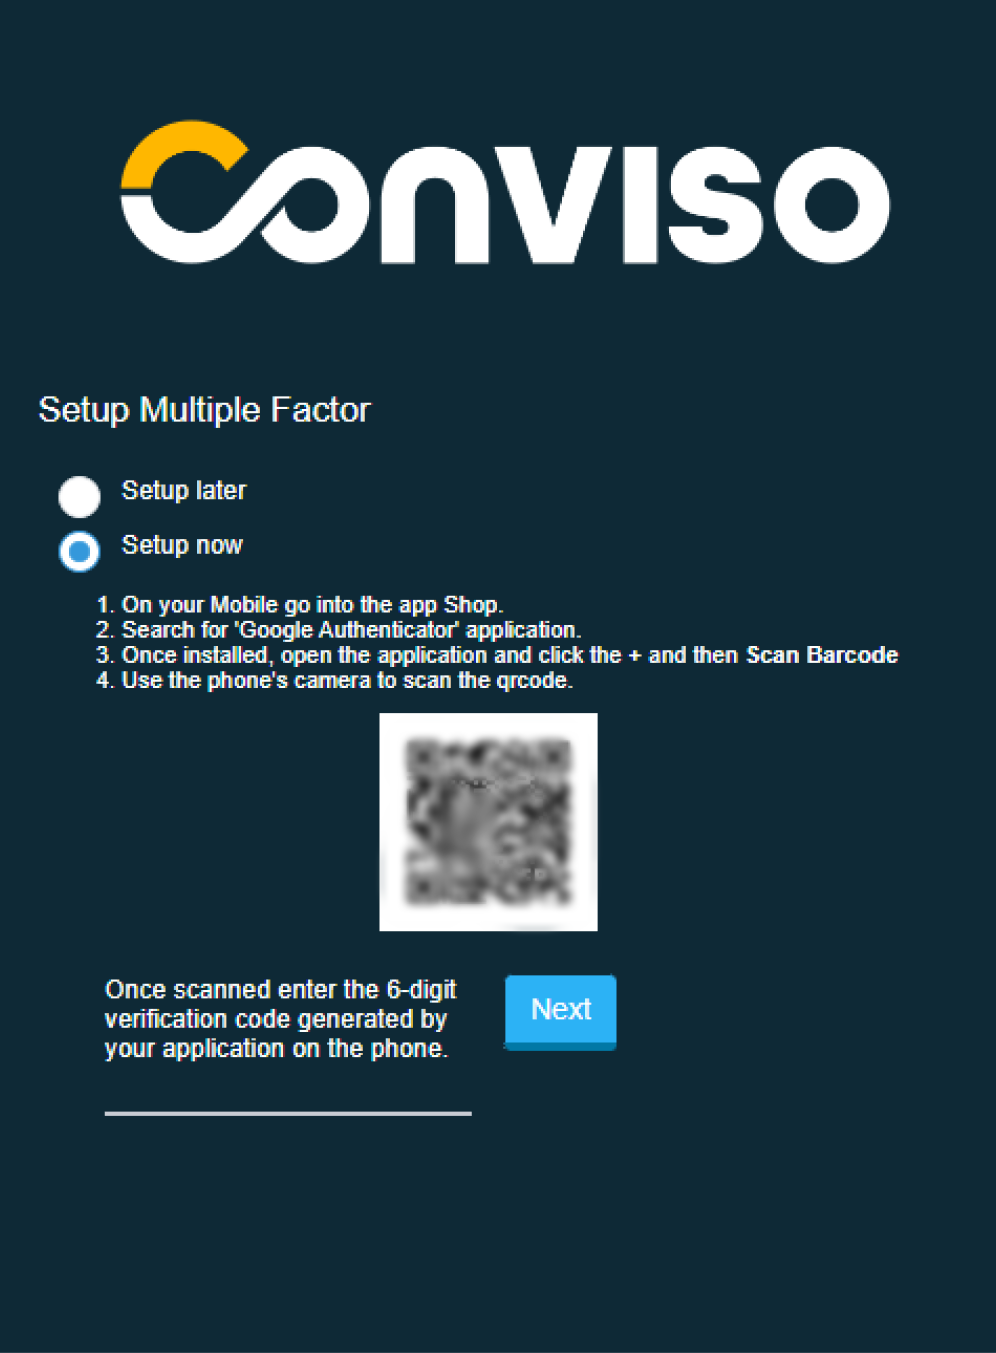
After scanning the image, your cell phone will display an authentication method that provides a secret 6-digit code.
Once you have this secret code, enter it in the line to the left of Next. That's it, 2FA authentication done!
To access the platform, you can use the traditional login with username and password. Alternatively, you can enhance your login security by using single sign-on (SSO).
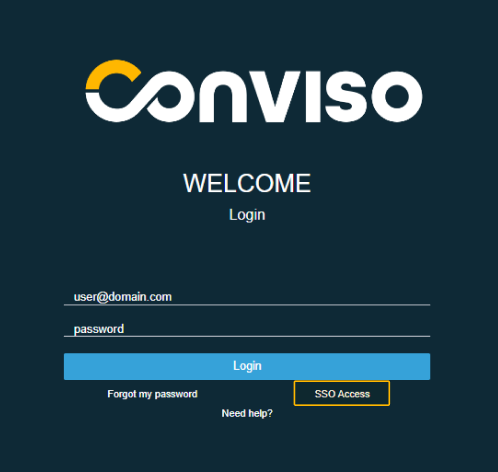
Learn how to connect via SSO based on our platform integrations.
Step 2 - Invite your team to strengthen the AppSec work
To invite new developers from your team to the platform, use the Invite team members button directly from your Security Feed:
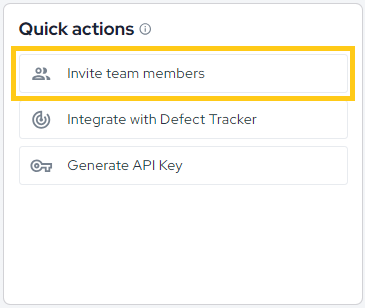
Next, enter your team members' email addresses, select a profile, and choose an access type.

Step 3 - Set up a Conviso Platform integration
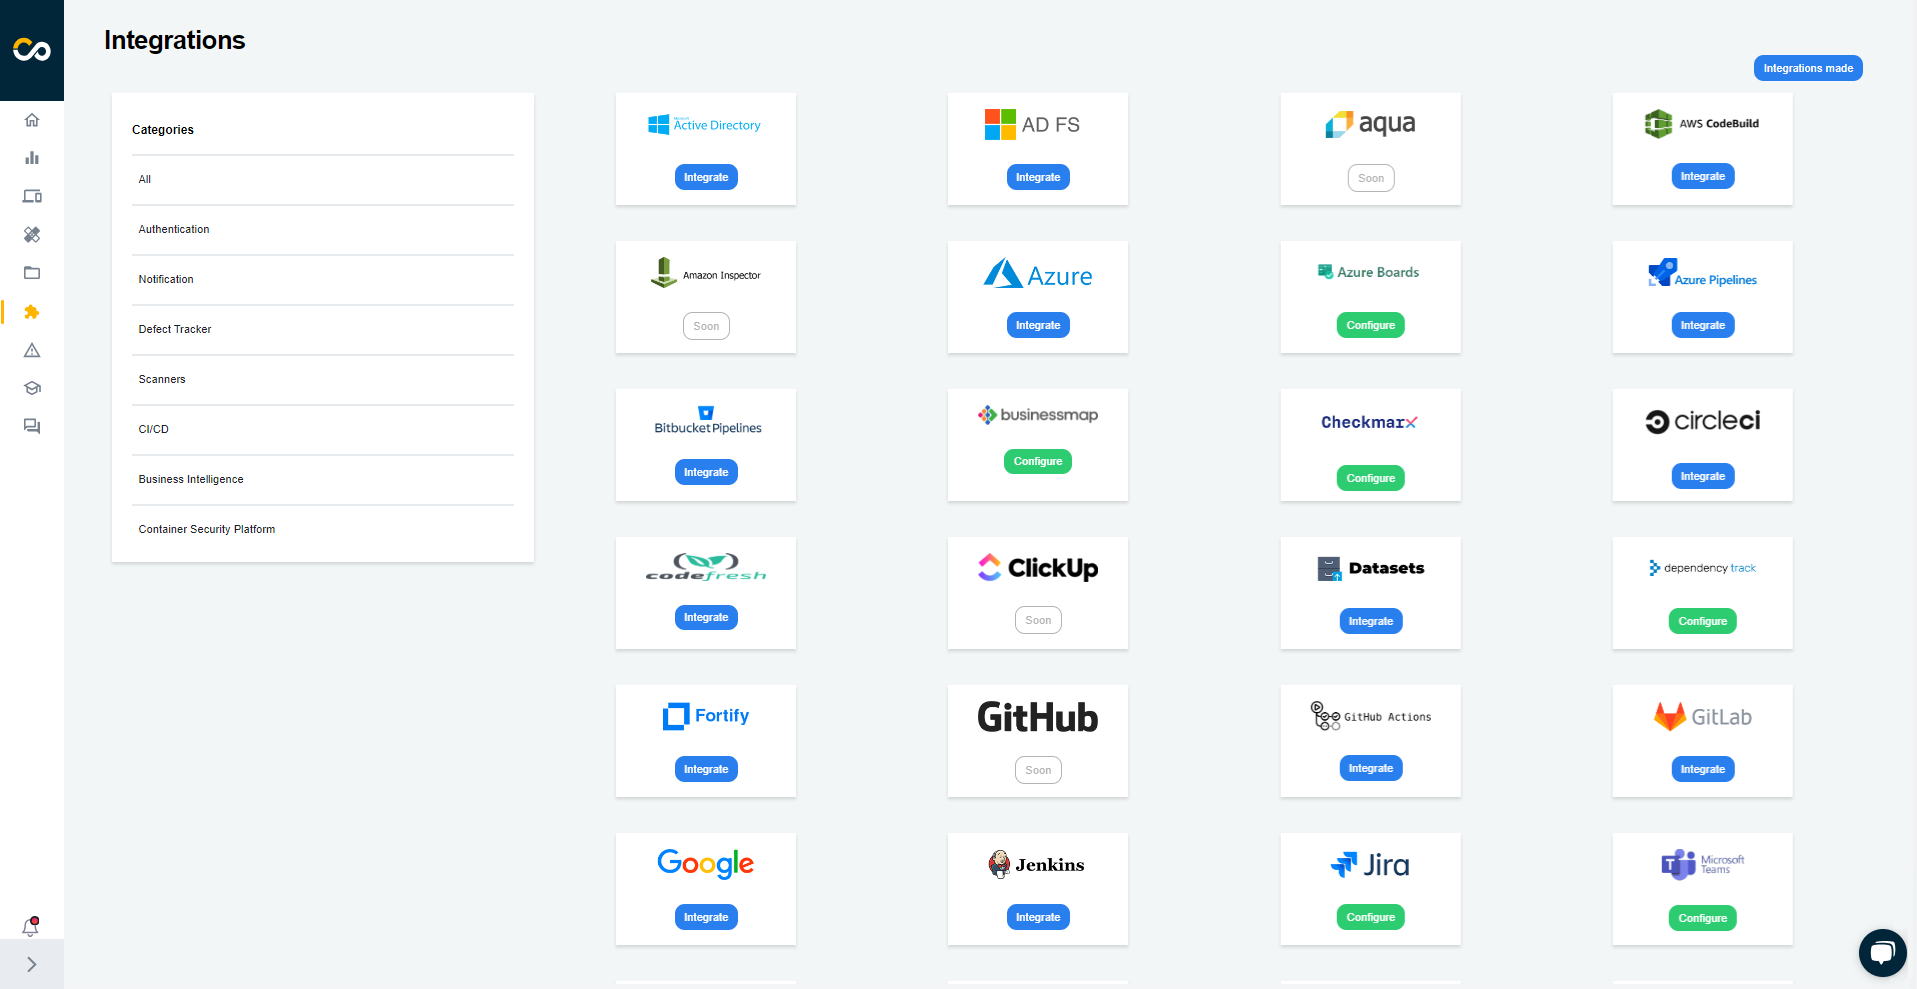
In Integrations, you will have access to a wide range of technologies with which Conviso Platform integrates.
In addition to connecting with your code, we integrate with defect tracker/bug, CI/CD systems, SSO authentication, Business Intelligence tools, and various other solutions and platforms.
Step 4 - Know your company's Assets and your Risk Score
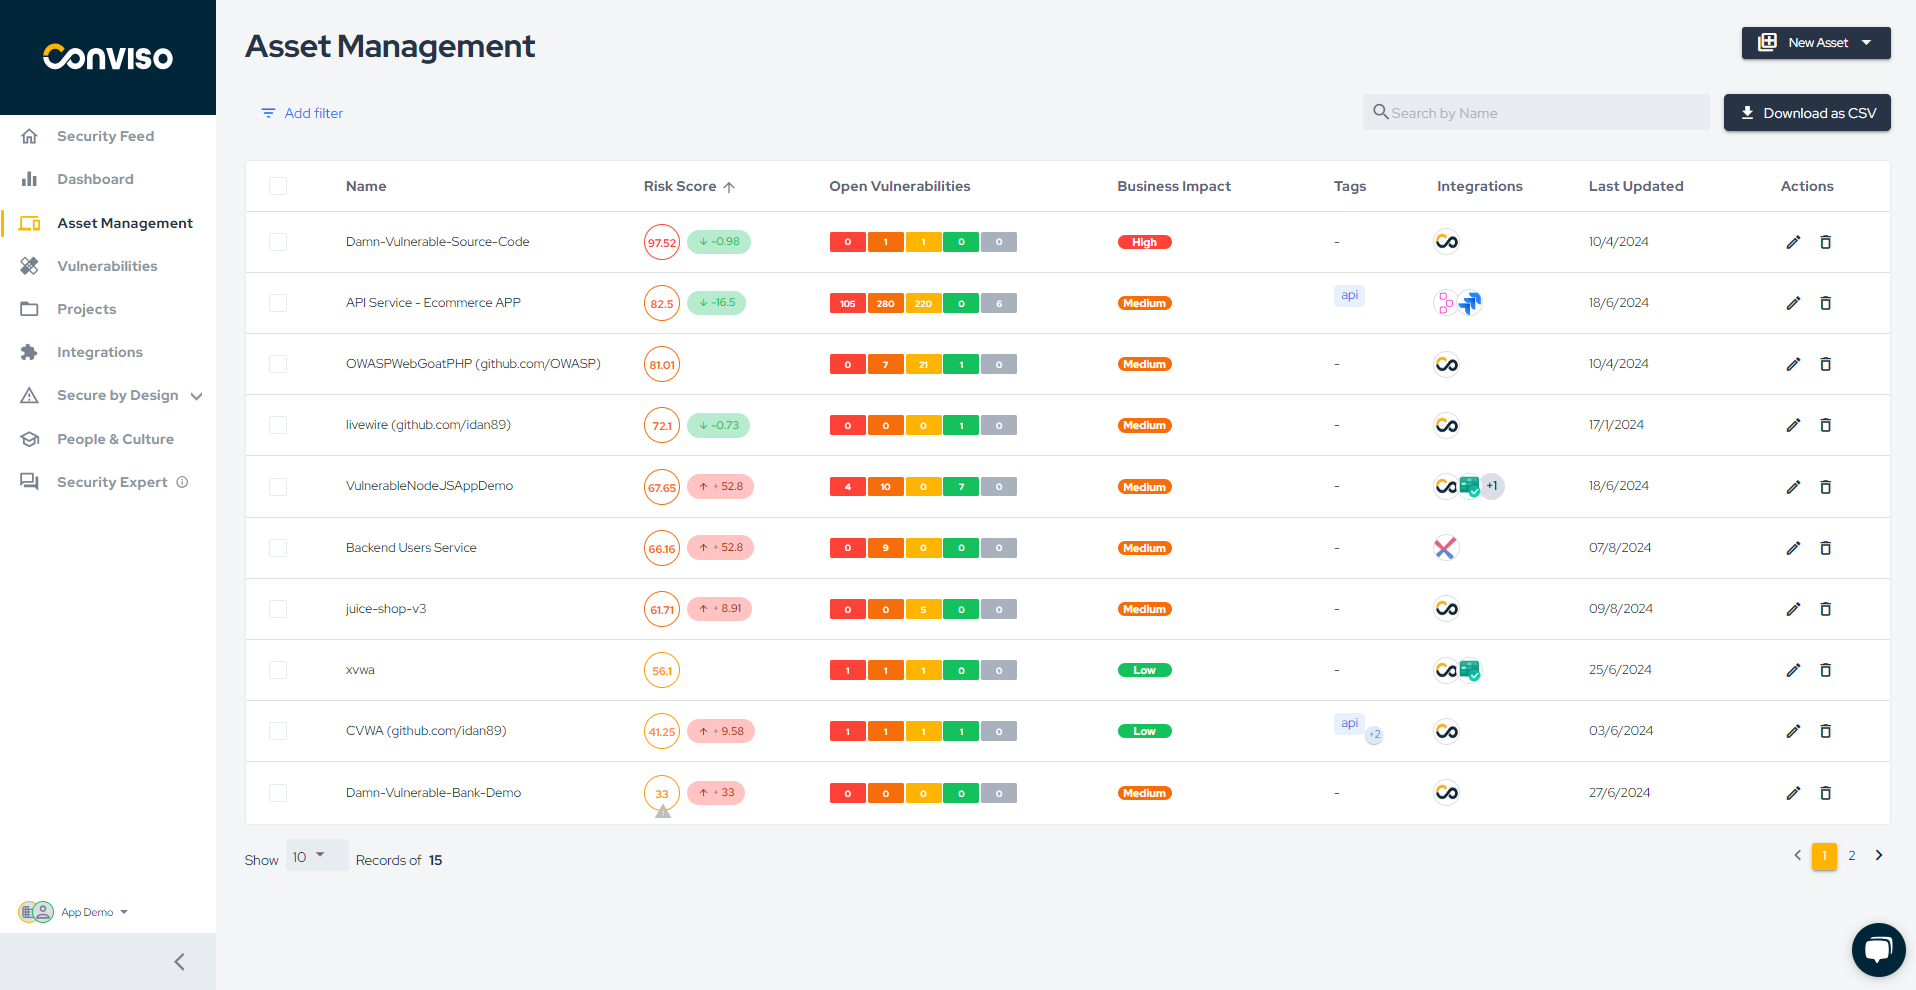
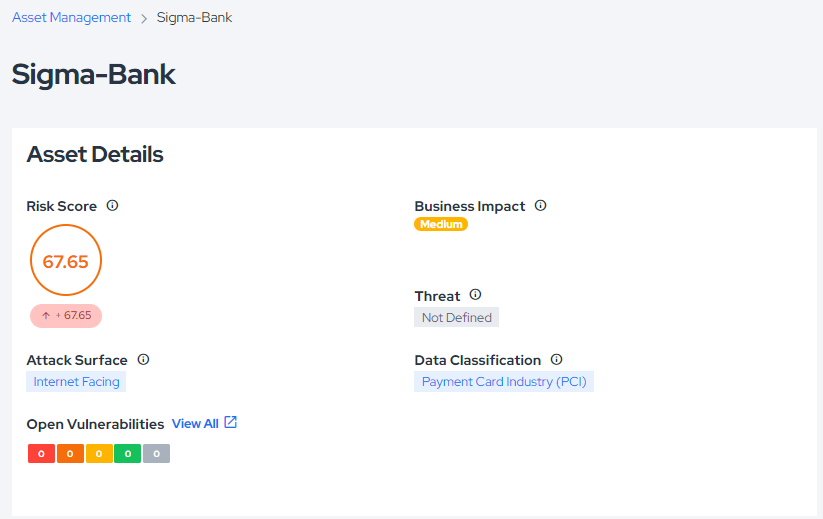
In the Asset Management section, you will obtain a comprehensive understanding of your company's assets and the associated risks.
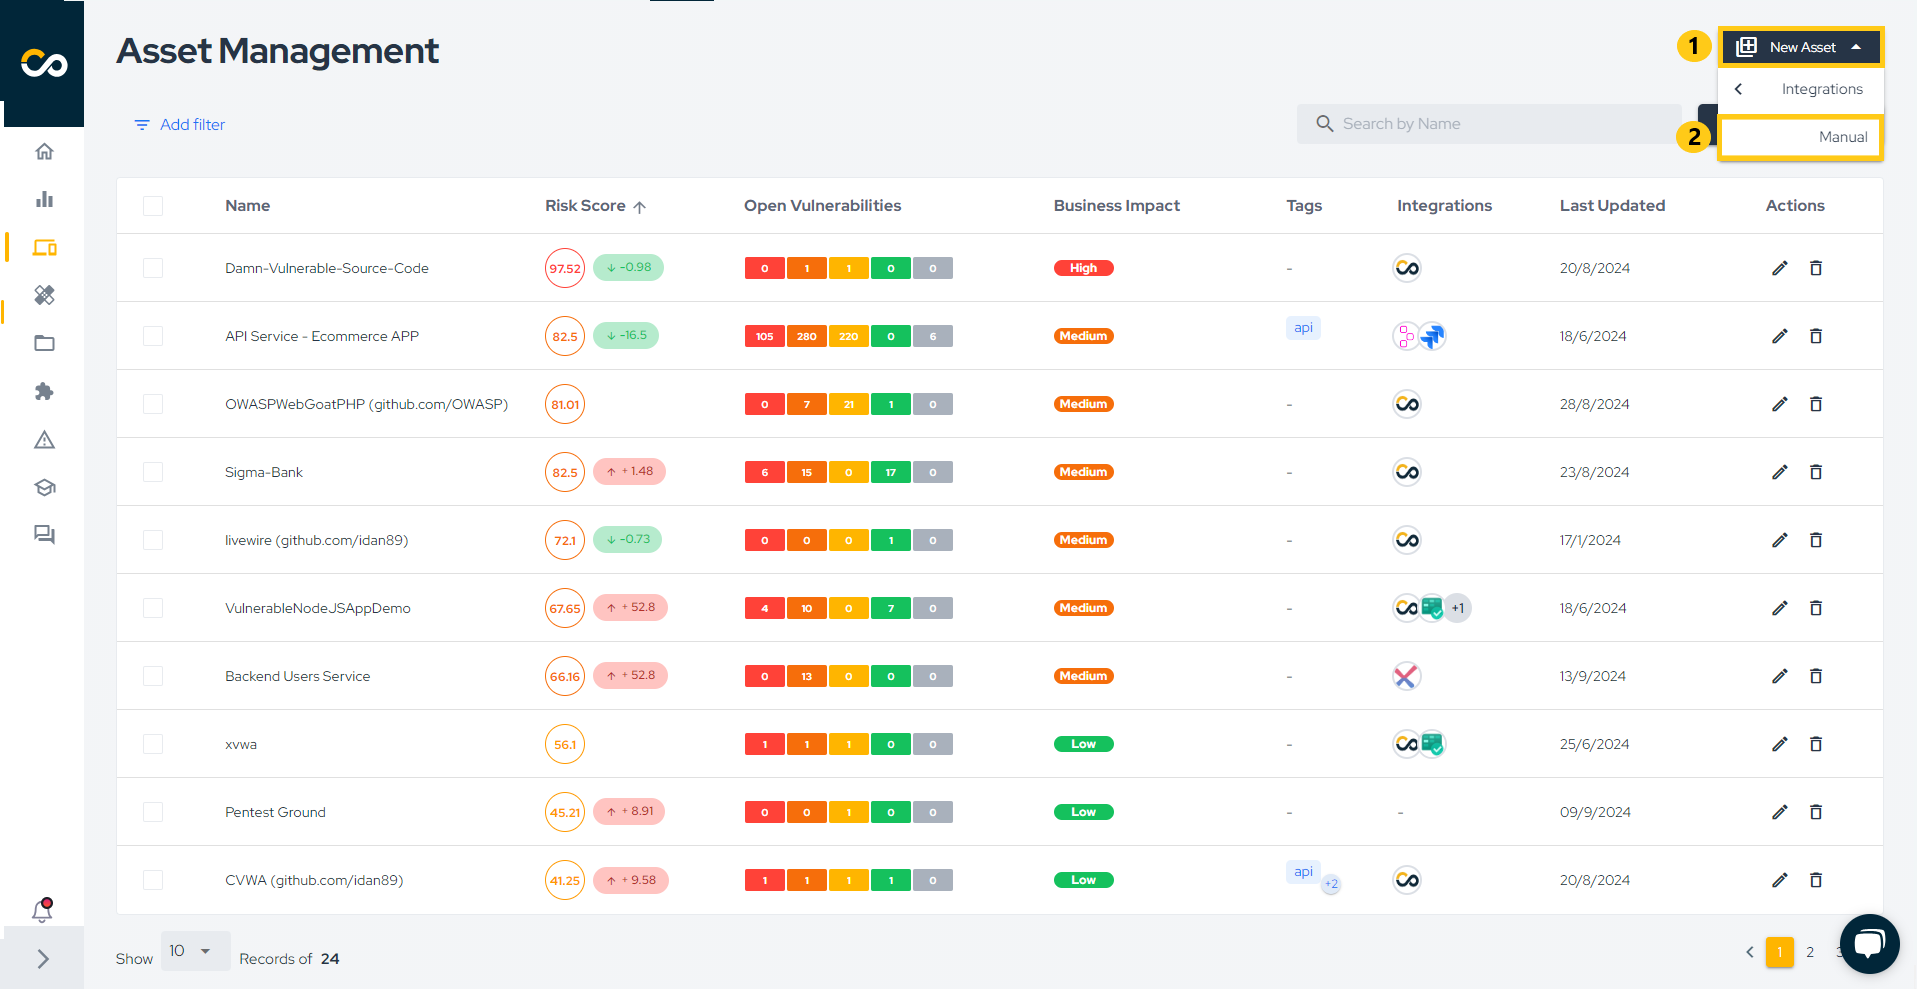
Let's create a new Asset by clicking on New Asset (1) and selecting Manual (2):
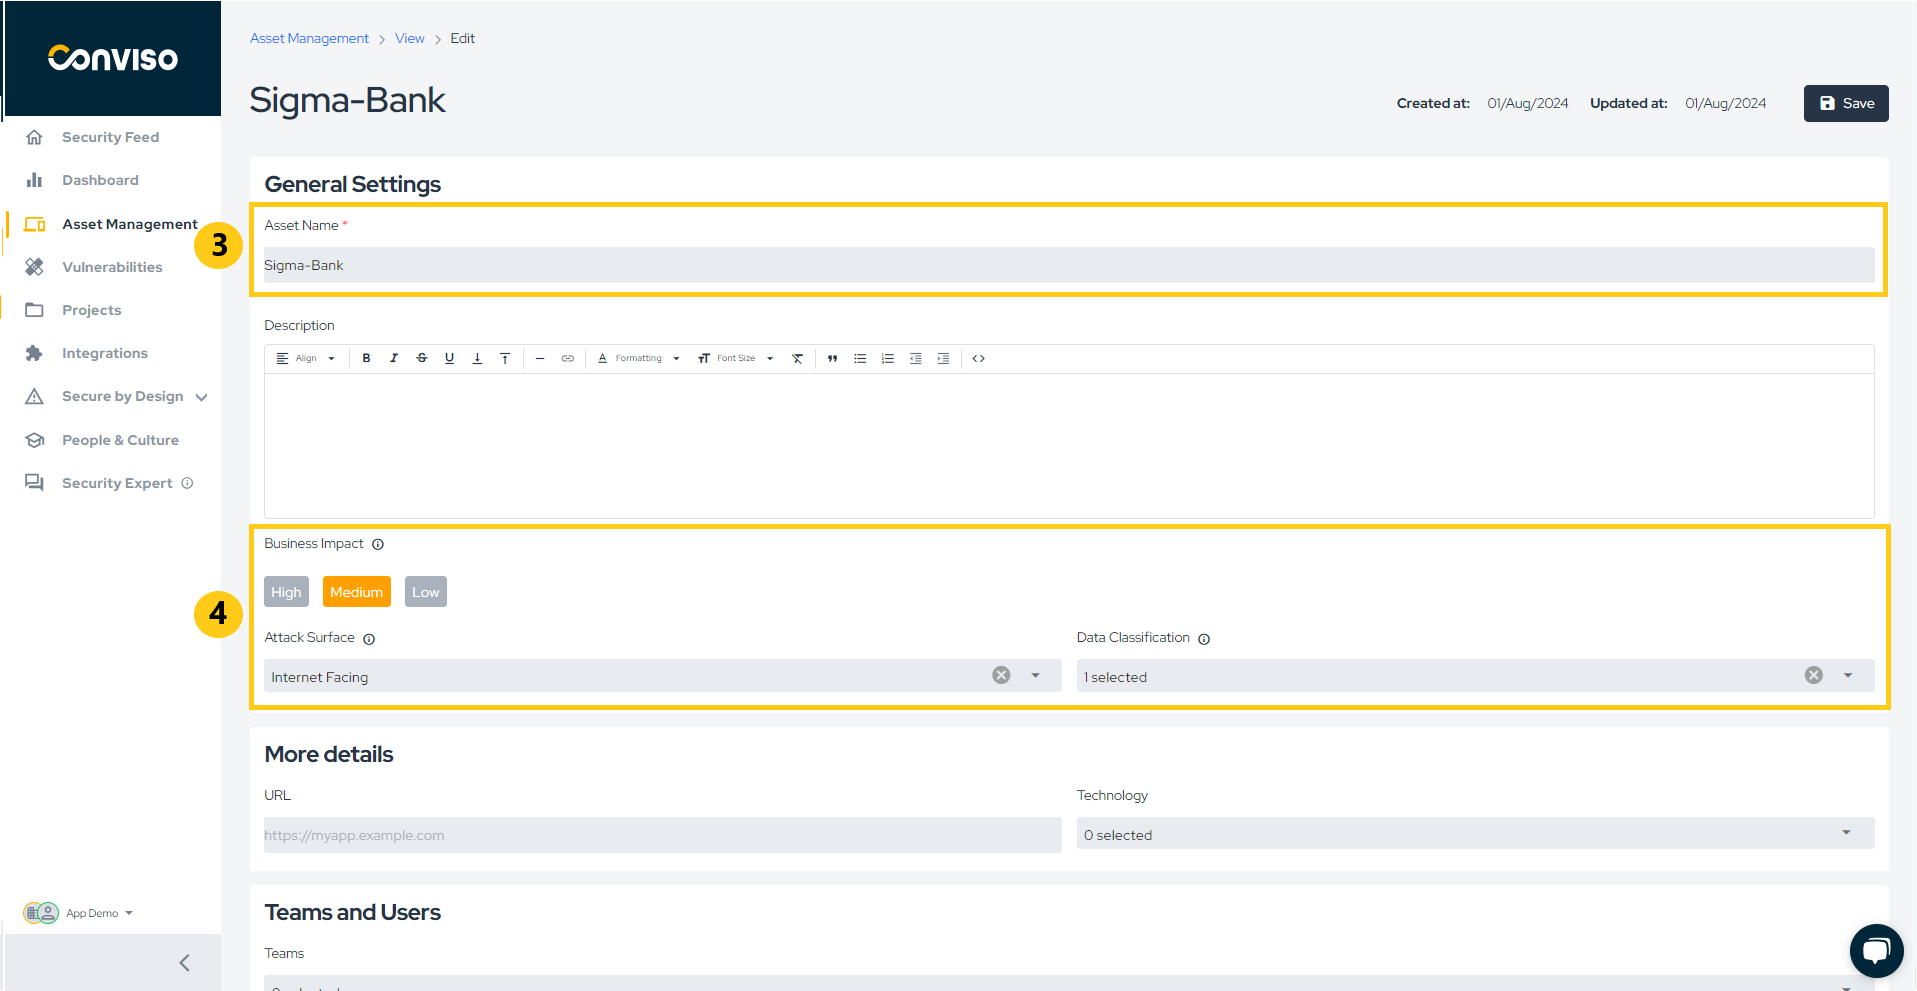
Now, enter the Asset Name (3) and the following information (4):
- Business Impact - Defines how critical/relevant the Asset is for the business (High, Medium or Low);
- Attack Surface - Defines the attack surface for the asset (Internet Facing or Internal);
- Data Classification - Defines the classification of data the Asset interacts/stores (Personally Identified Information, Payment Card Information or Non-sensitive).
Once you click Save, the platform will automatically calculate the asset's Risk Score.
Learn more by reading this documentation.
Step 5 - Stay informed about your vulnerabilities
In the Vulnerabilities section, you'll have a comprehensive view of the vulnerabilities found in your company's assets. When you click on Vulnerabilities in the side menu, a filter will be applied to display the open vulnerabilities:
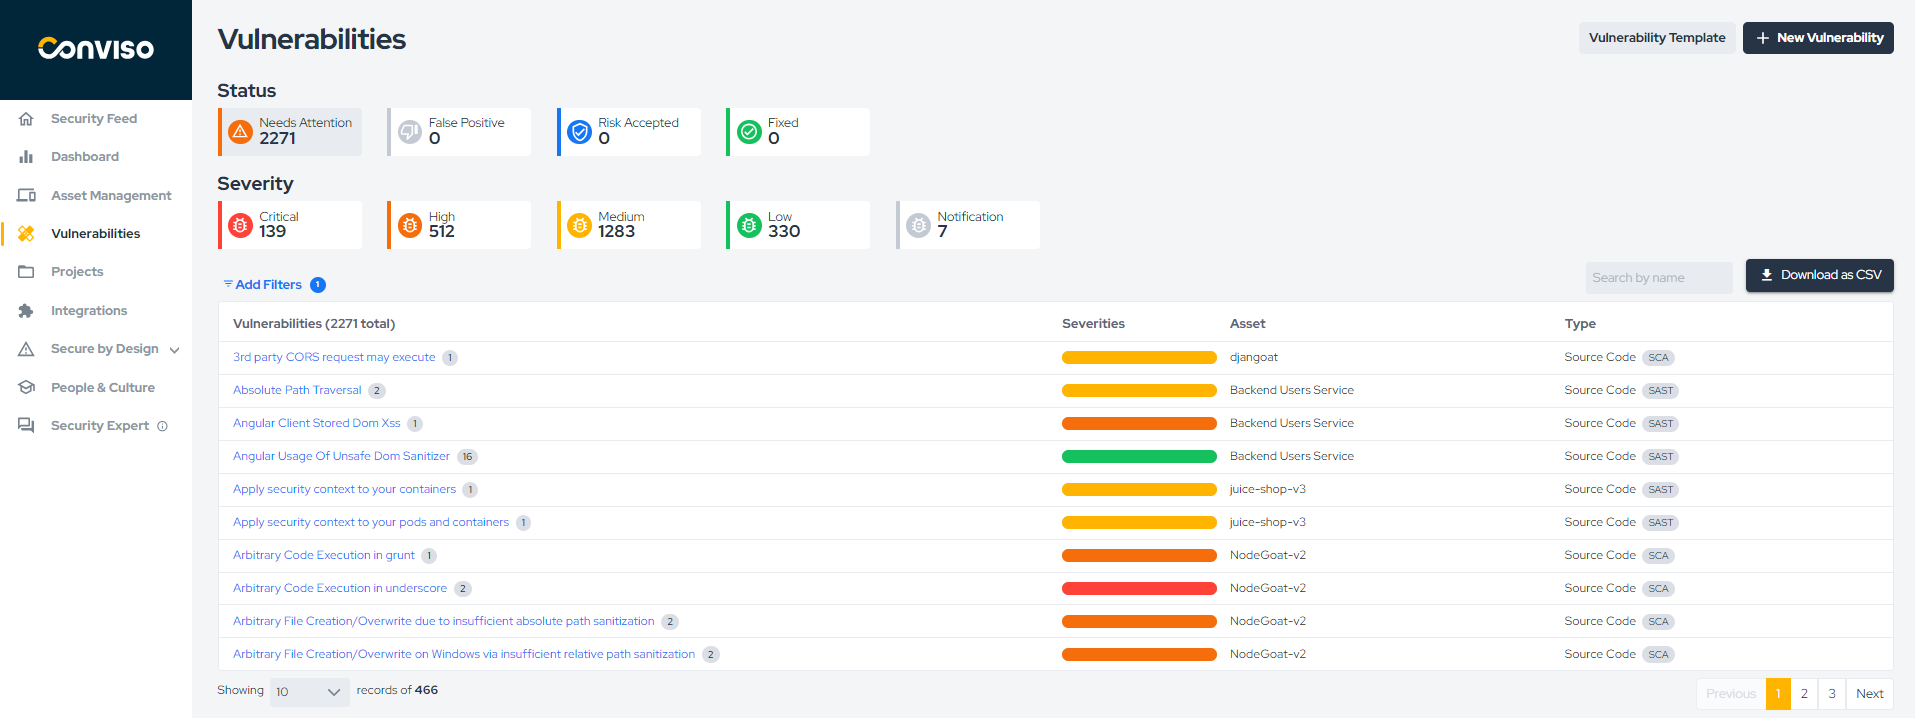
To view more details about a specific vulnerability, simply click on its title. A page like the following will be displayed:

On the left column of the above image, you can find more information about the vulnerability, such as the description, solution, and reference links. Additionally, you can see how many times the same vulnerability occurs in the asset in question, as shown in Occurrences.
On the right column, you can see the severity, status, source, and other details about this specific occurrence of the vulnerability.
Step 6 - Fixing your vulnerabilities
Different approaches can be taken to fix a vulnerability. To proceed, select the topic that corresponds to the origin of your vulnerability:
- AST Vulnerability;
- DAST Vulnerability;
- External Vulnerability (from external scanners);
- Pentest Vulnerability.
AST Vulnerability
For a vulnerability found by Conviso's AST, locate it in your code, apply the fix, and run a new scan, making sure it is executed as follows:
conviso ast run --vulnerability-auto-close
DAST Vulnerability
For a vulnerability found by Conviso's DAST, simply fix it, and the next scan will be able to identify it and change its status in the platform to "Fixed."
External Vulnerability
For vulnerabilities imported from an external scanner, the scanner must detect the fix, and after the next sync, the vulnerability will be automatically marked as fixed.
Pentest Vulnerability
For pentest vulnerabilities, the standard process is for the vulnerability to follow this lifecycle:
- Identified -> In Progress -> Awaiting Validation -> Fixed When changing the vulnerability status to "Awaiting Validation", Conviso's analysts will retest it to verify whether it has truly been fixed or if it still persists. If the vulnerability has been fixed, the analyst will change the status to "Fixed". If not, the vulnerability will revert to the "Identified" status.
Step 7 - View your Dashboard
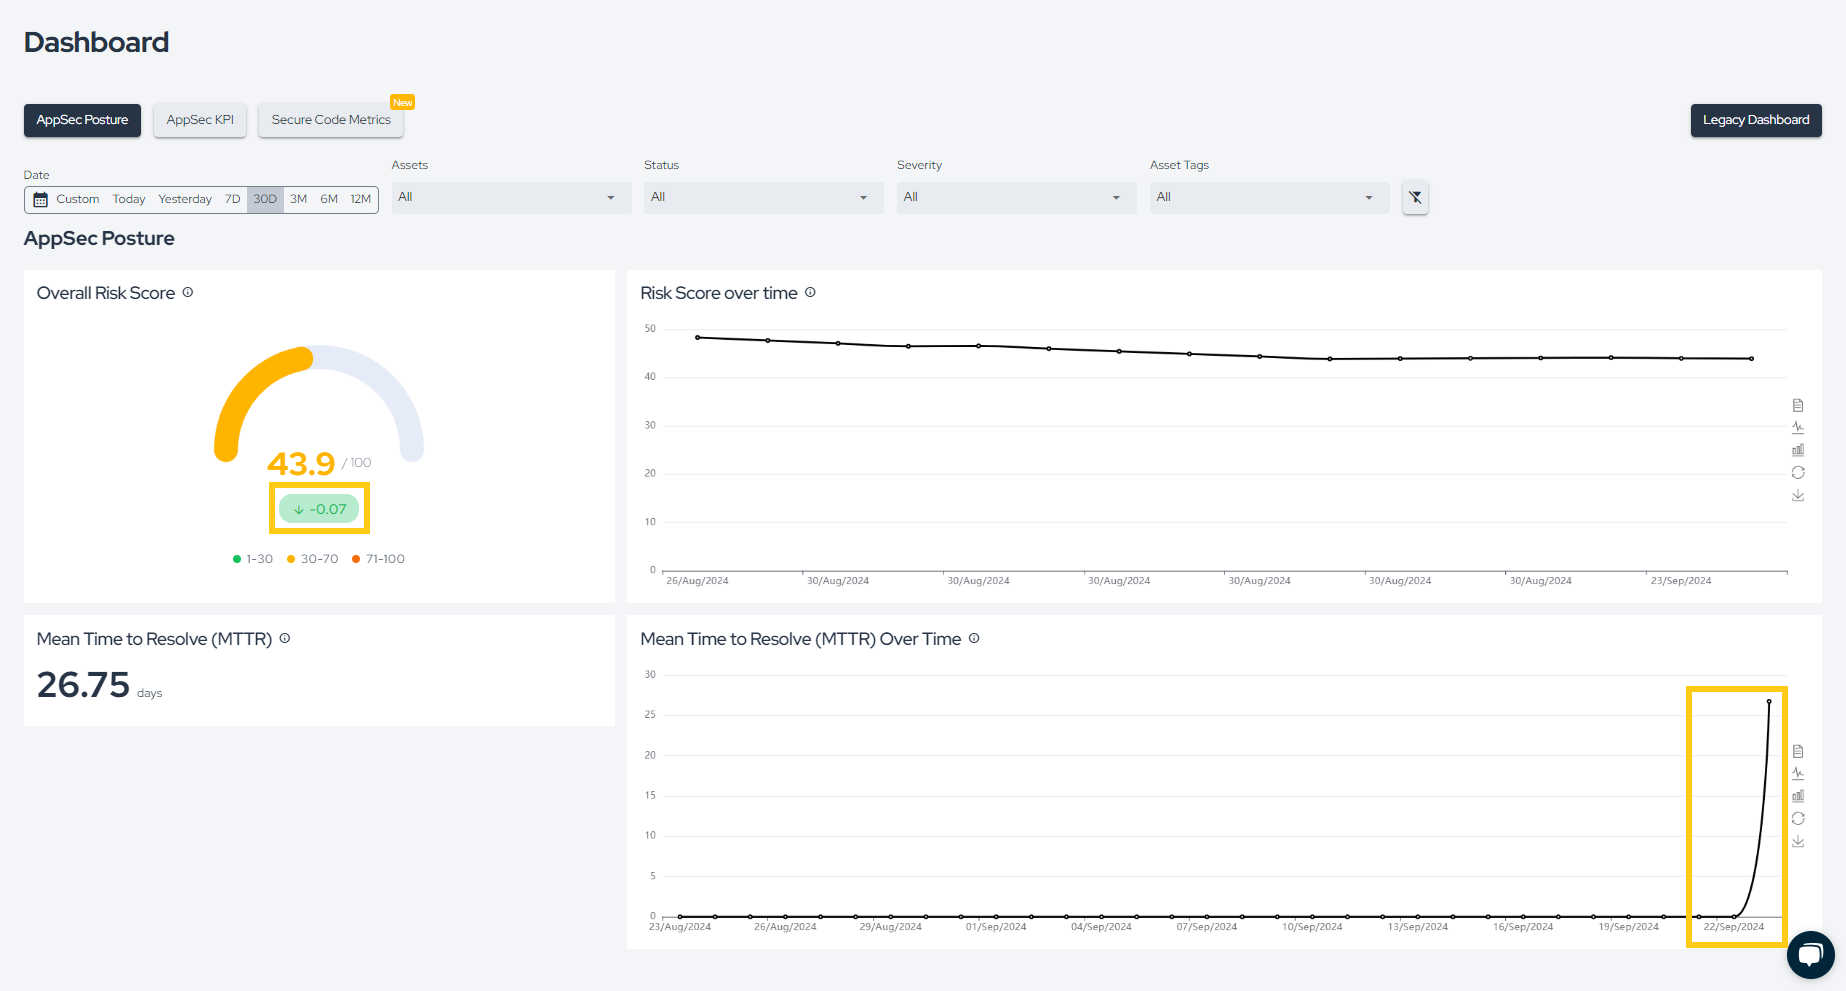
After fixing your first vulnerability, click the Dashboard button in the side menu. Here, you can view KPIs and your AppSec Posture. Since we’ve just fixed a vulnerability, you will already see a slight reduction in the Risk Score and an increase in MTTR:
Additionally, under AppSec KPI, you can also see how many vulnerabilities were opened or fixed during the selected time period in the filter, among other information:

Learn more by reading this documentation.
Support
If you have any questions or need help using the Conviso Platform, please don't hesitate to contact our support team.
Resources
By exploring our content, you'll find resources that will enhance your understanding of the importance of a Security Application Program.
Conviso Blog: Explore our blog, which offers a collection of articles and posts covering a wide range of AppSec topics. The content on the blog is primarily in English.
Conviso's YouTube Channel: Access a wealth of informative videos covering various topics related to AppSec. Please note that the content is primarily in Portuguese.