Google Integration
Introduction
The Google SSO (Single Sign-On) integration aims to increase user security on the platform. With this SSO feature, managers will have full control of who should have access to the Conviso Platform. The impact will be positive for your company's support teams tasks, reducing common “forgot my password” calls by employees, customers and suppliers, allowing the process to flow more quickly.
Benefits:
-
Authenticate using corporate email;
-
User control.
Google Web App Setup
In order to configure Google SSO, it is necessary to have Admin privileges on the Google Workspaces.
-
Log in to your Google Admin Console;
-
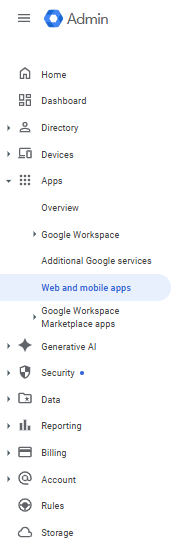
Click on the Apps at the left menu and choose the Web and mobile apps option:
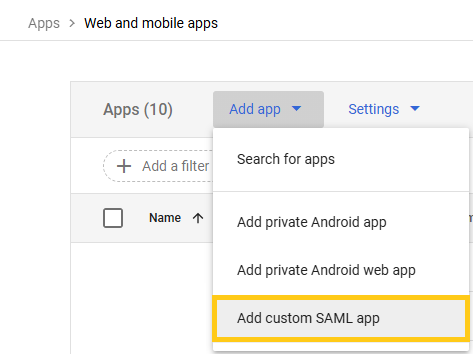
- On the top Web and mobile apps menu bar, click on the Add app and choose the Add custom SAML App option:
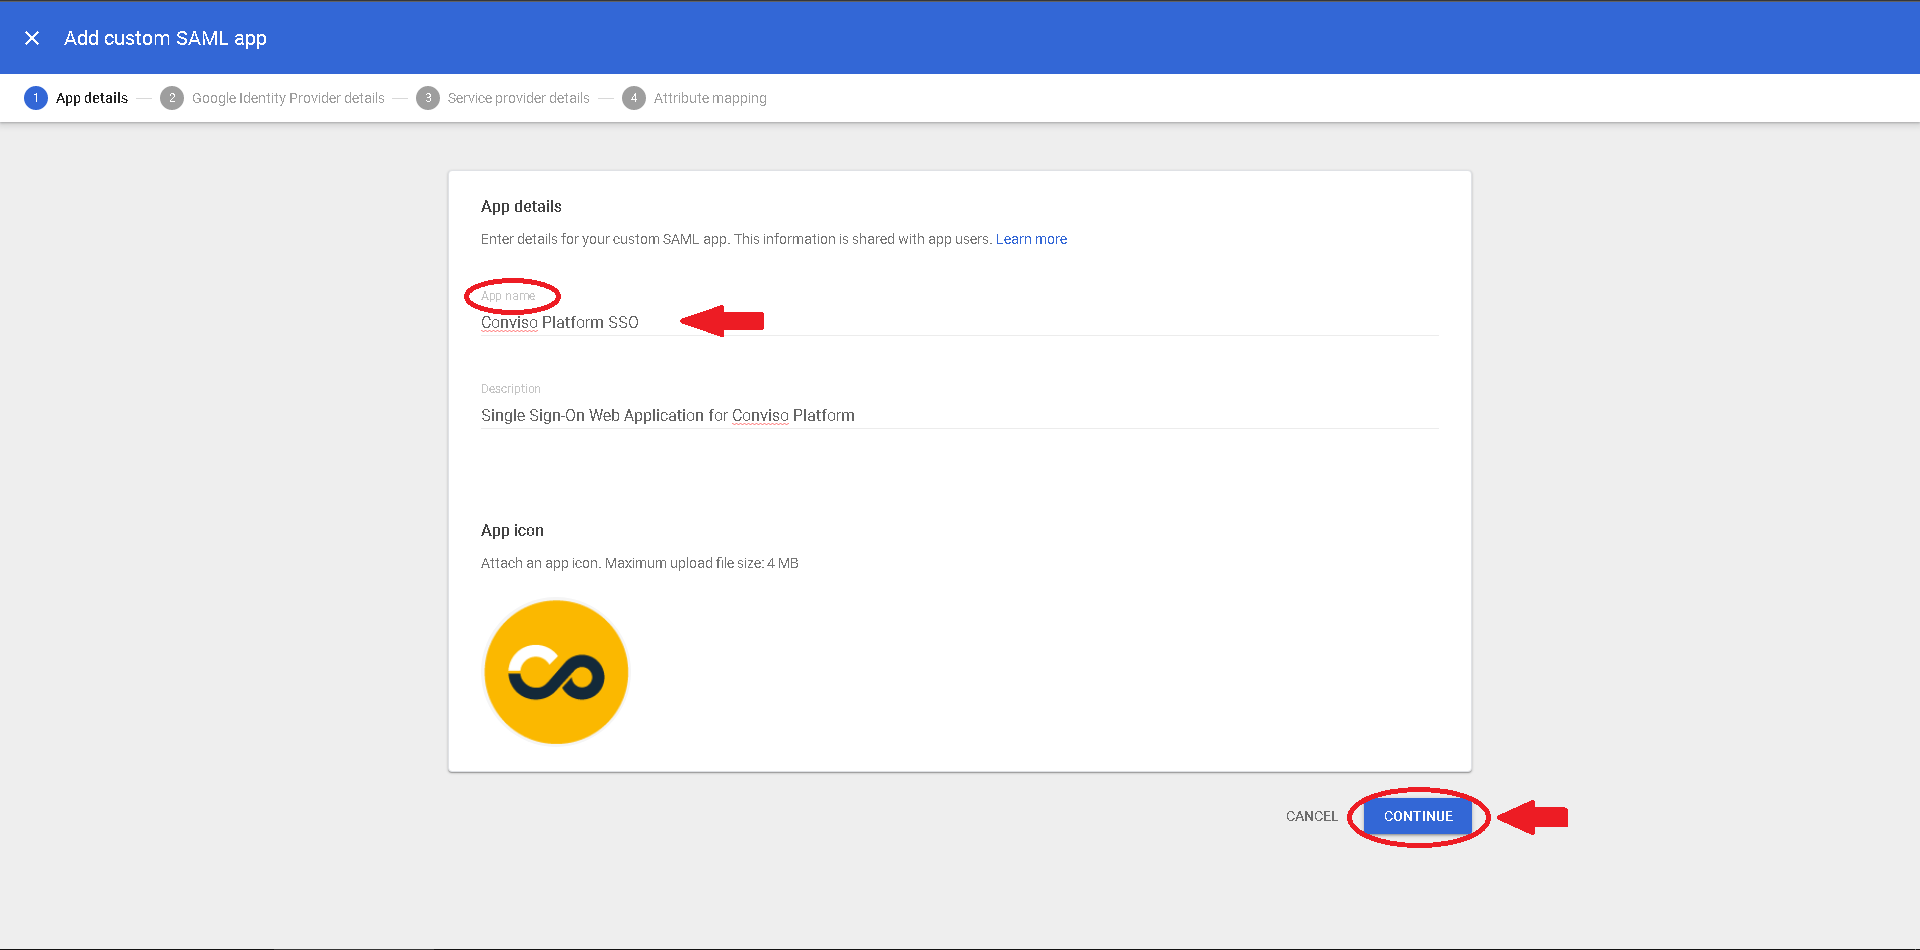
- A configuration wizard will start. First, name you application as you wish (we strongly recommend that you use a related label to your new Web Application, like Conviso Platform SSO). If you wish, you can also create a brief description to your Web App and an app icon to better describe your application (optional). As an app icon, you can use this one:
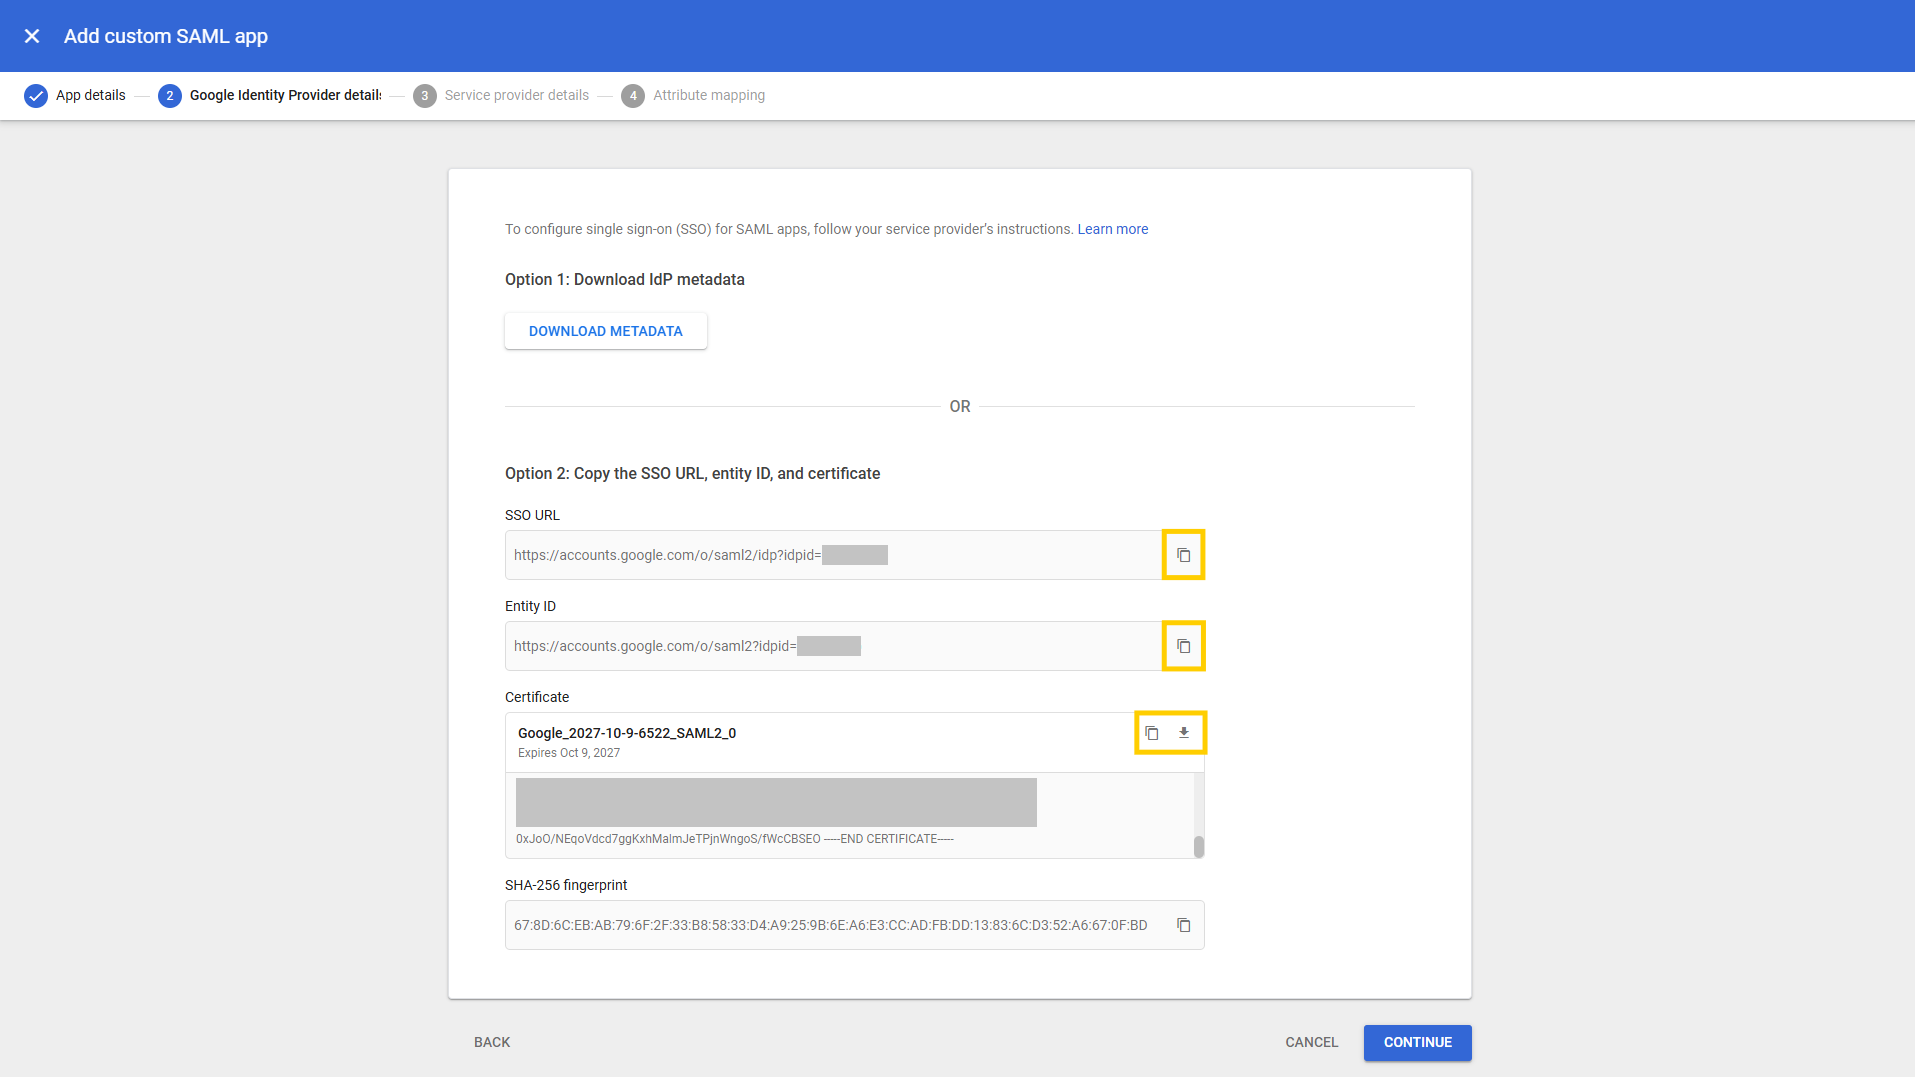
- In the following step, you will review the following configuration data, you will use it later at the Conviso Platform Setup (you can always get back to this configuration section to copy the data). Click on the Continue button to go to the next step;
- At this point you must provide the following URLs:
- At the ACS URL field, paste
https://auth.app.convisoappsec.com/realms/conviso-platform/broker/google_<YOUR_COMPANY_ID>/endpoint - At the Entity ID field, paste
https://auth.app.convisoappsec.com/realms/conviso-platform - At the Start URL field, paste
https://app.convisoappsec.com
Also, you must check the Signed Response checkbox, before clicking on the Continue button:

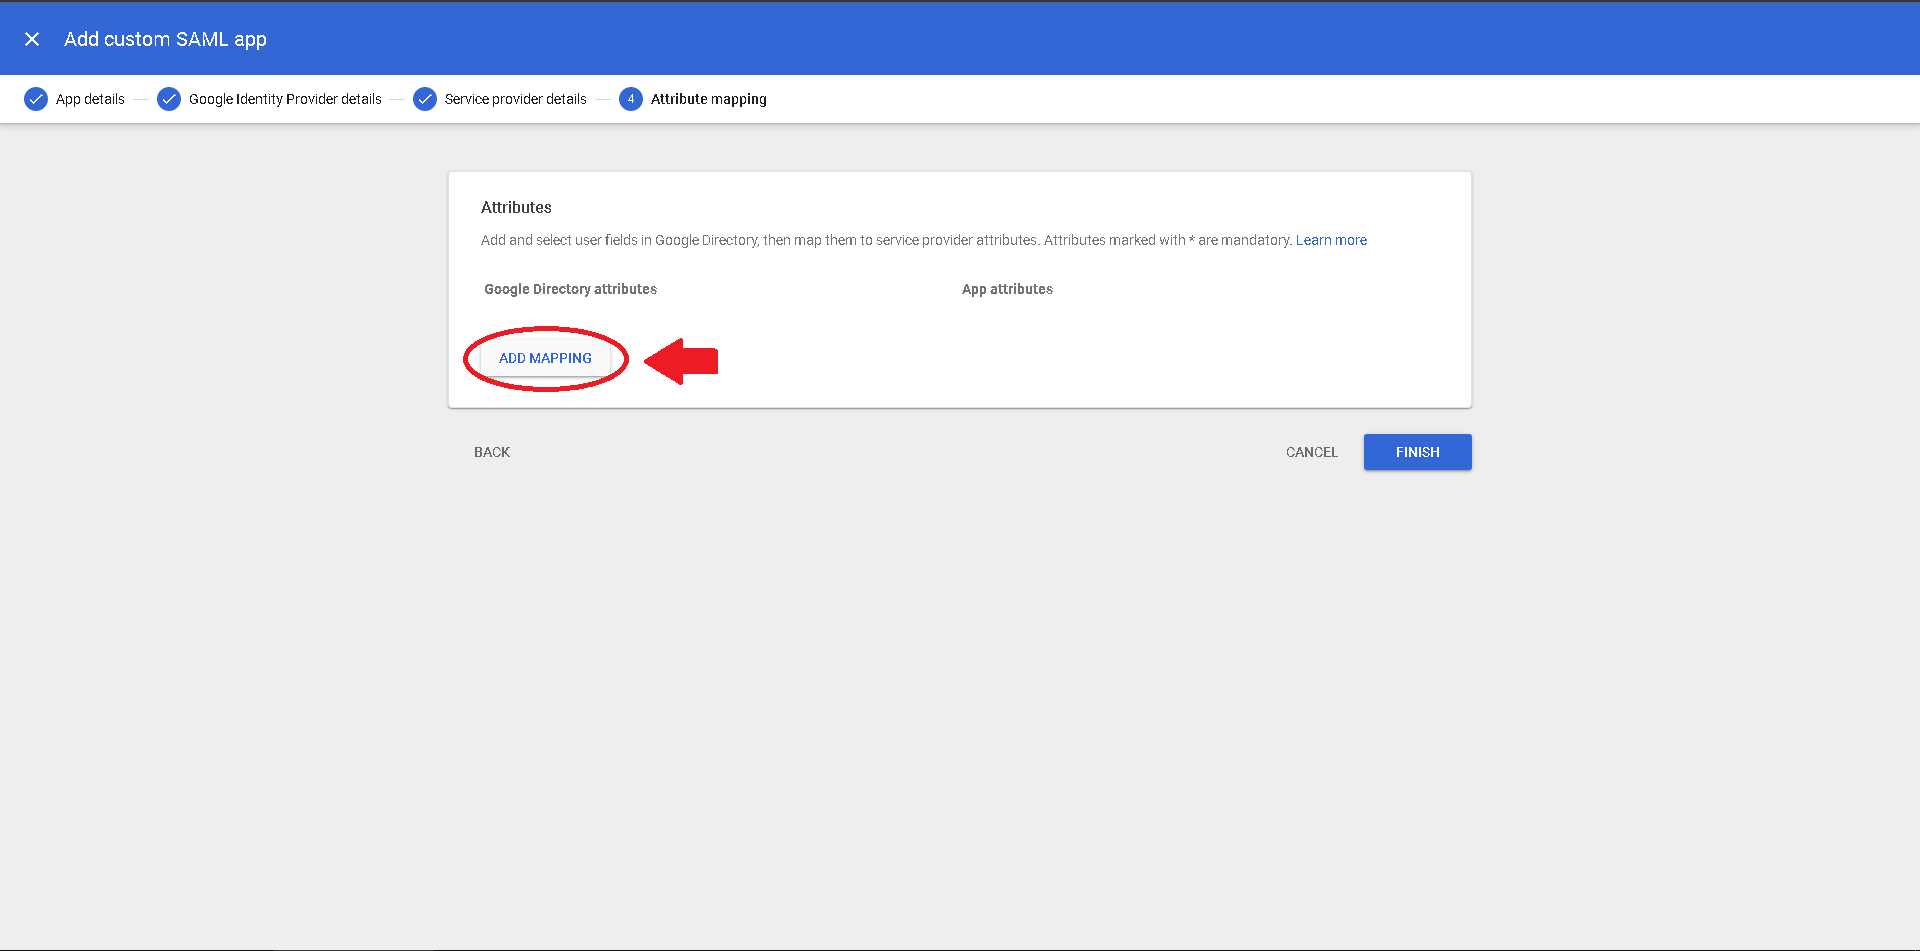
- In the next setup section, we will add the necessary attribute mappings. This is important to be able to correct log in to the Conviso Platform. Click on the Add mapping button to start configuring it:
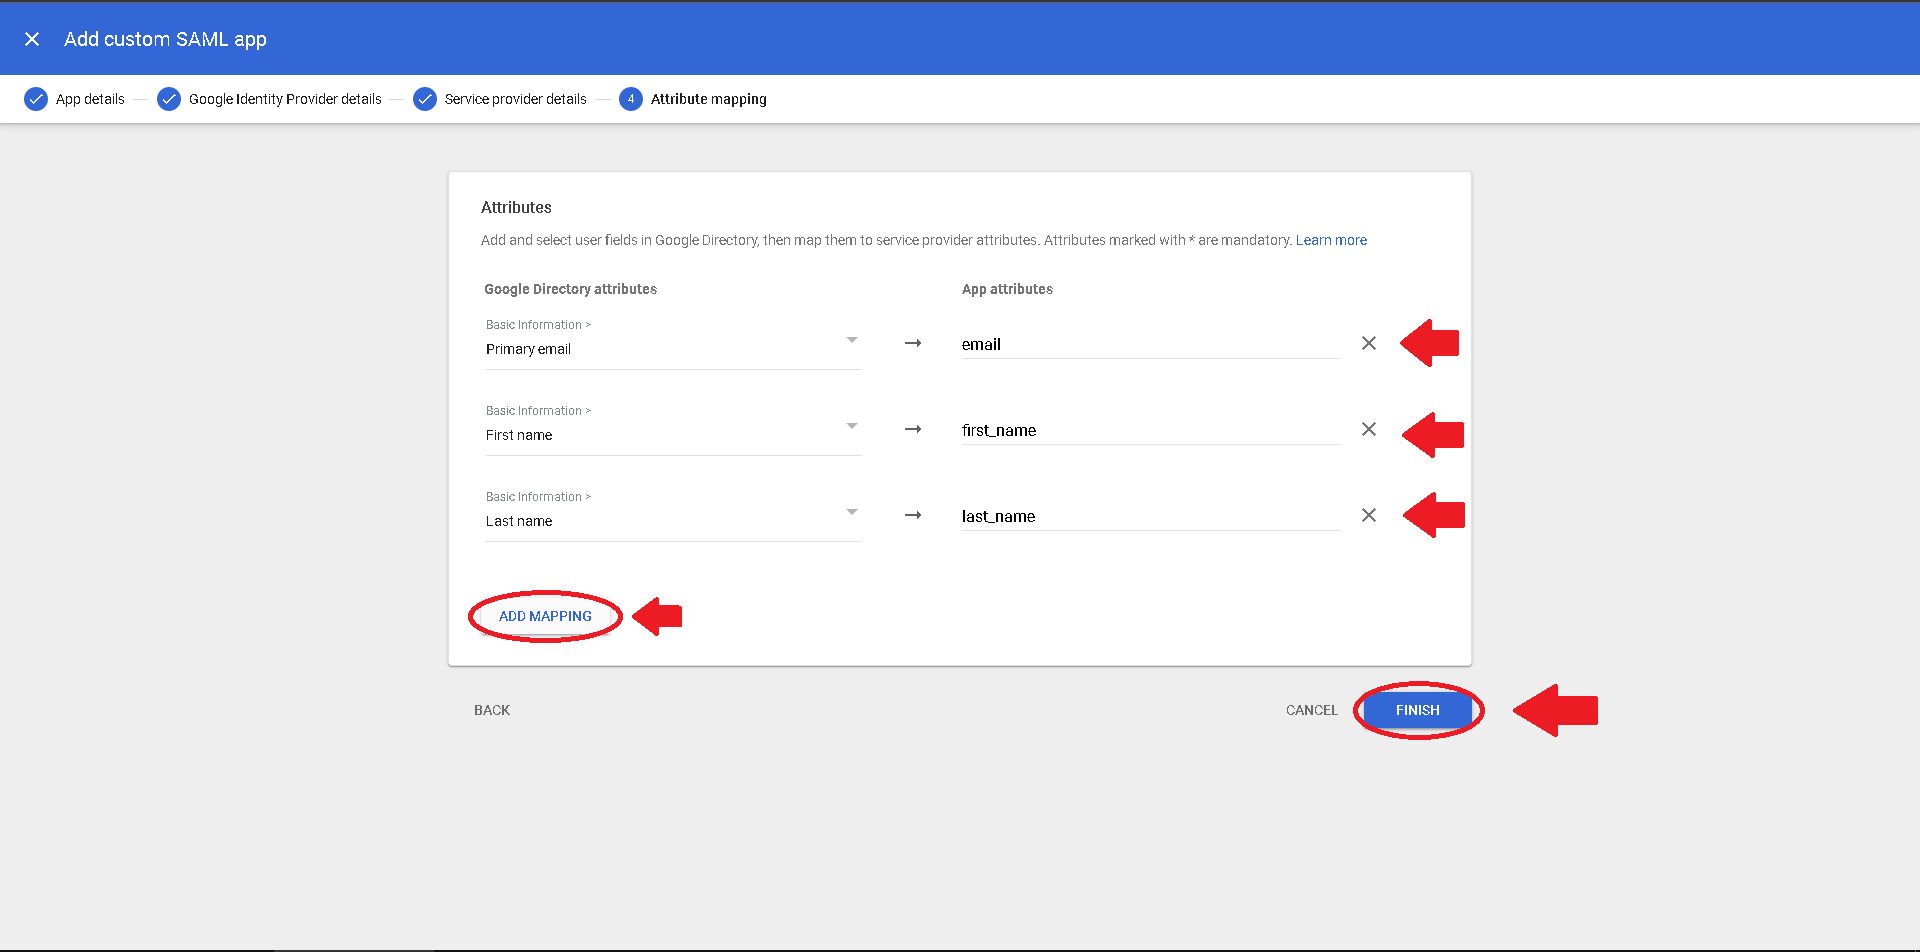
- You must add the following attribute mappings, associating each Google Directory attribute with its corresponding App attribute, as shown below.
-
Primary email -> email
-
First Name -> first_name
-
Last Name -> last_name
When done, click on the Finish button:
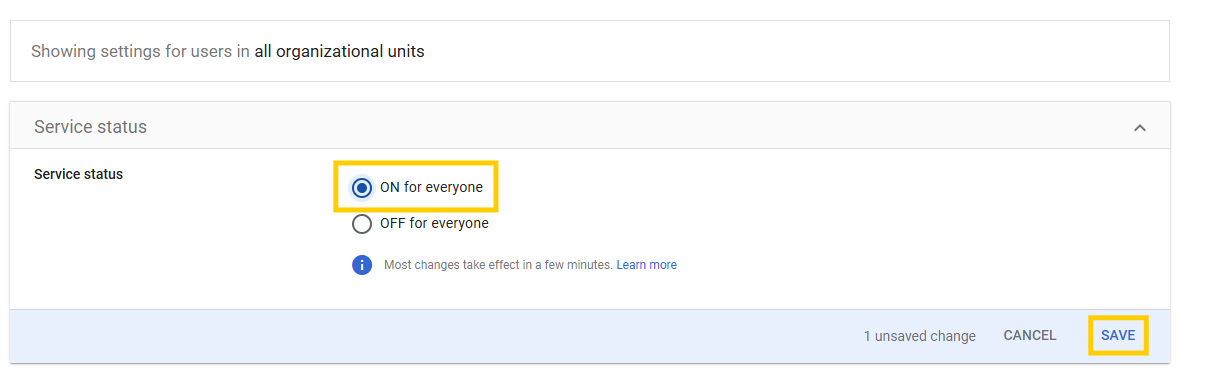
- Now, we must enable users to get access to this Web Application. Expand the User Access configuration section, by clicking at the down arrow at its right side, as indicated below:

- On the Service Status option, check ON for everyone and click at the Save button at the end of this form, as shown below:
Google SSO Authentication Setup
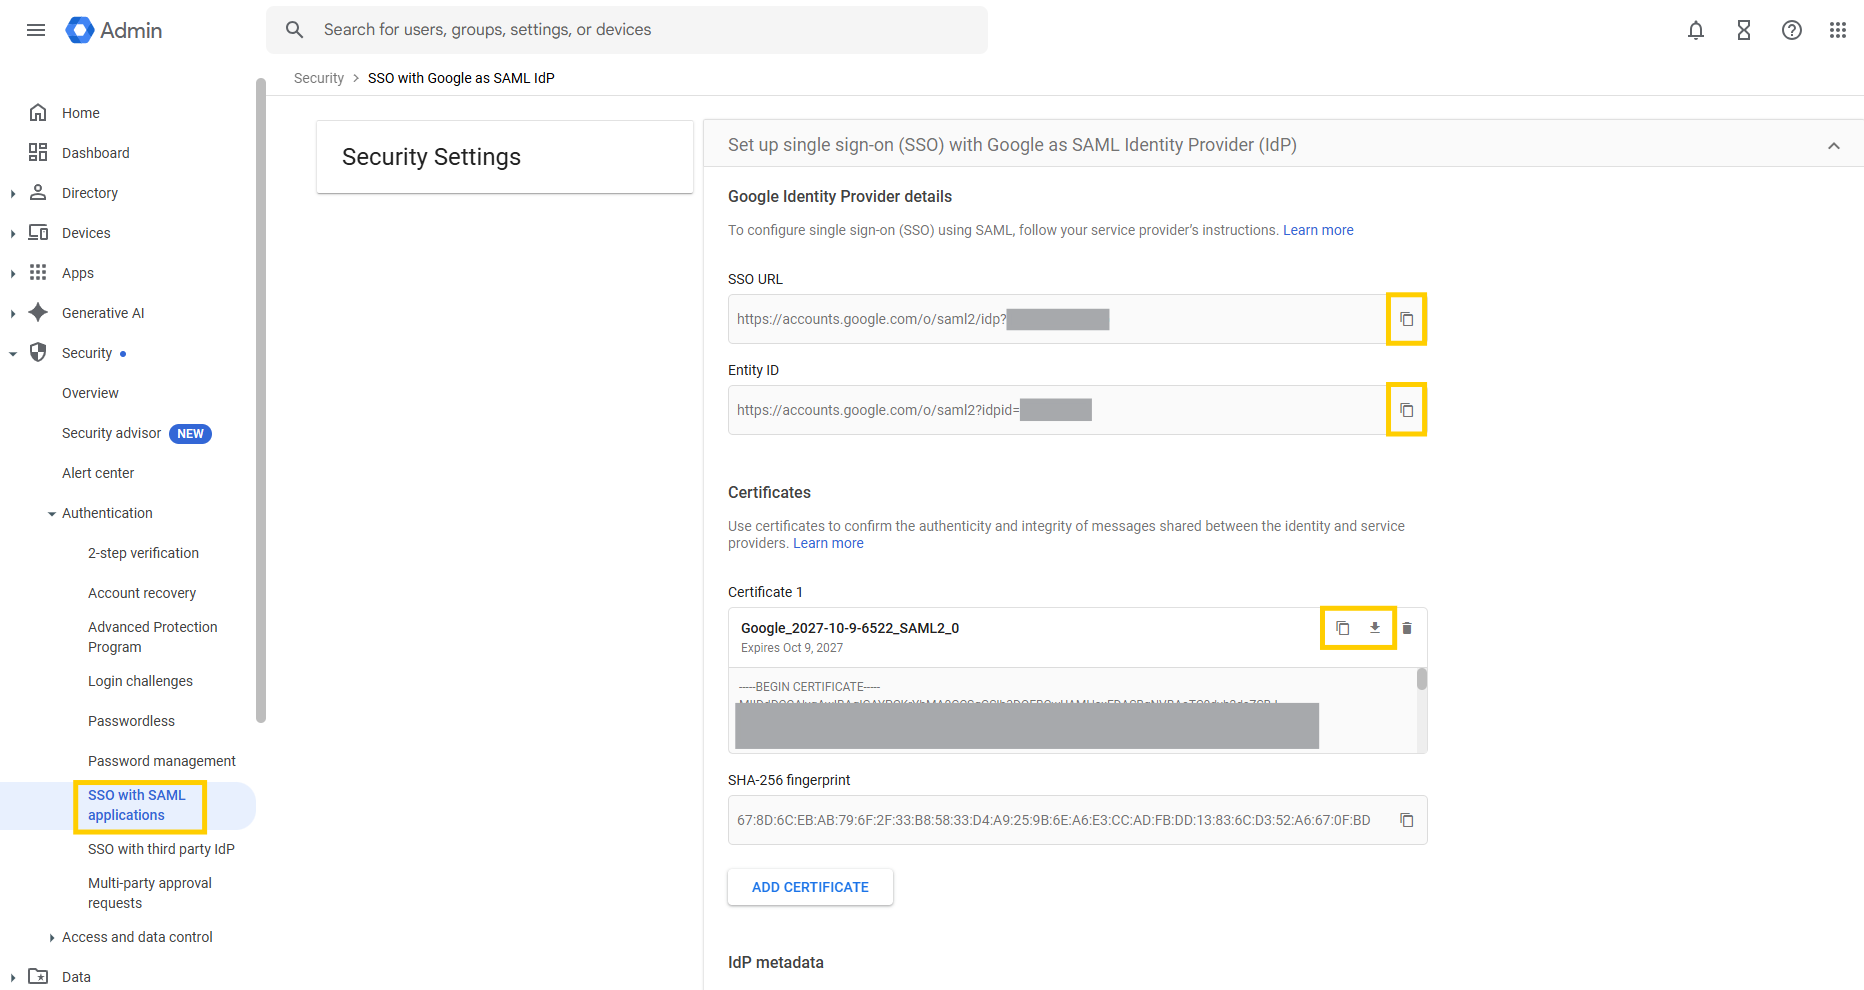
- On the left menu at the main Google Admin Console, go to Security, then Authentication and then SSO with SAML Apps. Leave this screen opened;
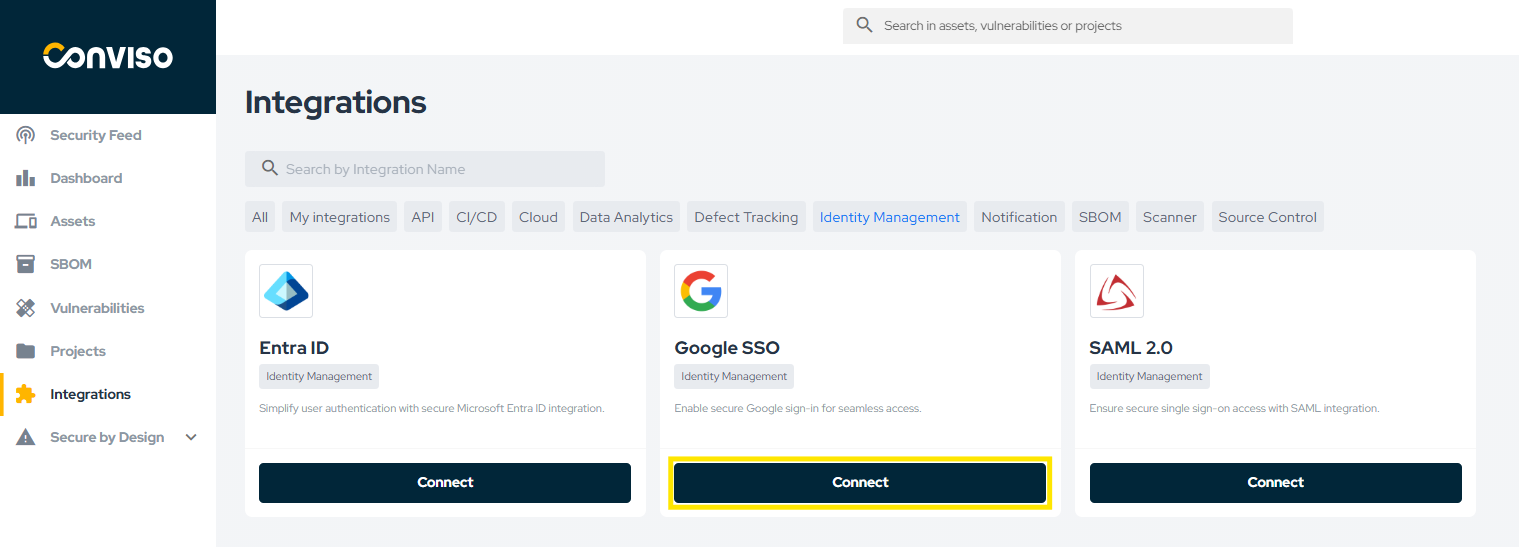
- Log on to Conviso Platform. Make sure your Company is selected. Select Integrations on the left menu and then select Identity Management. Find the Google SSO card and click on Connect::
- The following screen will open. Copy the matching fields obtained from Google Workspaces to the corresponding fields at this screen. First, the SSO URL. Next, the Entity ID and, then, the Certificate. Finally, fill the Authorized Domains field with all your domain name and aliases, if they exist:
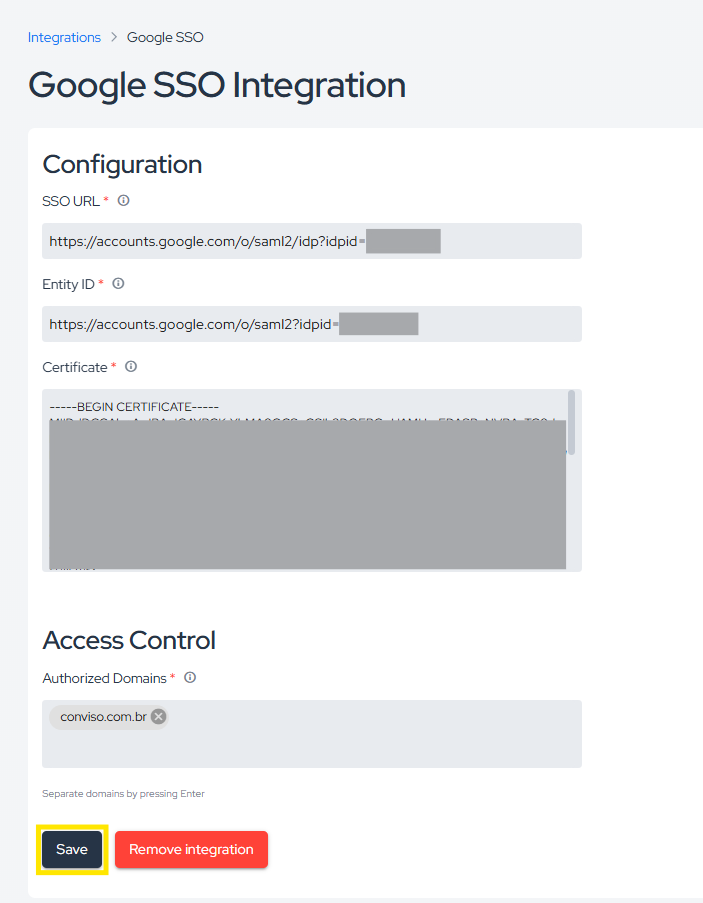
- At last, click Save to store your Google SSO integration configuration.
Verifying Google SSO Integration
To check if everything is correct, you may click Integrations, then Identity Managment:
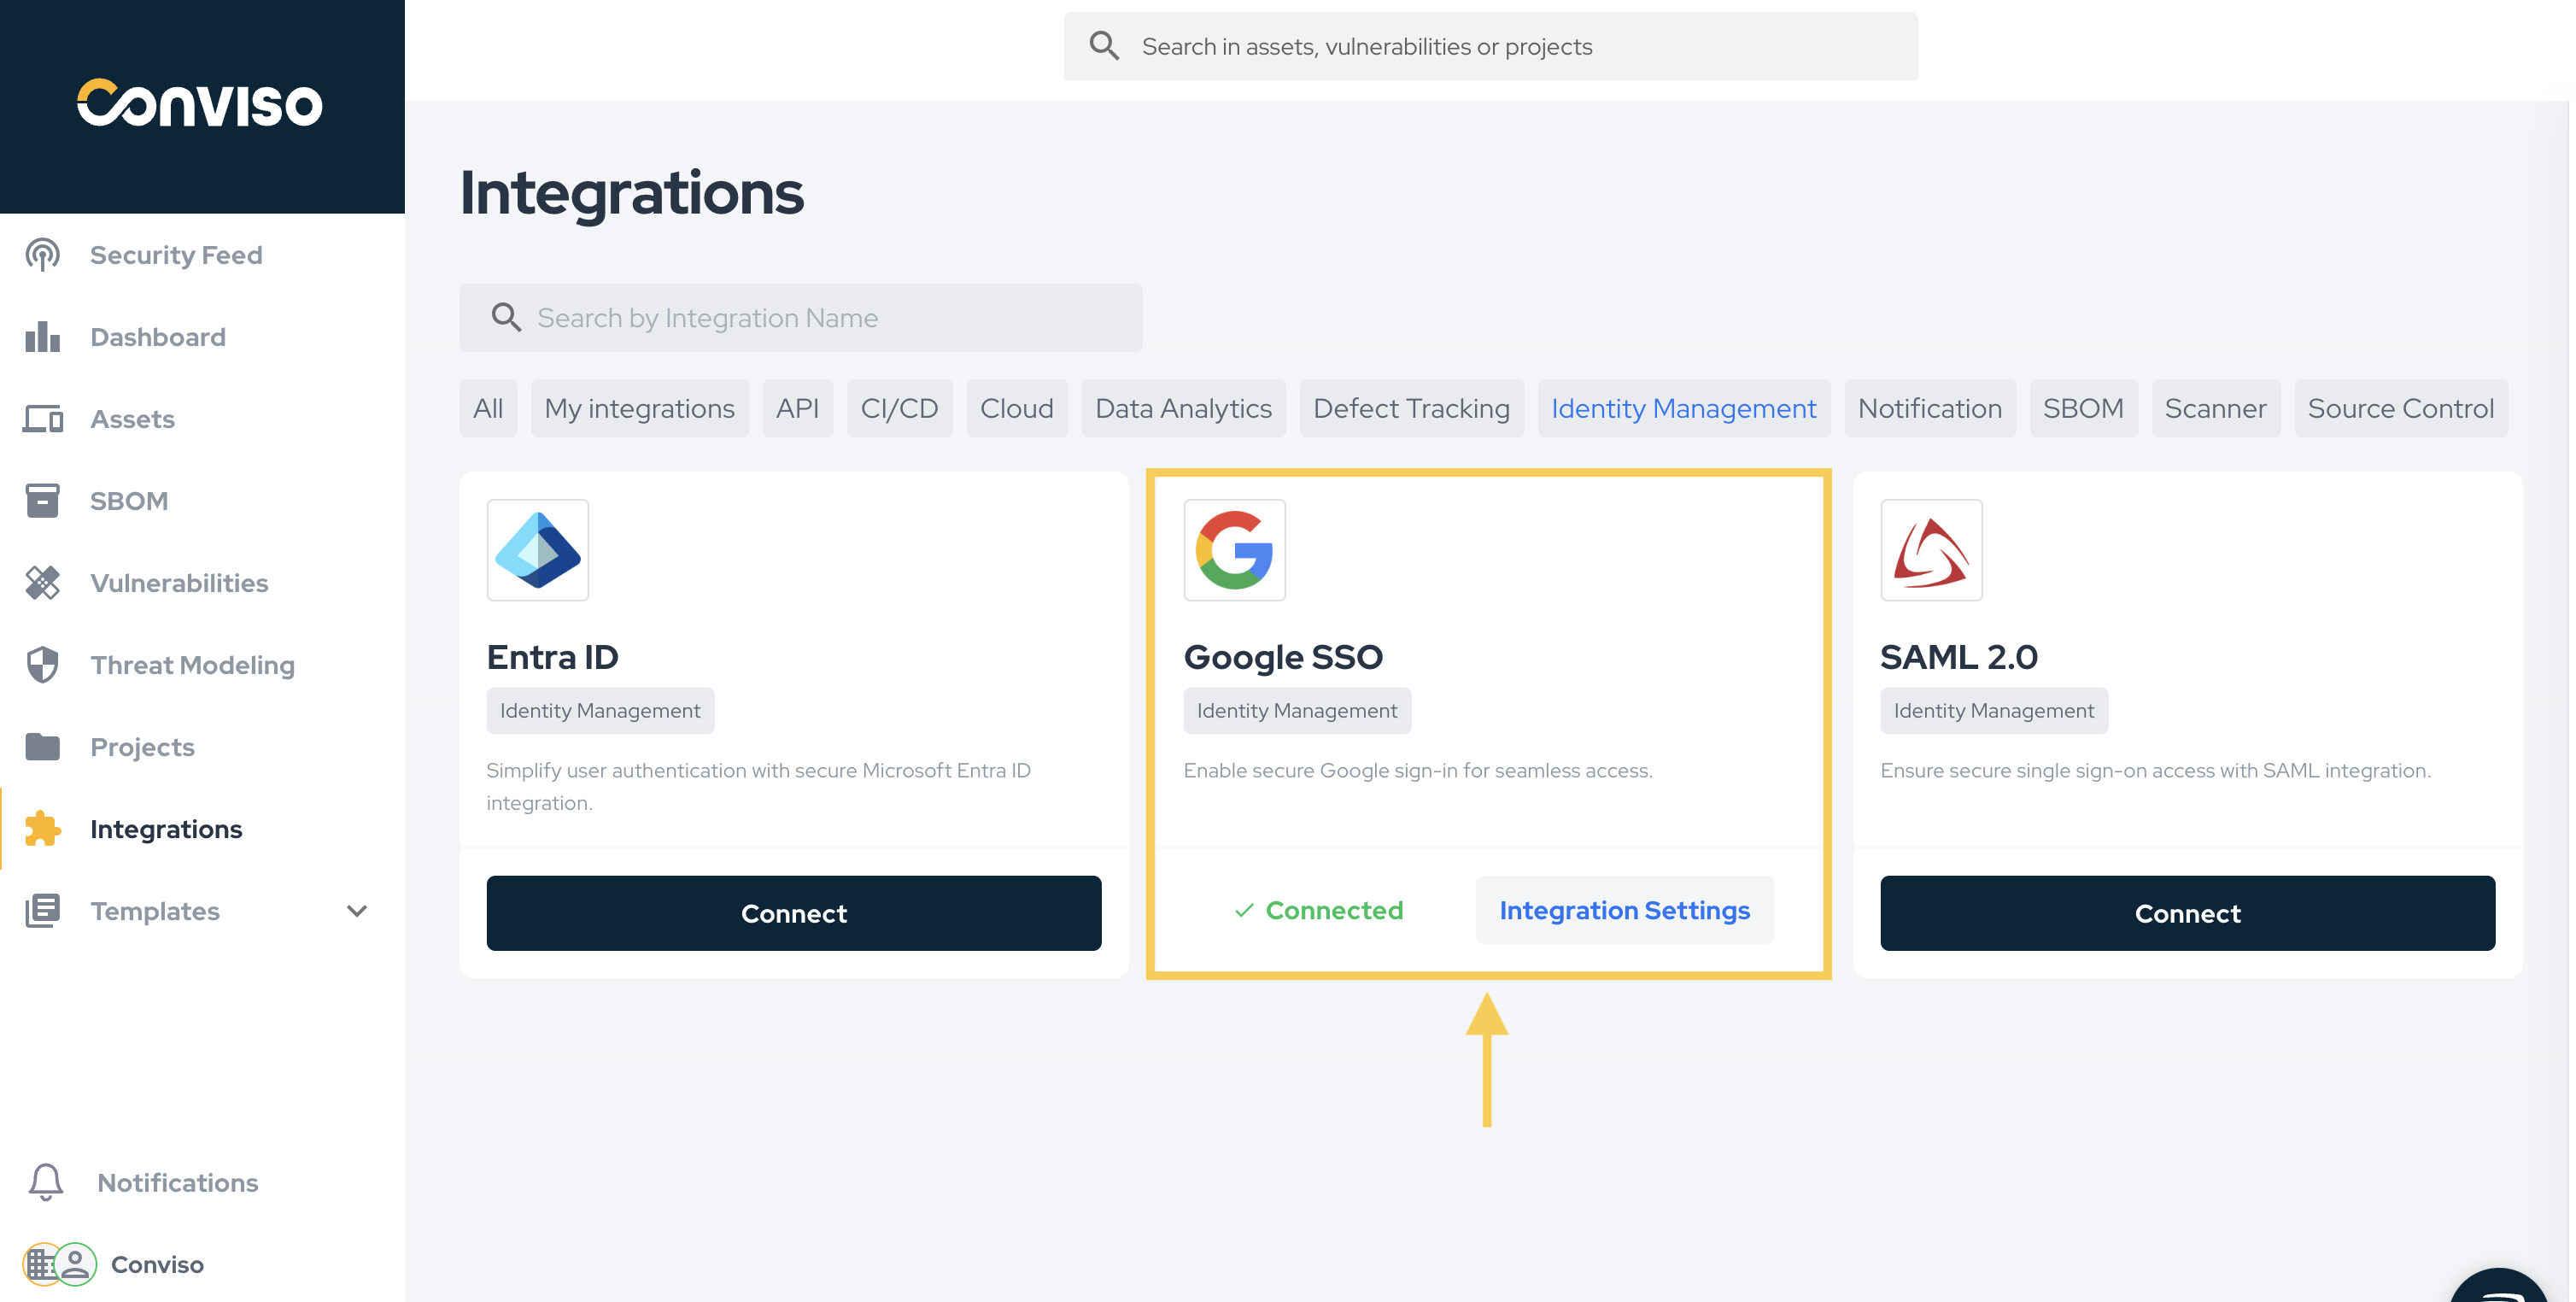
Select the integration you want to view and click at the Integration Settings
Test application
Before testing the SSO integration, ensure you are logged out of the Conviso Platform.
The SSO test process is mandatory in the Google provider. Follow these steps to test the integration:
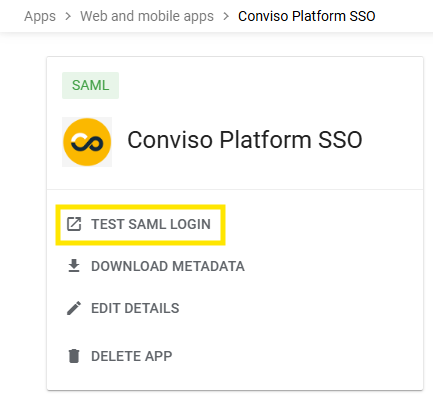
-
Click TEST SAML LOGIN.
-
You will be redirected to the Conviso Platform and automatically authenticated.
The test will verify that the SSO configuration is working correctly between Google SSO and the Conviso Platform.
Email Field Mapping in SAML 2.0
When configuring the Google SSO integration via SAML, it is important to ensure that the email field is used correctly as the mapping parameter. The email configured in your SSO identity provider must match the email of the logged-in user on the Conviso Platform to ensure proper authentication.
How this works:
During the SSO authentication process, the email is used as the primary identifier to map the user's identity in the Conviso Platform. This means the email value provided by the SSO identity provider in the SAML Assertion must match exactly with the user's email in Conviso. If not, login might fail.
Therefore, when configuring the identity provider (such as Google Workspaces or others), make sure the email field is mapped correctly and matches the email associated with the user's account in the Conviso Platform.

Contribute to the Docs
Found something outdated or missing? Help us improve the documentation with a quick suggestion or edit.
How to contributeResources
By exploring our content, you'll find resources that will enhance your understanding of the importance of a Security Application Program.
Conviso Blog: Explore our blog, which offers a collection of articles and posts covering a wide range of AppSec topics. The content on the blog is primarily in English.
Conviso's YouTube Channel: Access a wealth of informative videos covering various topics related to AppSec. Please note that the content is primarily in Portuguese.