ClickUp

First time using ClickUp? Please refer to the following documentation.
Introduction
Streamline your development process by integrating ClickUp as a Defect Tracking tool, enhancing automation and productivity for your development team!
This integration allows you to connect a ClickUp workspace and its lists, enabling seamless two-way communication with the Conviso Platform. With this two-way integration, updates—such as status changes—can flow effortlessly between ClickUp and Conviso Platform. This eliminates the need for repetitive manual actions, saving time and reducing errors.
By integrating ClickUp, your developers can boost productivity by receiving real-time notifications for new tasks whenever vulnerabilities are identified.
Prerequirements
To set up the integration, you'll need the following information:
- A valid ClickUp account.
- Permissions to create tasks and set up automations.
Conviso Platform integration with ClickUp
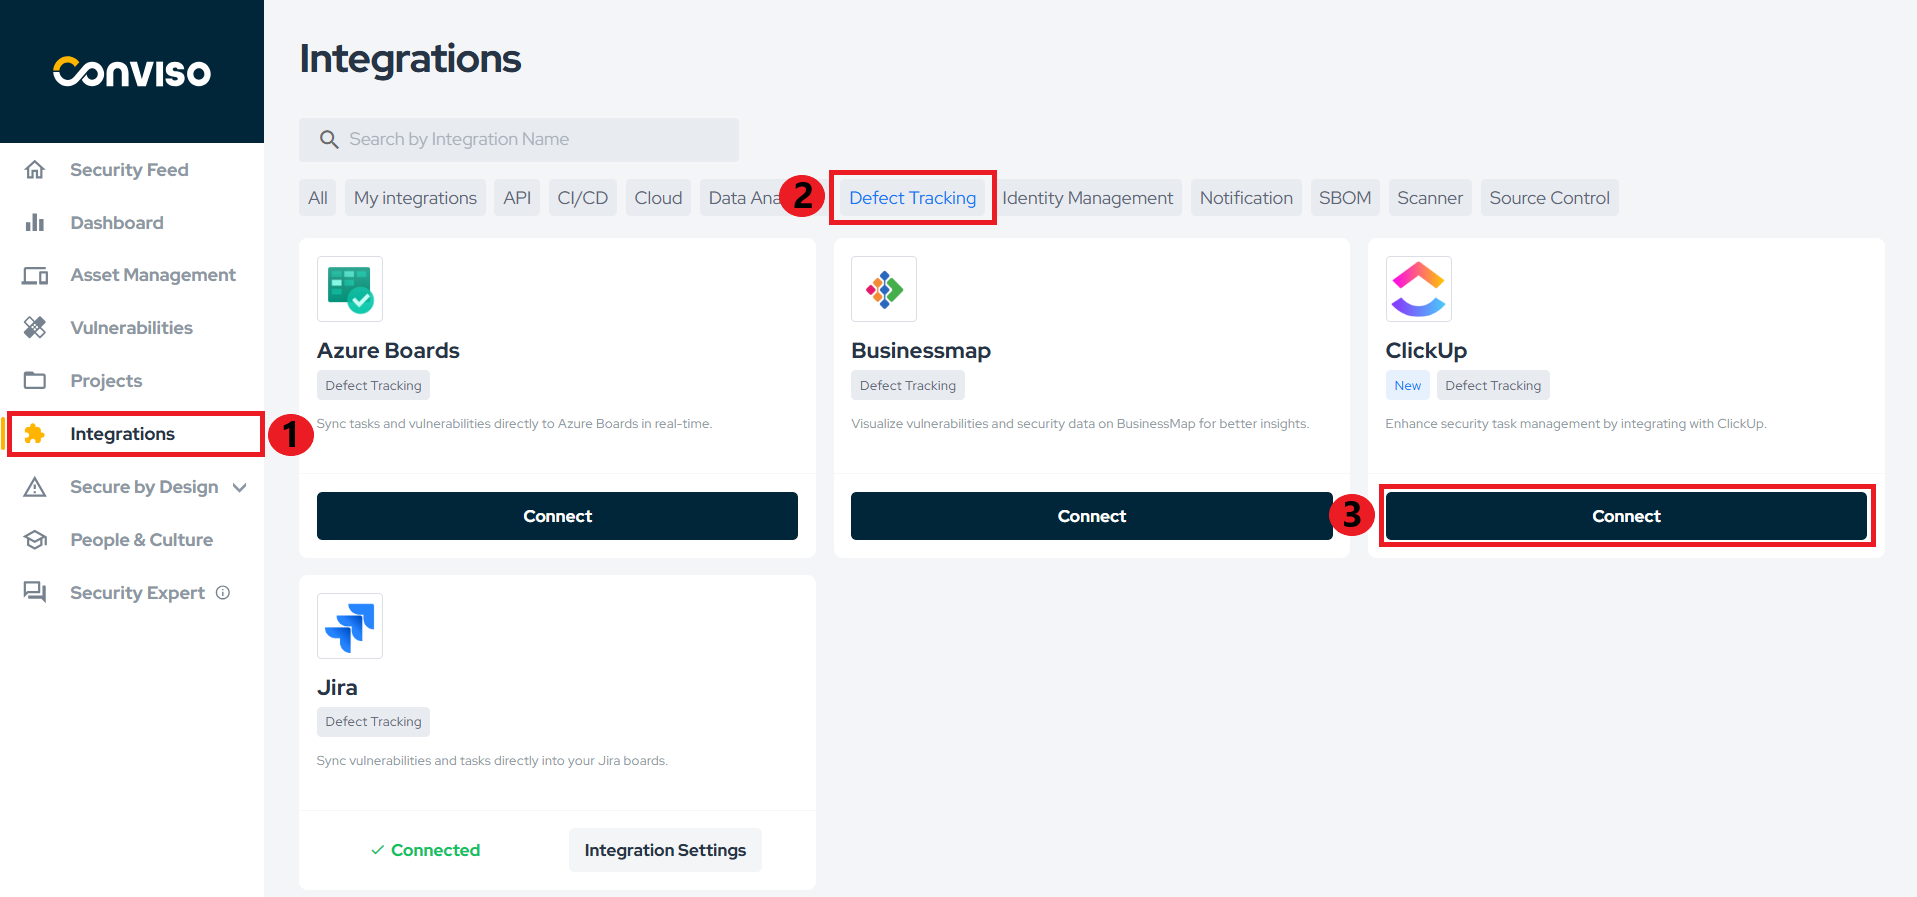
On the main menu to the left, click on Integrations. At the panel to the right, click on the Defect Tracking option, then click on the Connect button on the ClickUp card:
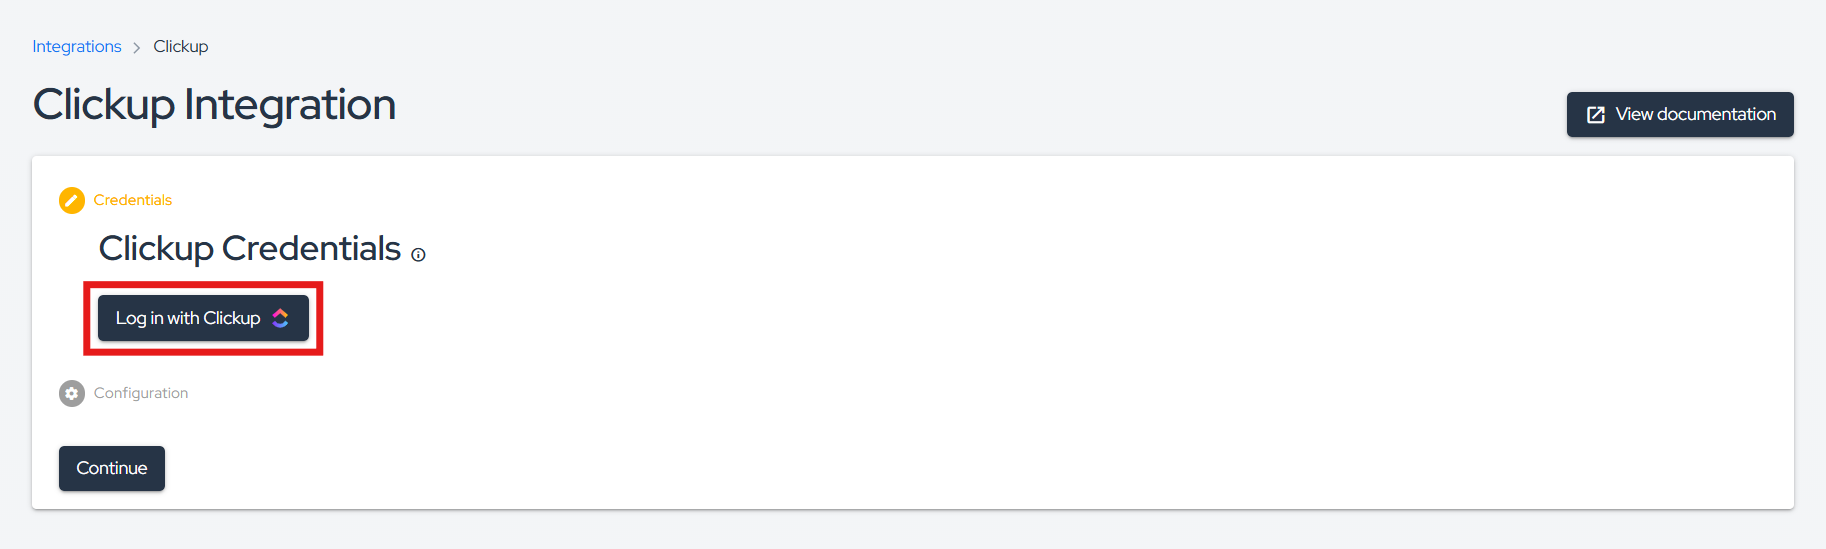
On the Credentials section, click on the Log in with ClickUp button:
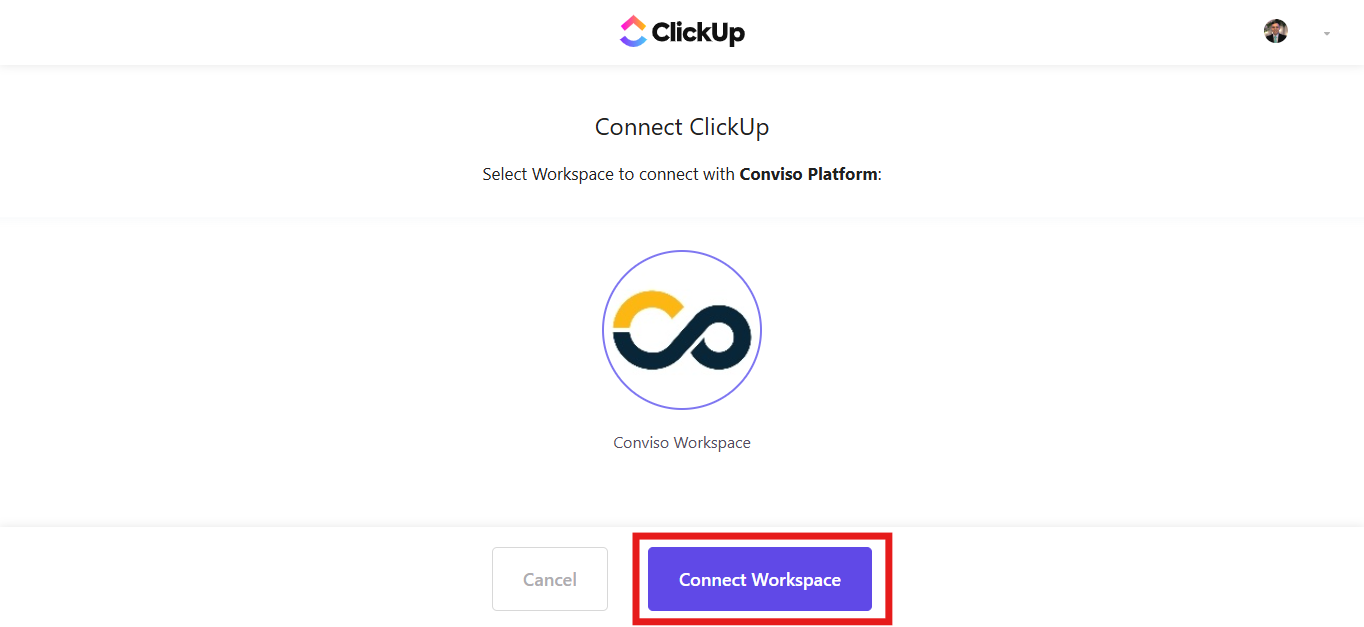
A new screen showing all your ClickUp Workspaces will be shown. Select the ClickUp Workspaces you want to integrate to Conviso Platform, then click on the Connect Workspace button:
You will be redirected to Conviso Platform, indicating the successful completed connection to ClickUp with a green check next to Connection Completed. Click on the Continue button:

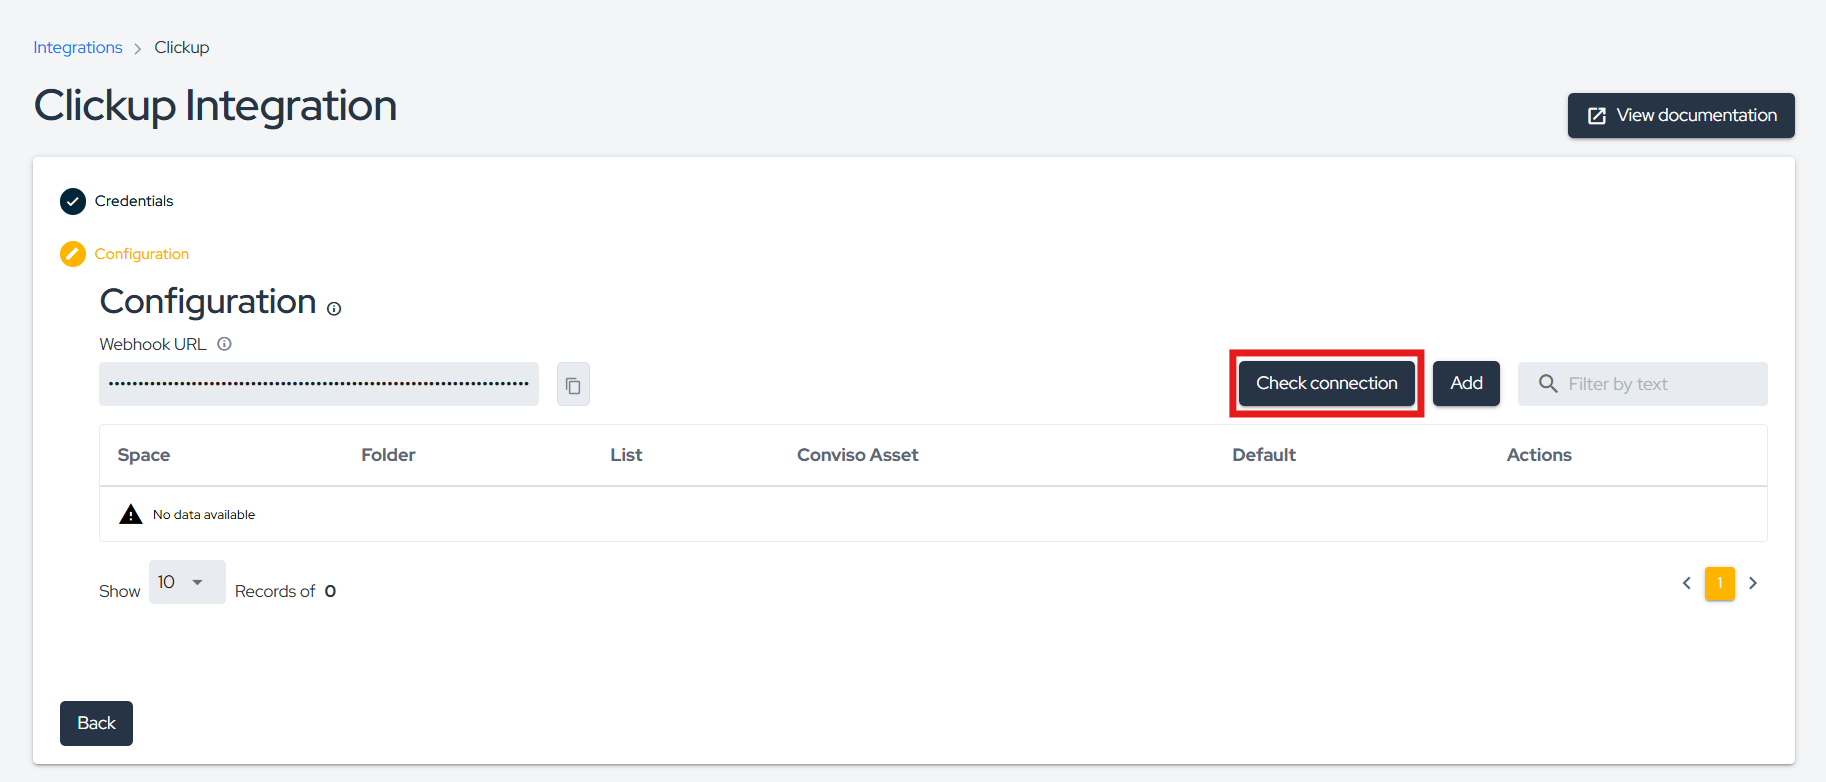
In the Configuration section, you can test the integration connectivity, by clicking on the Check connection. A green banner at the bottom of the screen will be shown, if the test succeeds (if not, a red banner will indicate that the connection has failed):
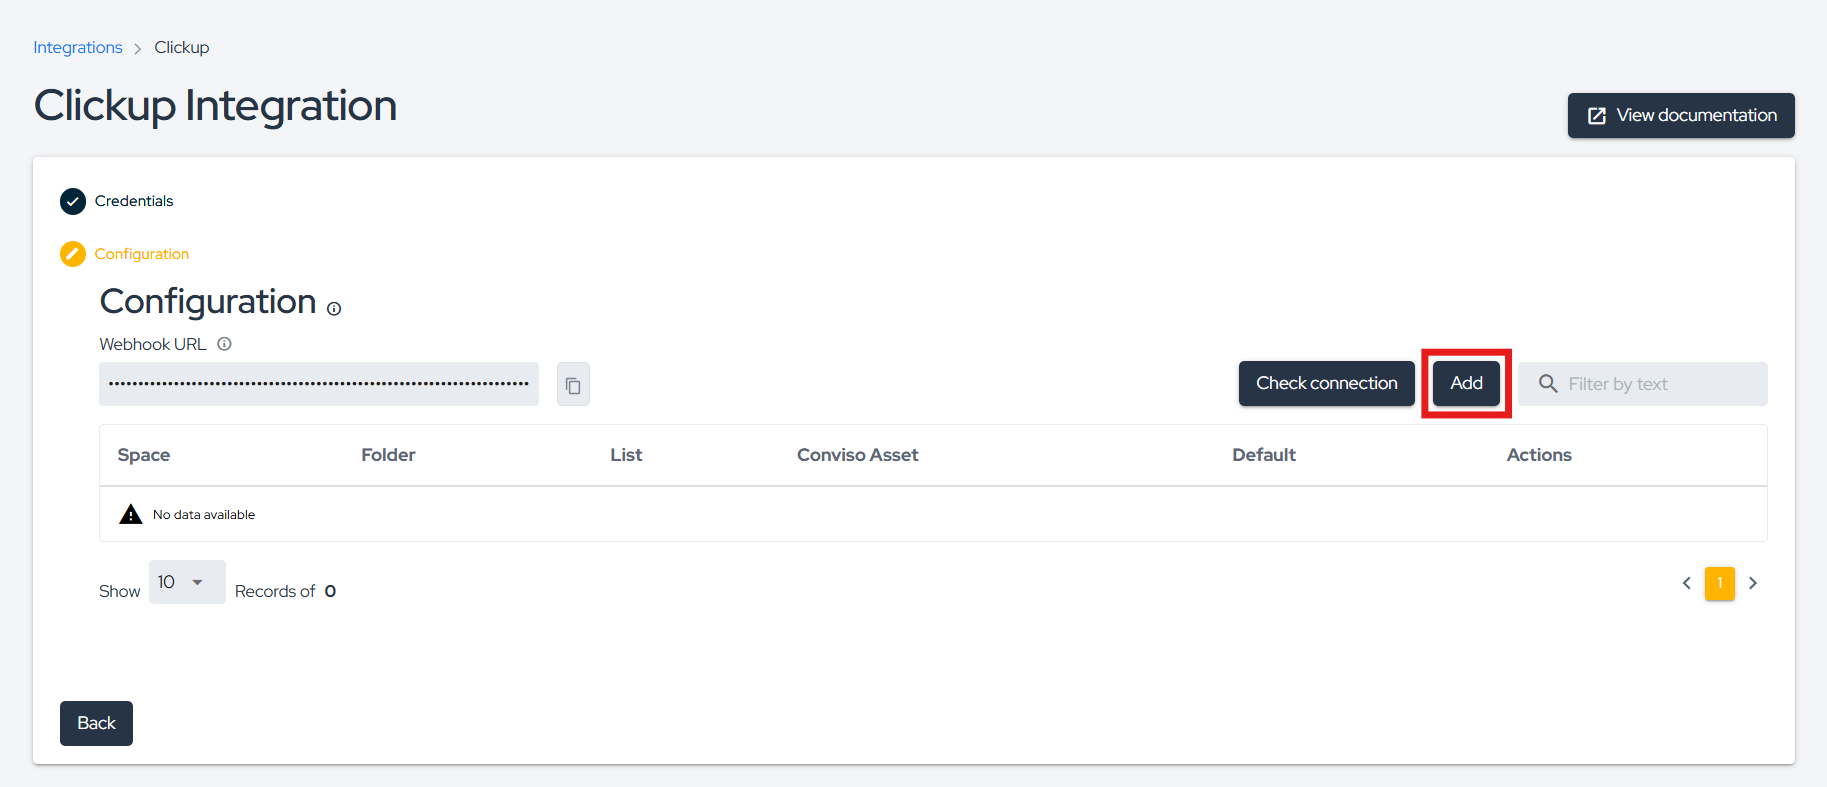
In order to start the ClickUp integration to Conviso Platform, click on the Add button at the Configuration section:
Custom Configuration vs Default Configuration
At this point in the process, you have two options: Custom Configuration or Default Configuration.
With Custom Configuration, you can specifically link a Conviso Platform asset to a single ClickUp list. On the other hand, Default Configuration enables you to link all available assets under Conviso Platform to a single ClickUp list by default — providing a standard integration setup.
Note: In the event that you have both a custom configuration for a specific asset and a default configuration for the integration, the custom configuration will always take precedence over the default configuration.
a) Custom Configuration
Step 6 - Select the Conviso Platform Asset you want to associate with your ClickUp Space, Folder (optional), and finally the List:

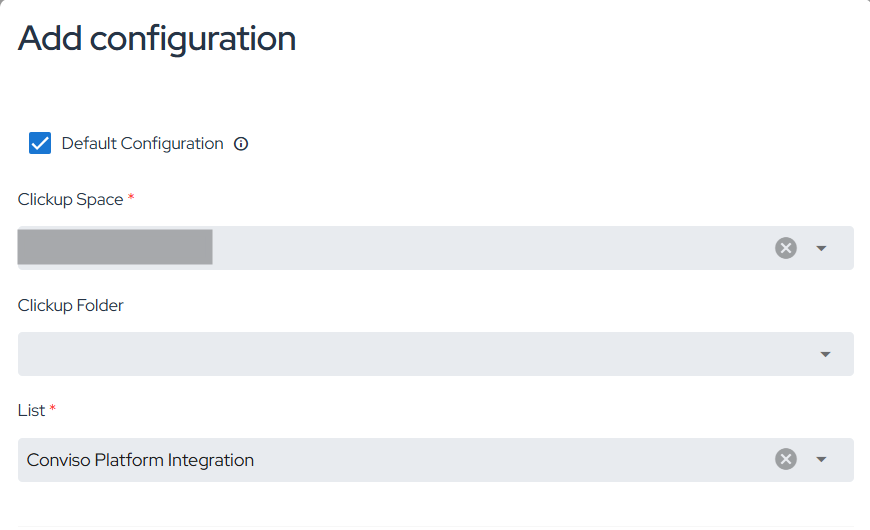
b) Default Configuration
Step 6 - Check the Default Configuration field (notice that the Asset label is no longer available), select the ClickUp Space, Folder (optional), and finally the List:
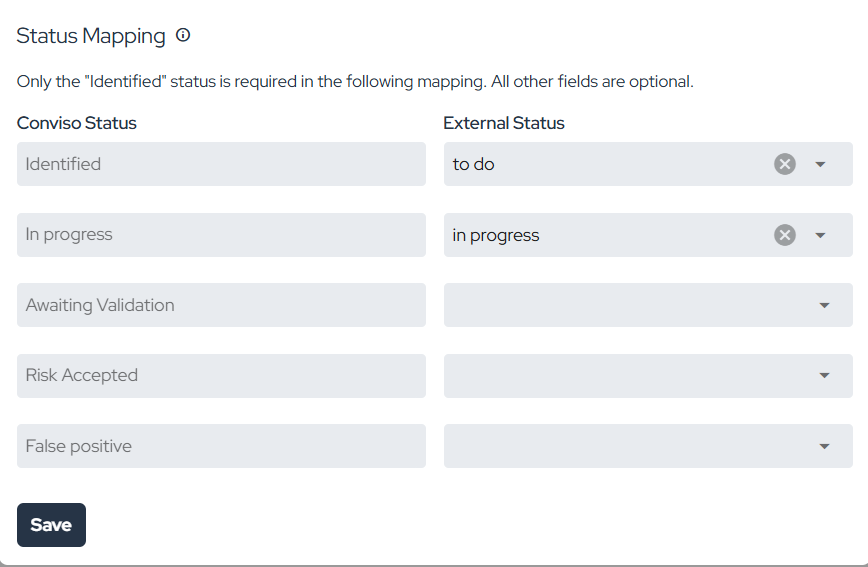
Step 7 - Consider the following in order to map Conviso Platform statuses to ClickUp statuses: Identified status (1) is required to map the vulnerabilities from Conviso Platform to ClickUp, while other fields (2) are optional. After mapping all the statuses, click on the Save button.
Synchronize vulnerability statuses between Conviso Platform and ClickUp using Webhooks
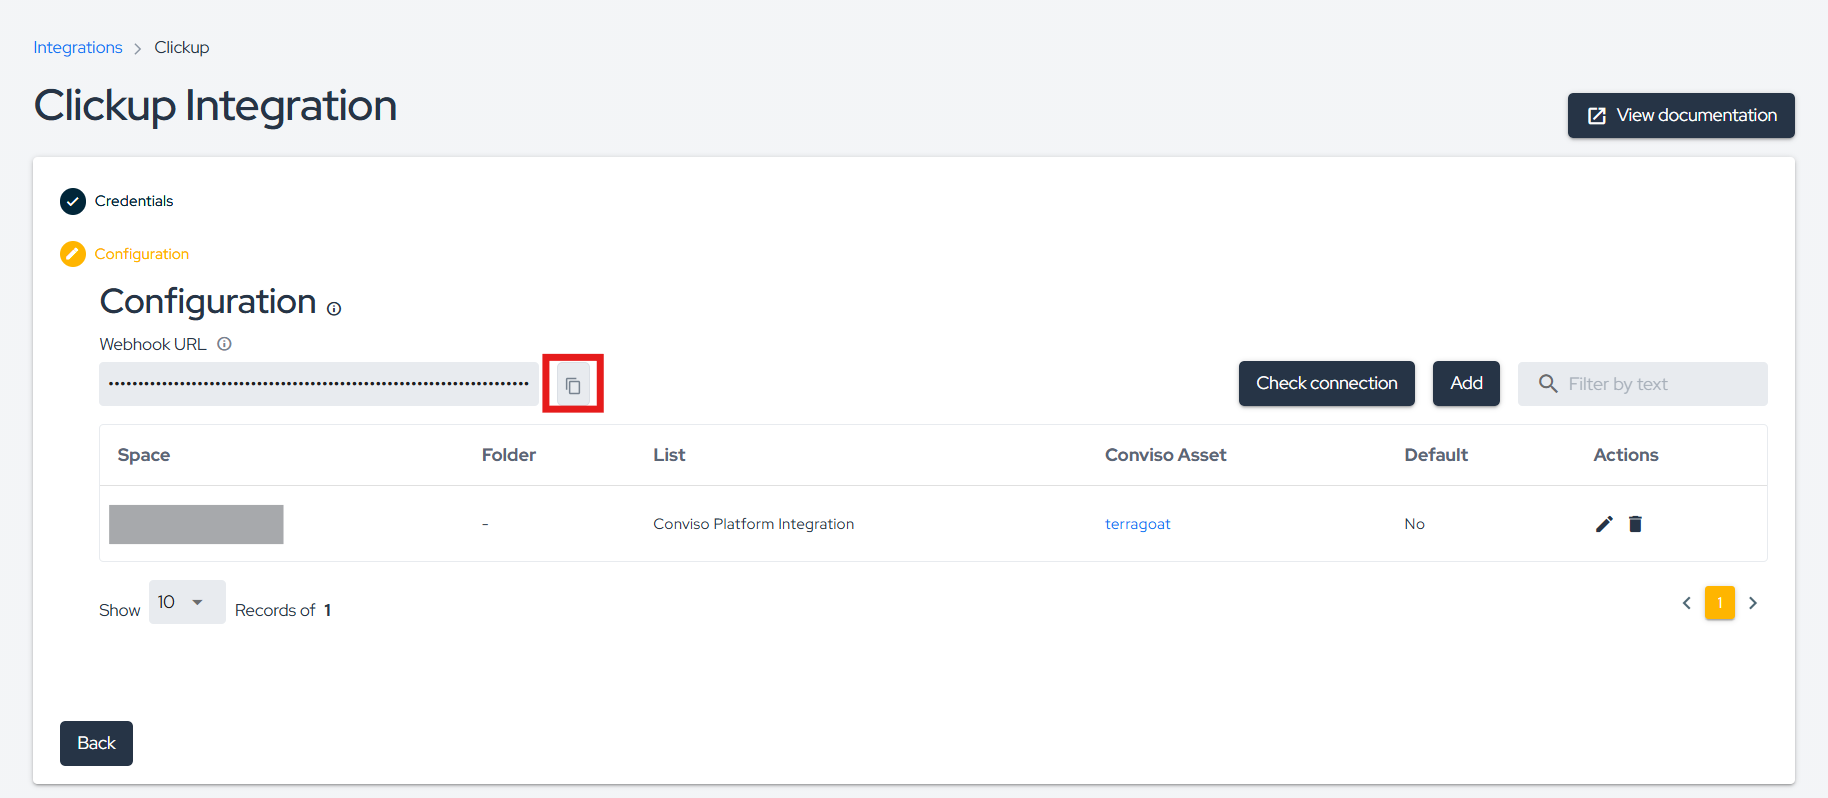
Step 1 - Copy and save the WebHook URL:
Step 2 - Open the desired list in ClickUp and click on Automations:

Step 3 - Crie uma nova automação com as configurações abaixo e clique emCreate a new automation with the settings below and click on Create:
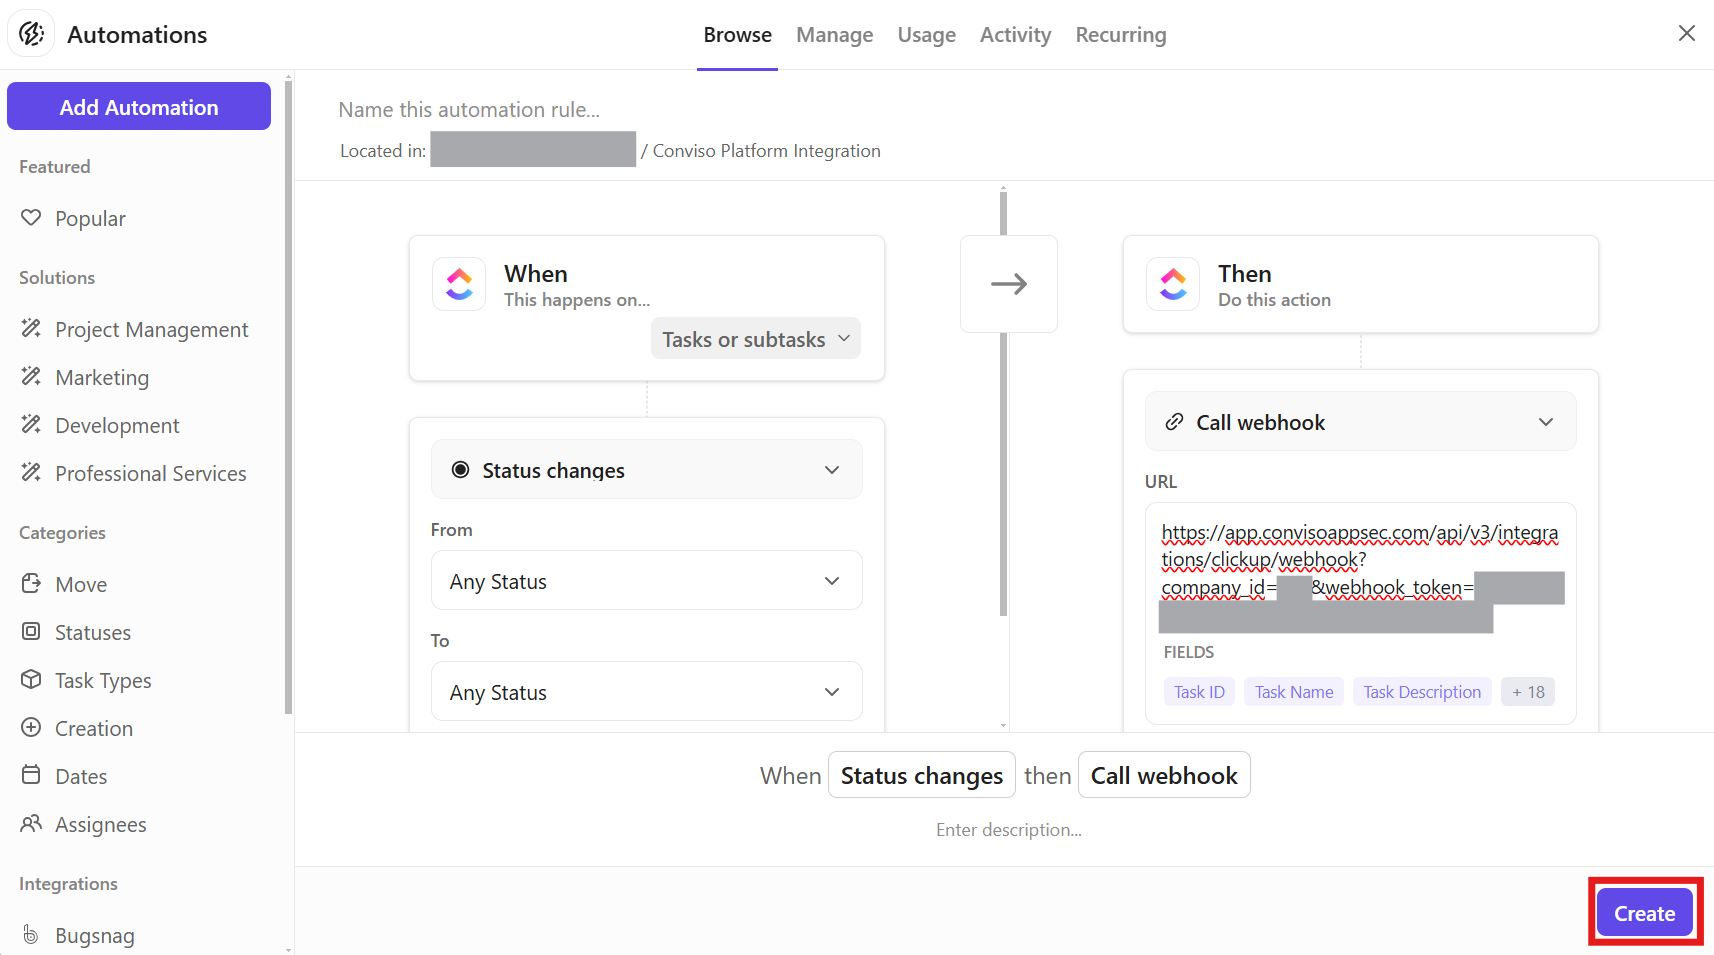
When any status changes to any other status on tasks or subtasks, the webhook will be triggered.
Recent Deliveries
The Recent Deliveries feature provides a detailed log of the interactions between Conviso Platform and ClickUp. This allows users to monitor the status of data transfers and identify any potential issues in the integration process.
To access and navigate the Recent Deliveries page, follow these steps:
Step 1 - In the integration configuration panel for ClickUp, locate and click the Recent Deliveries button:

Step 2 - You will be directed to the Recent Deliveries page, which displays a table with the following columns:
- Date: The timestamp of the delivery attempt.
- Level: The severity level of the log entry (info, error, or warn).
- Message: A detailed description of the communication or event.

Step 3 - Use the available filters to refine the log list:
- Date Range: Filter logs by a specific time period.
- Level: Filter by log severity (Info, Warning, or Error).
- Search Box: Enter text or keywords to search for specific messages.

Support
Should you have any questions or require assistance while using the Conviso Platform, feel free to contact our dedicated support team.
Contribute to the Docs
Found something outdated or missing? Help us improve the documentation with a quick suggestion or edit.
How to contributeResources
By exploring our content, you'll find resources that will enhance your understanding of the importance of a Security Application Program.
Conviso Blog: Explore our blog, which offers a collection of articles and posts covering a wide range of AppSec topics. The content on the blog is primarily in English.
Conviso's YouTube Channel: Access a wealth of informative videos covering various topics related to AppSec. Please note that the content is primarily in Portuguese.