Jira Integration

Introduction
Integrating Jira in Conviso Platform will let developers gain productivity while we do all the hard work by automating the whole vulnerability management triage process.
New vulnerabilities identified in Conviso Platfom are created in real time directly in Jira.
With our two-way integration capability, every status update from both solutions are automatically updated in order to reduce the toil and increase productivity.
Prerequirements
To set up the integration, you'll need the following information:
-
A user with Admin permissions in Jira.
-
A user with Admin permissions in Conviso Platform.
Usage
To seamlessly integrate Conviso Platform with Jira, follow these step-by-step procedures:
1 - Configure the integration between Conviso Platform and Jira
2 - How to Modify the Policy to Automatically Create Issues in Jira
3 - How to Manually Create Issues in Jira
Configure the integration between Conviso Platform and Jira
Step 1 - Access the Conviso Platform, look for Integrations on the left-side menu, select Defect Tracking, and finally, click the Connect button located just below the Jira card, as shown in the example image below:

Step 2 - Click the Log in with Jira button to authenticate with Jira:

Step 3 - On the page below, grant the necessary permitions so the Conviso Platform application can perform the required actios on your Jira.

Step 4 - Severity Mapping refers to Jira's two-way integration with Conviso Platform. Select which severity will be mapped to Jira's priority:

Step 5 - Then, in Configuration, click on the Add Project button to start pairing Conviso Platform Projects with Jira Projects:

Step 6 - Finally, to add a new project, select the Asset in Conviso Platform that you want to associate with your Jira Project. Then, choose the appropriate Jira Issue Type and map the Conviso Platform statuses to the corresponding Jira statuses. Once everything is configured, click Save.

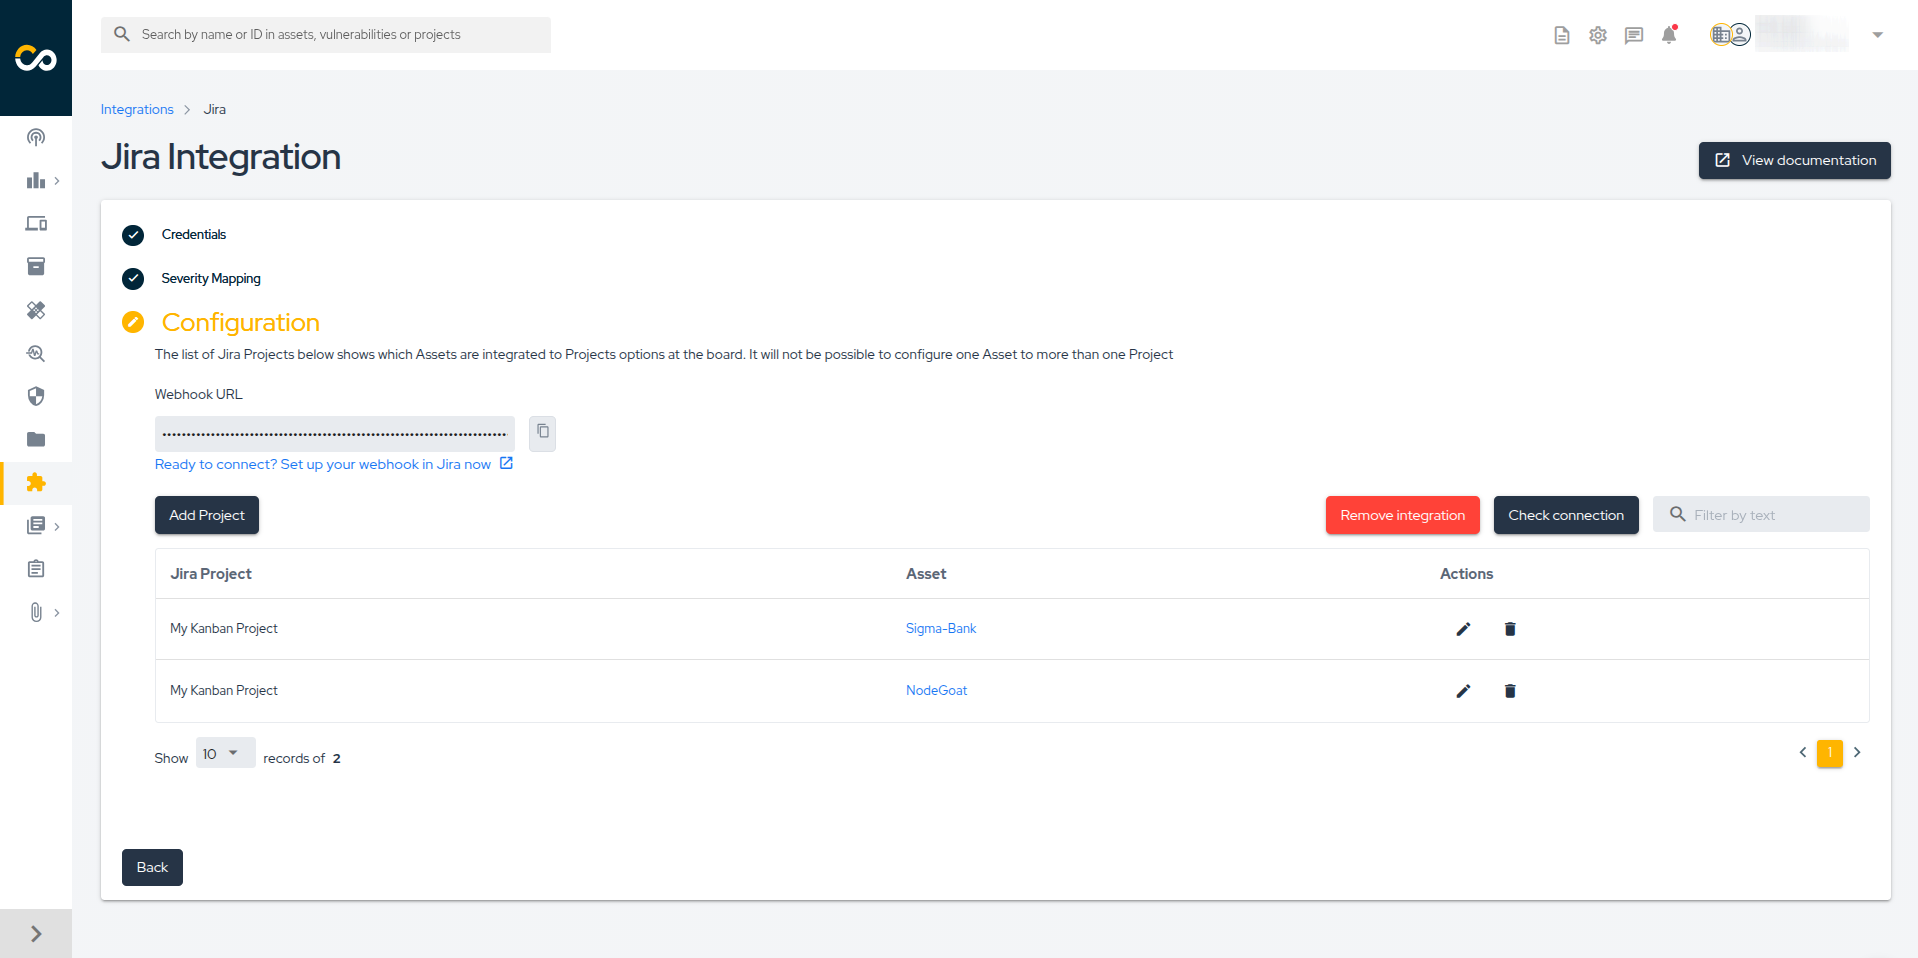
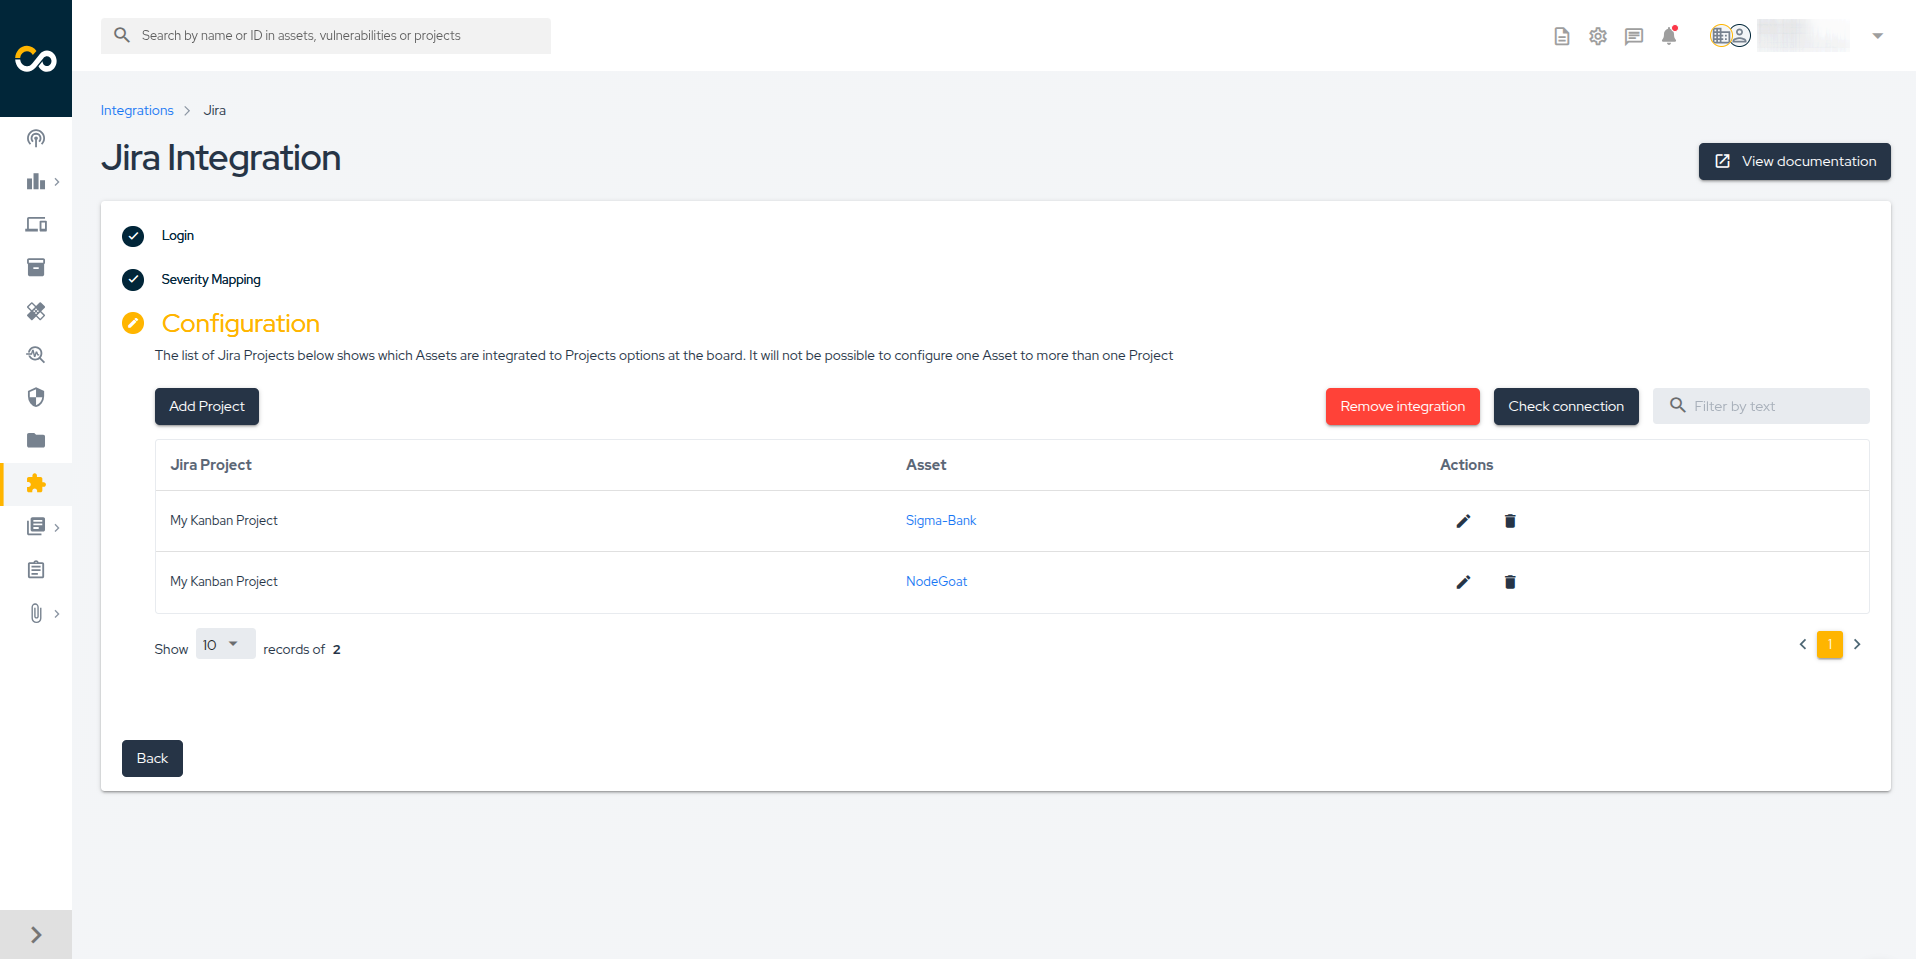
Step 7 - After saving your integration settings, you can review, update, or delete the configuration in the Conviso Platform. To do so, go to your integration panel and click the Edit icon to review or make change changes; or the Trash icon to permanently delete the integration:

Step 8 - Whenever a new vulnerability is detected, it will be automatically sent to the linked Jira project, as shown in the example below:

How to Modify the Policy to Automatically Create Issues in Jira
Conviso Platform allows you to enable a policy that defines which vulnerability severities will be automatically sent to Jira. To configure it, follow the steps below:
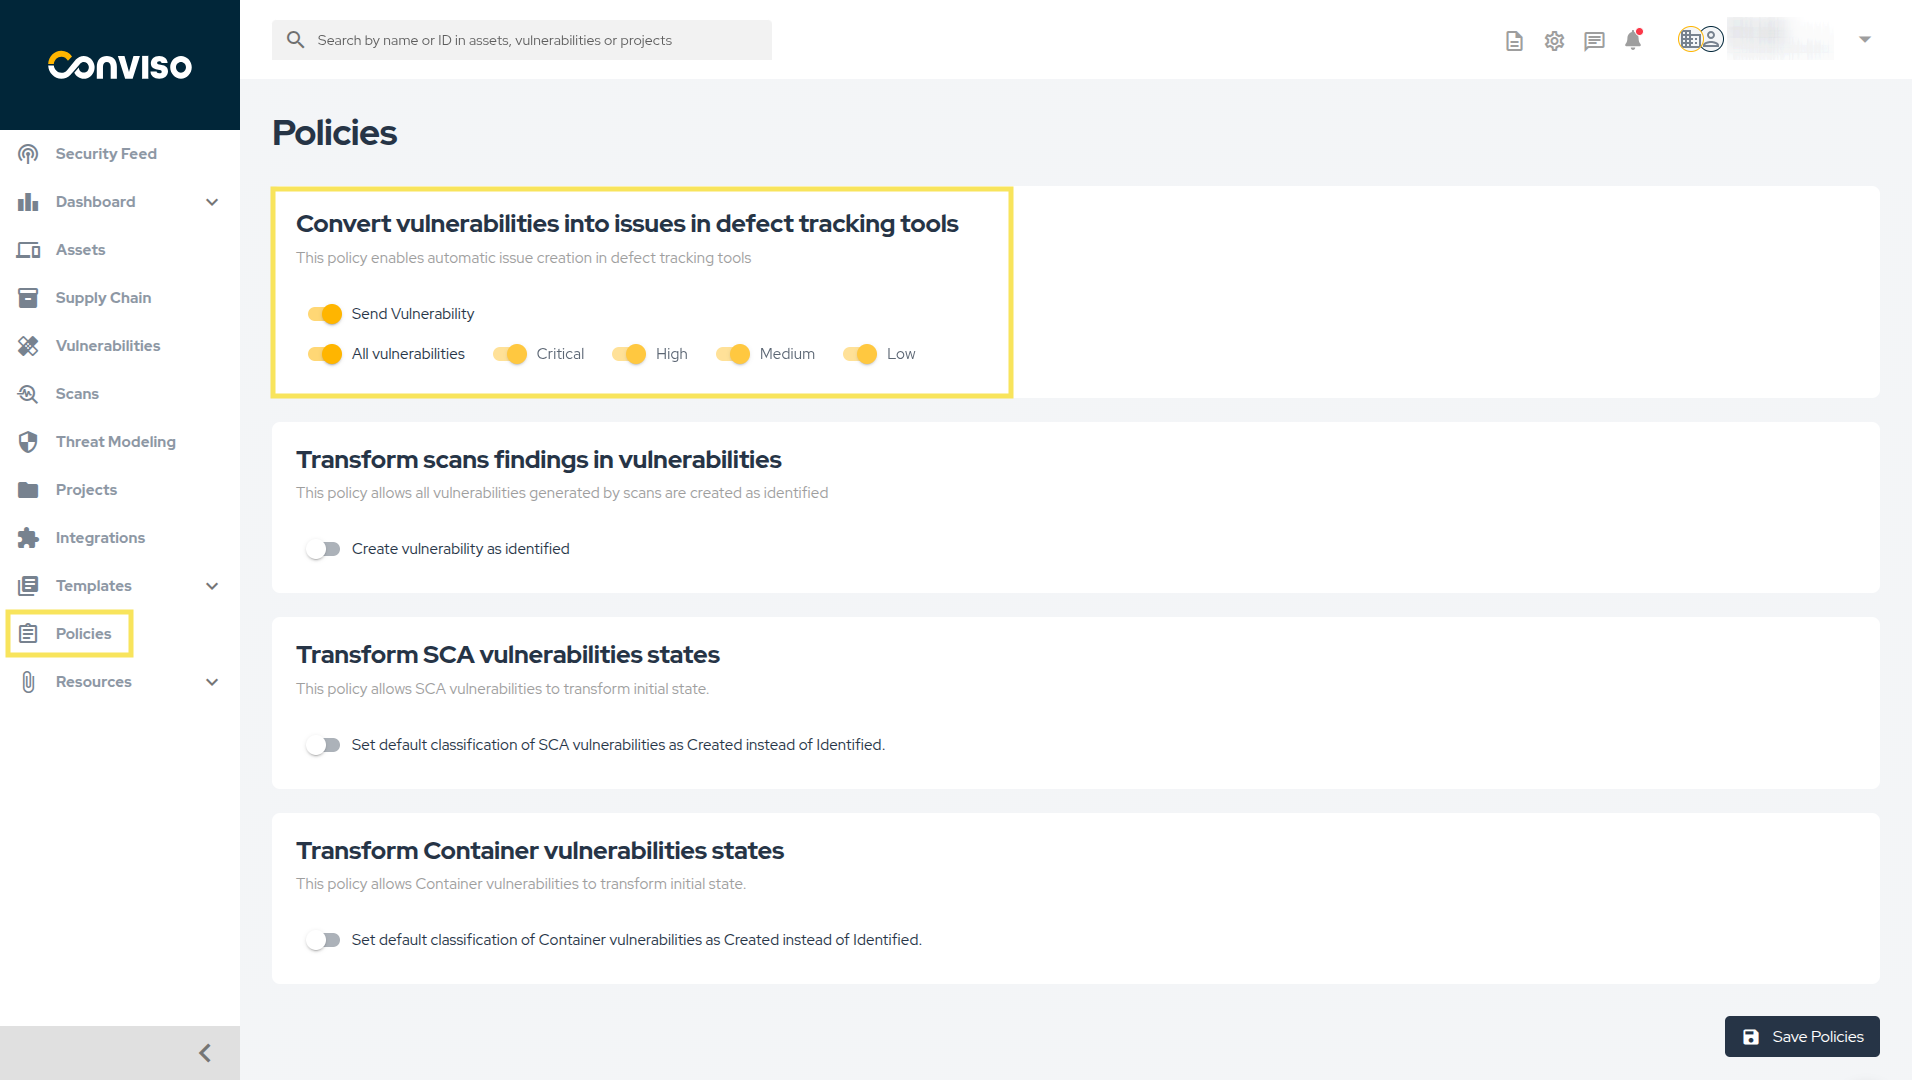
Step 1 - At the sidebar menu, click Policies.
Step 2 - Enable the Convert vulnerabilities into issues in defect tracking tools policy. You can choose to send vulnerabilities of all severities (selecting All vulnerabilities) or enable only specific severities:
How to Manually Create Issues in Jira
If you need to manually create a vulnerability in Jira, there are two available methods:
Creating a vulnerability in Jira from the vulnerability details page
To create a vulnerability in Jira from the vulnerability details page, follow the steps below:
-
Go to the vulnerability details page.
-
Click the three-dot icon, as shown in the example below.
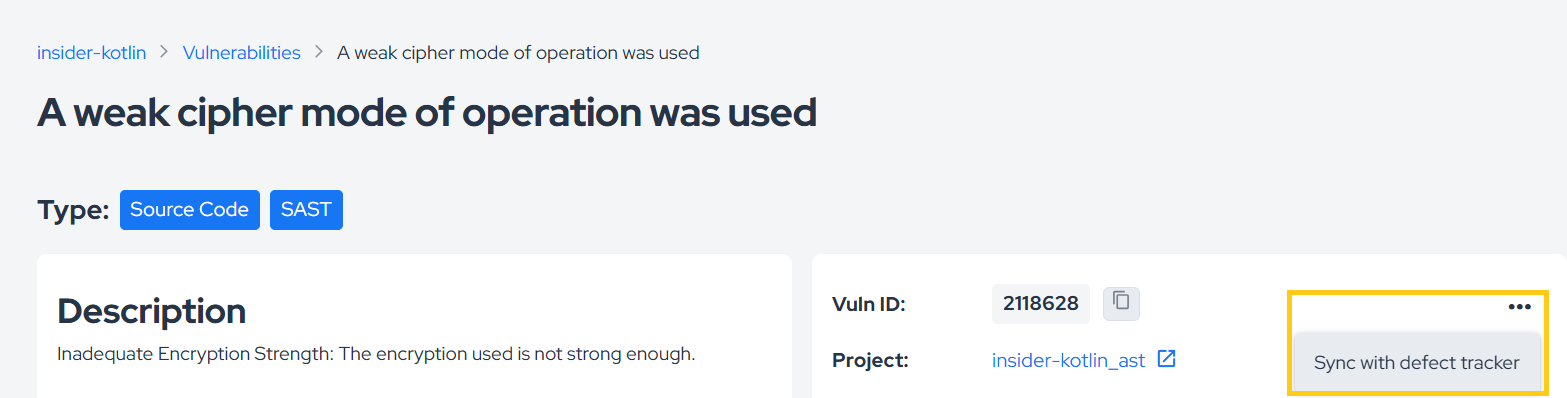
- Select Sync with defect tracker.
Creating a vulnerability in Jira via API
To create a vulnerability in Jira using the API, follow the steps below:
- Retrieve the vulnerability ID.
- Execute the following mutation, replacing the ID with the one you retrieved:
mutation {
  syncVulnerabilityWithDefectTracker(input: {id: <YOUR_VULNERABILITY_ID>}) {
    issue {
      id
    }
  }
}
If you need help using our API, click here.
Migrating Jira Configuration
If you already have an existing Jira integration configured but need to migrate your setup, follow the steps below:
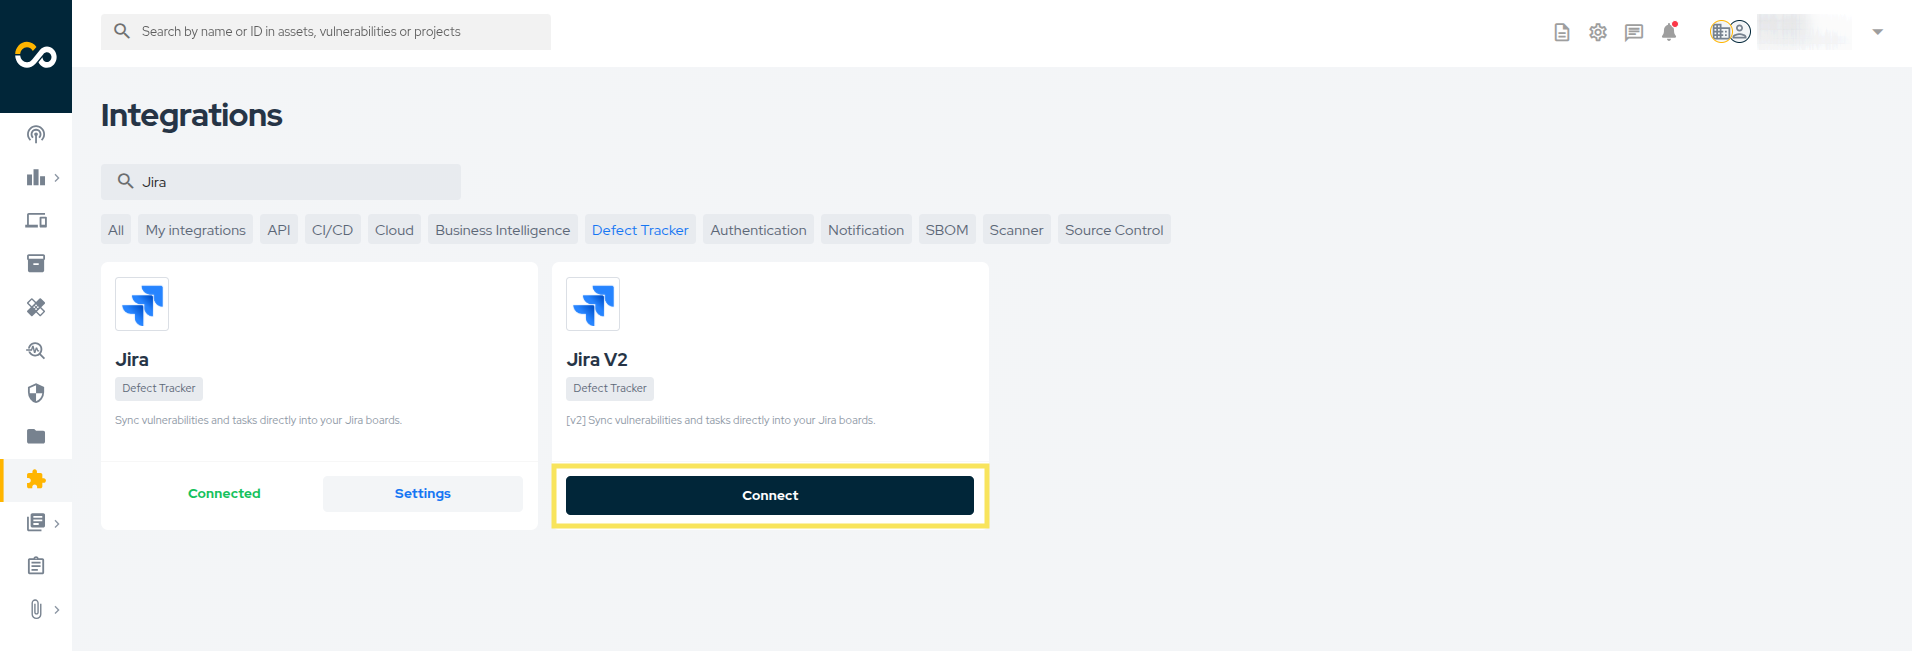
Step 1 - Access the Conviso Platform, look for Integrations on the left-side menu, select Defect Tracking, and finally, click the Connect button located just below the Jira V2 card, as shown in the example image below:
Step 2 - Click the Log in with Jira button to authenticate with Jira:
Step 3 - On the page below, grant the necessary permitions so the Conviso Platform application can perform the required actios on your Jira.
Step 4 - Severity Mapping refers to Jira's two-way integration with Conviso Platform. Select which severity will be mapped to Jira's priority:
Step 5 - Then, in Configuration, you’ll see your imported settings, as shown in the example below.
Original Jira Configuration:
Imported Configuration in the New Version:
Recent Deliveries
The Recent Deliveries feature provides a detailed log of the interactions between Conviso Platform and Jira. This allows users to monitor the status of data transfers and identify any potential issues in the integration process.
To access and navigate the Recent Deliveries page, follow these steps:
Step 1 - In the integration configuration panel for Jira, locate and click the Recent Deliveries button:

Step 2 - You will be directed to the Recent Deliveries page, which displays a table with the following columns:
- Date: The timestamp of the delivery attempt.
- Level: The severity level of the log entry (info, error, or warn).
- Message: A detailed description of the communication or event.

Step 3 - Use the available filters to refine the log list:
- Date Range: Filter logs by a specific time period.
- Level: Filter by log severity (Info, Warning, or Error).
- Search Box: Enter text or keywords to search for specific messages.

Support
Should you have any questions or require assistance while using the Conviso Platform, feel free to contact our dedicated support team.
Contribute to the Docs
Found something outdated or missing? Help us improve the documentation with a quick suggestion or edit.
How to contributeResources
By exploring our content, you'll find resources that will enhance your understanding of the importance of a Security Application Program.
Conviso Blog: Explore our blog, which offers a collection of articles and posts covering a wide range of AppSec topics. The content on the blog is primarily in English.
Conviso's YouTube Channel: Access a wealth of informative videos covering various topics related to AppSec. Please note that the content is primarily in Portuguese.