Projects
Introduction
The Projects feature allows you to create and manage different types of security projects in a centralized way. You can consolidate the results of security analyses, such as code reviews, penetration testing, and requirement validation (Threat Modeling), all in one place.
Usage
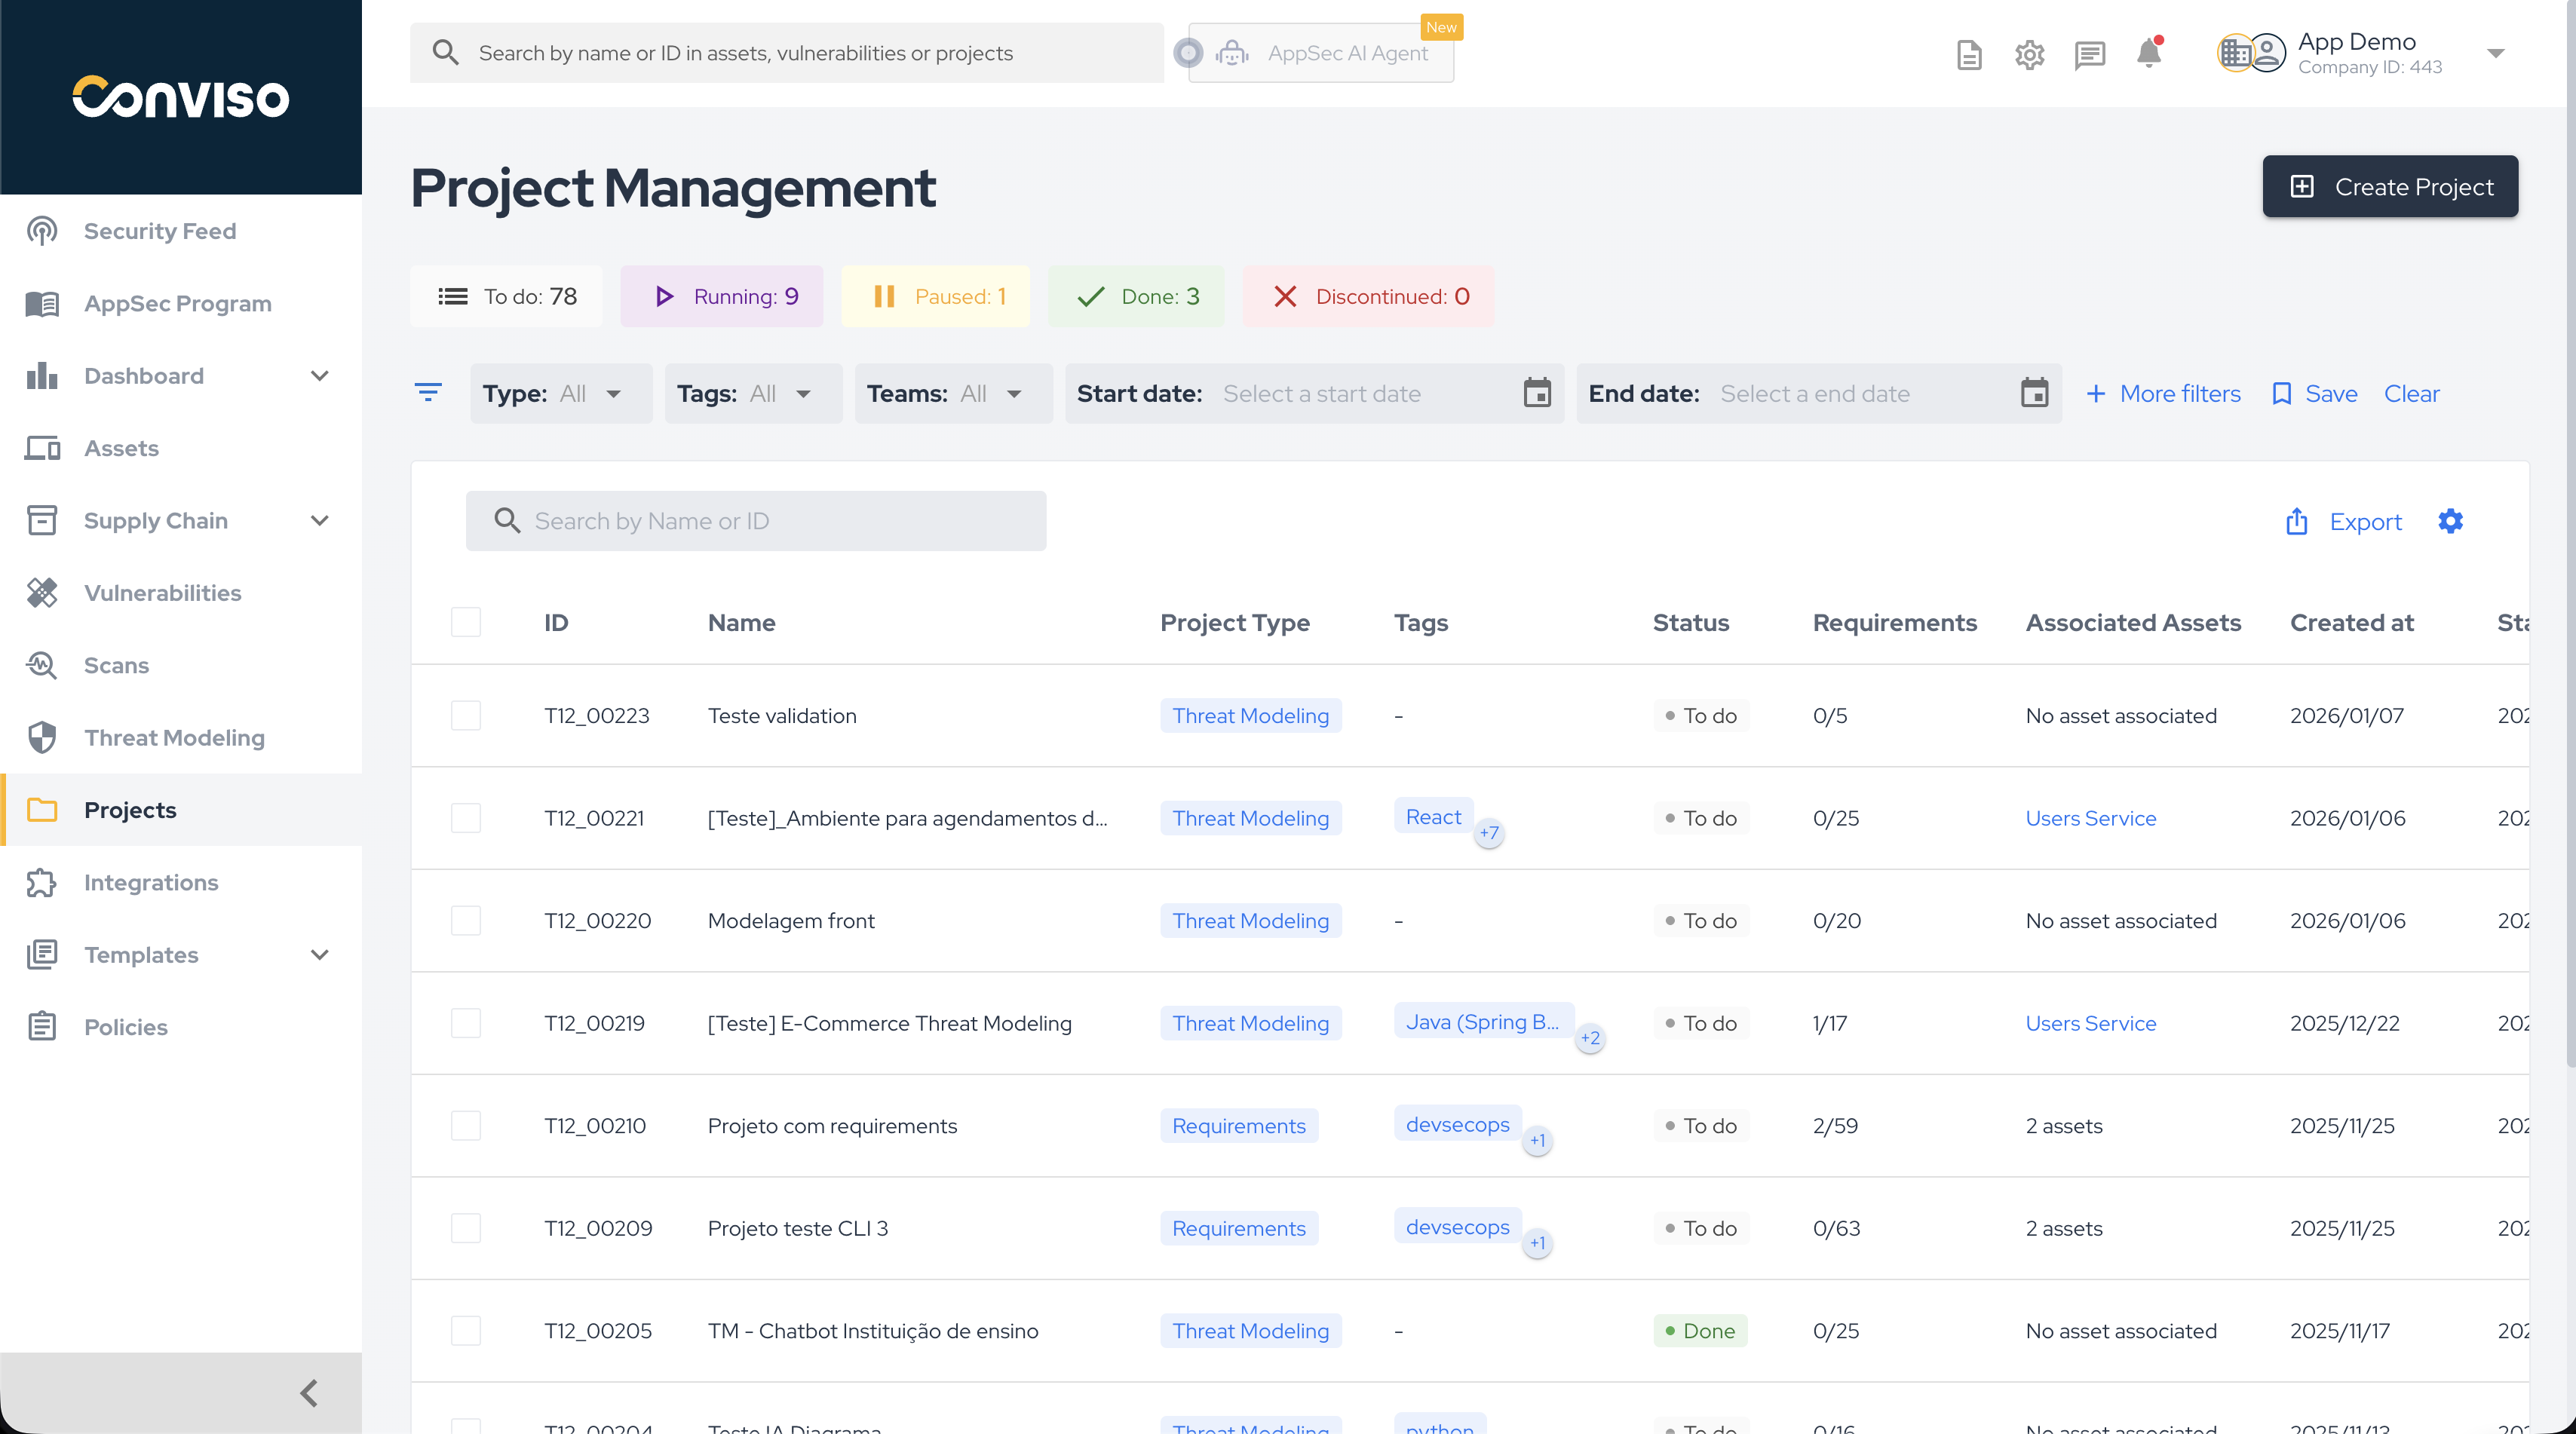
To access the project dashboard, navigate to Projects in the left-hand menu:
⚠️ Important: Tags will be automatically deleted from the system when they are no longer associated with any project.
On this screen, you'll find an overview of your project statuses. You can quickly filter projects by status by clicking on the corresponding status name:
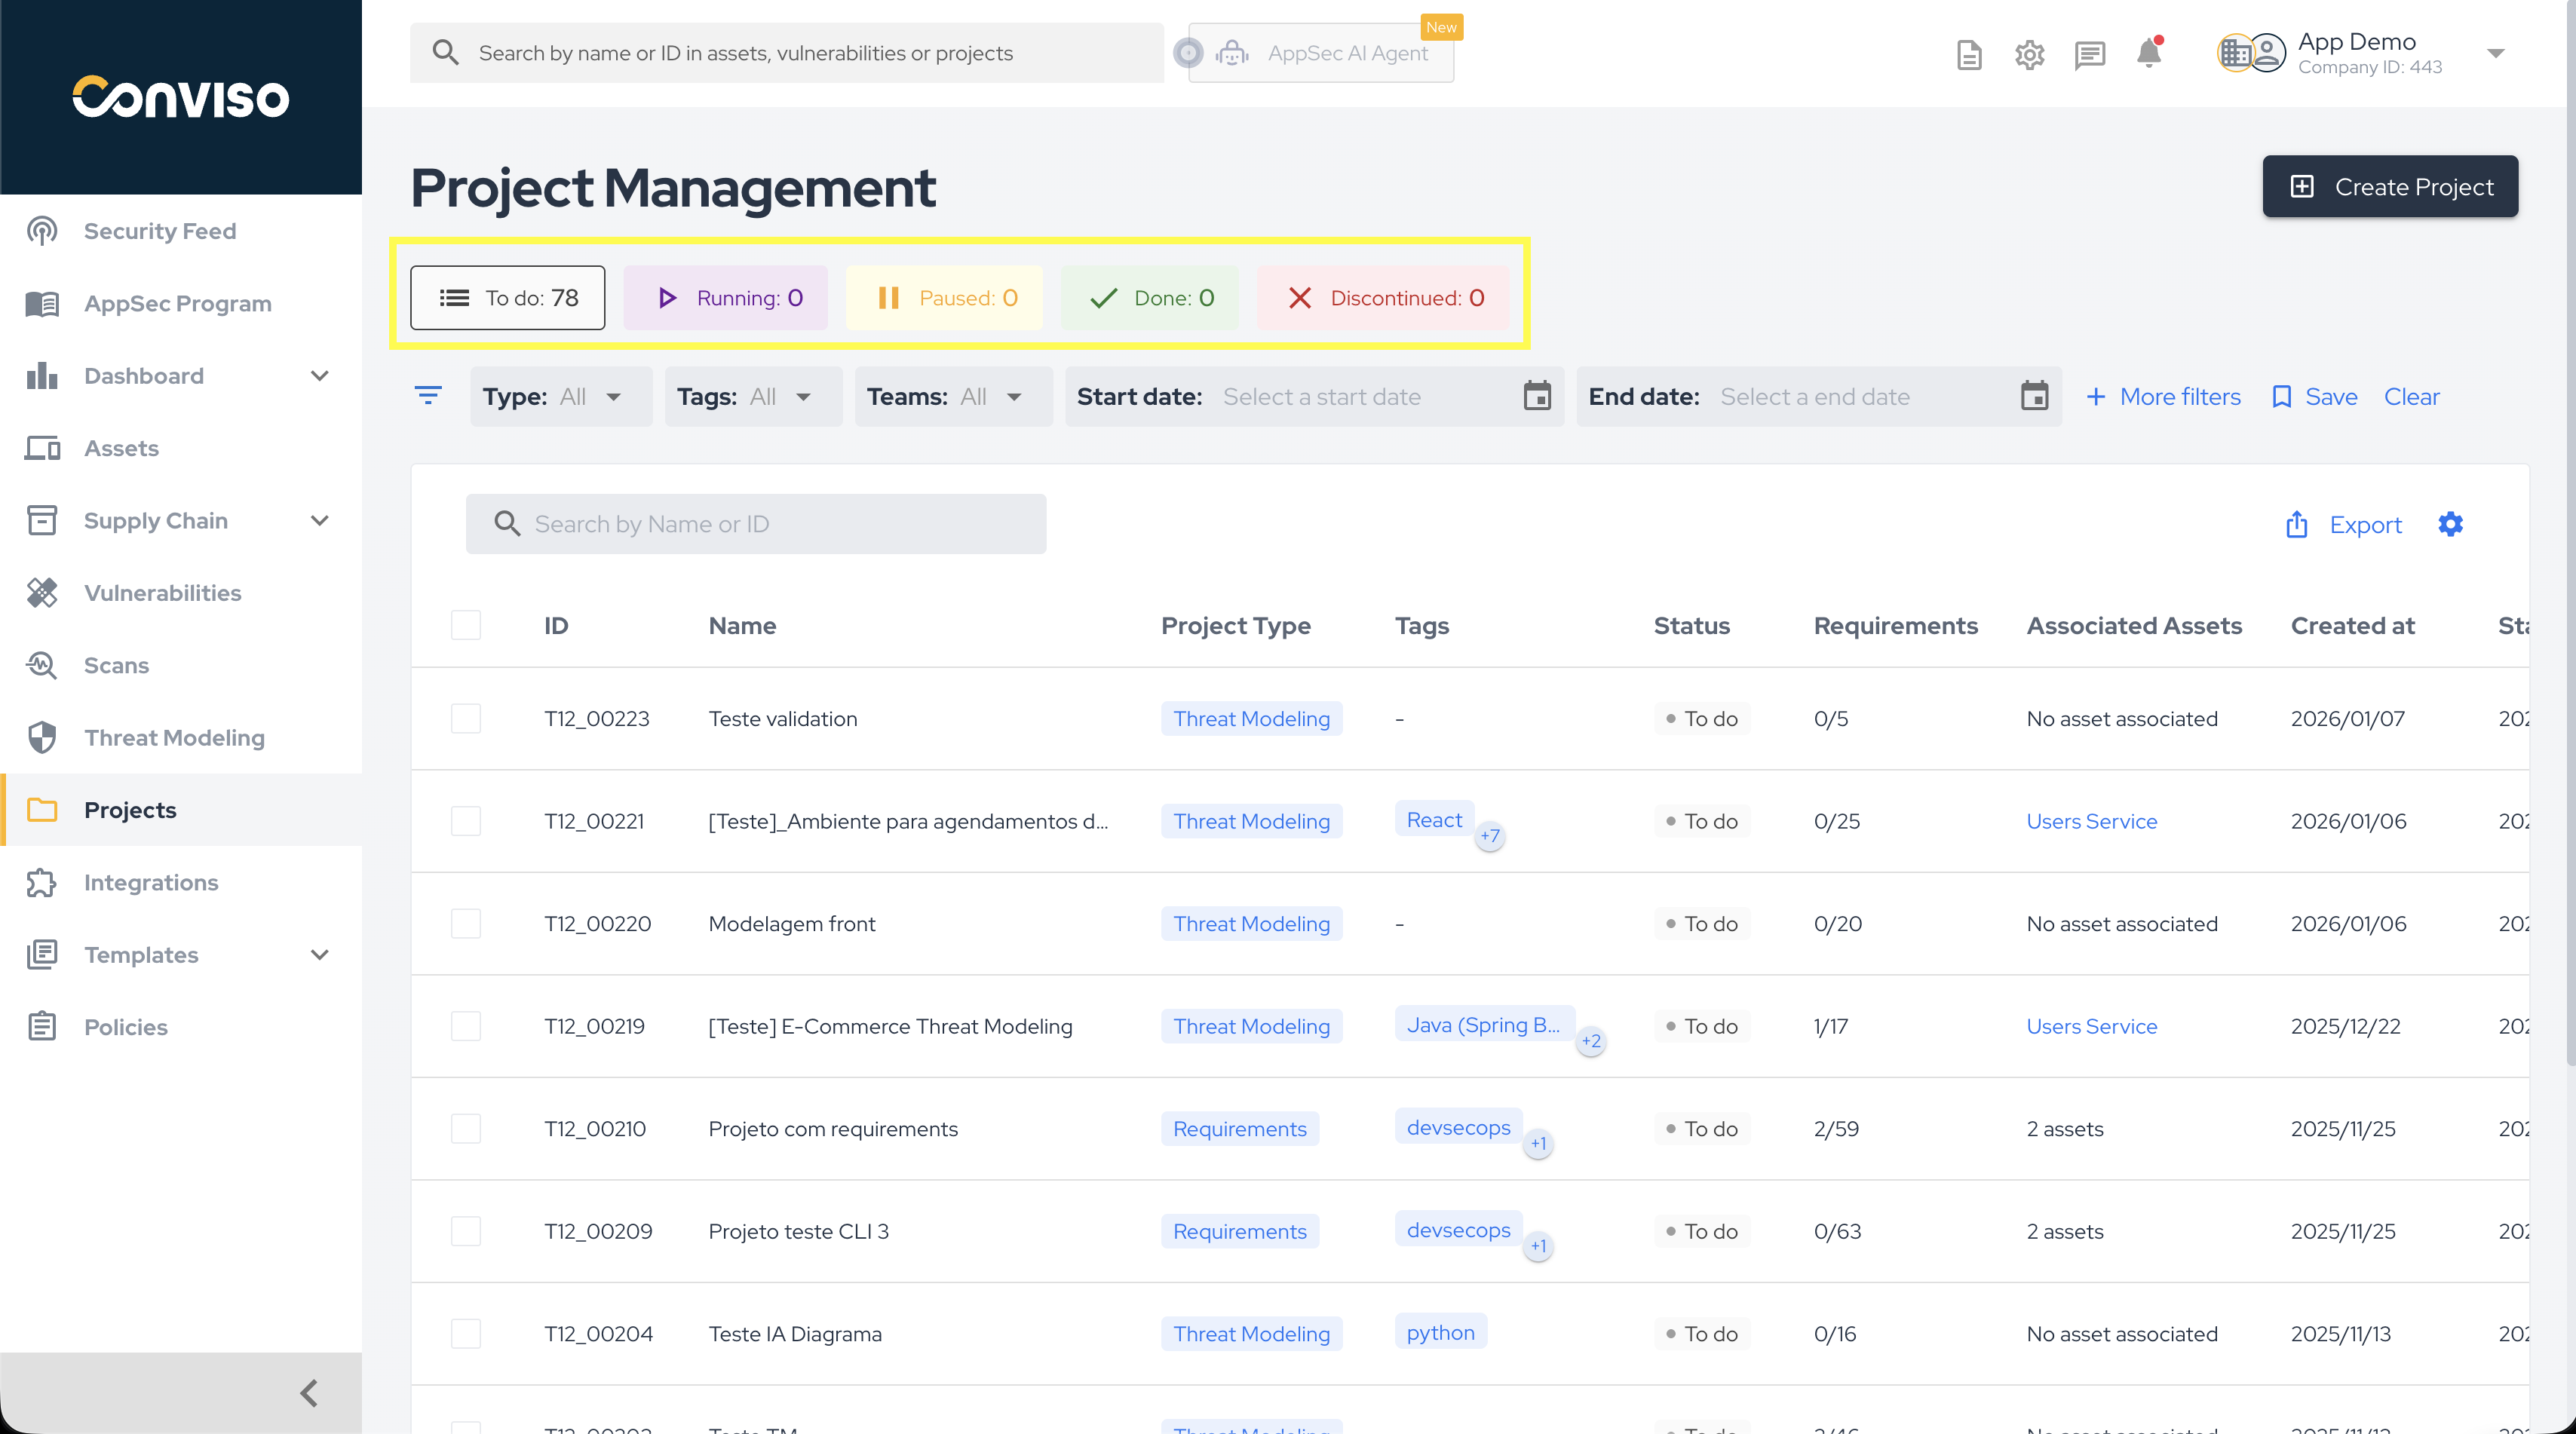
For more details on project statuses, please refer to this guide.
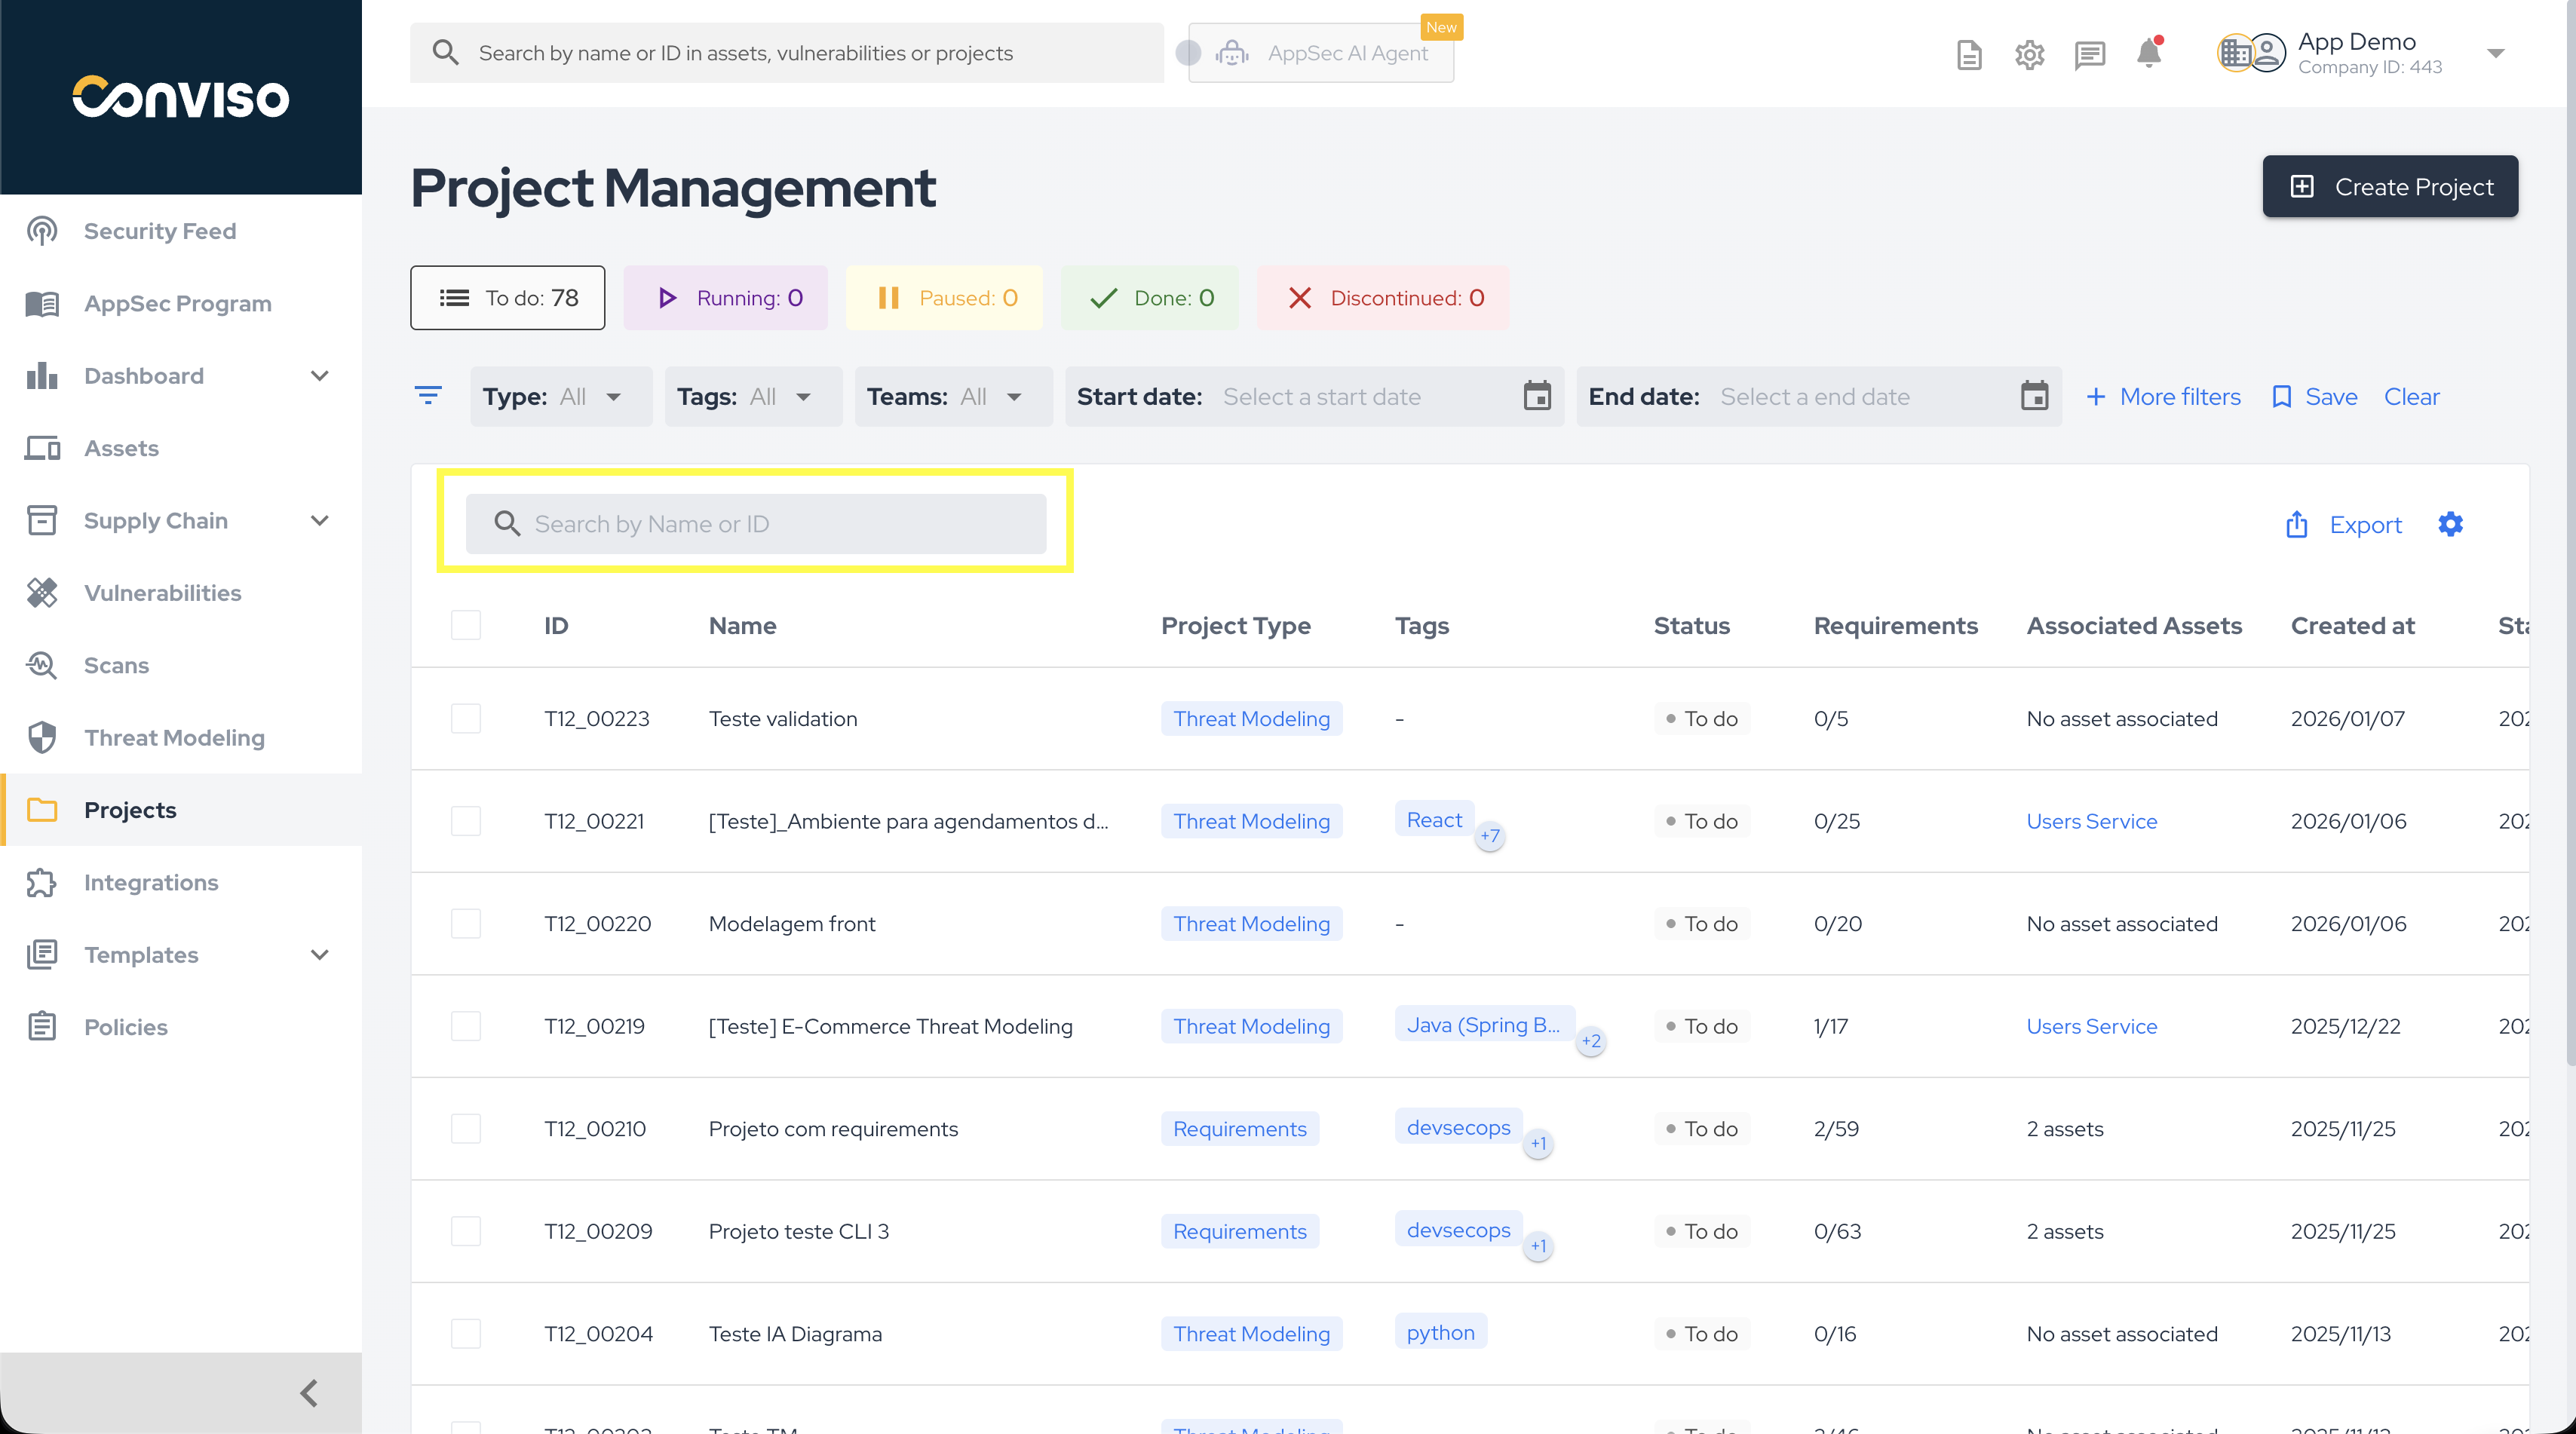
Additionally, you can filter projects by name or ID:
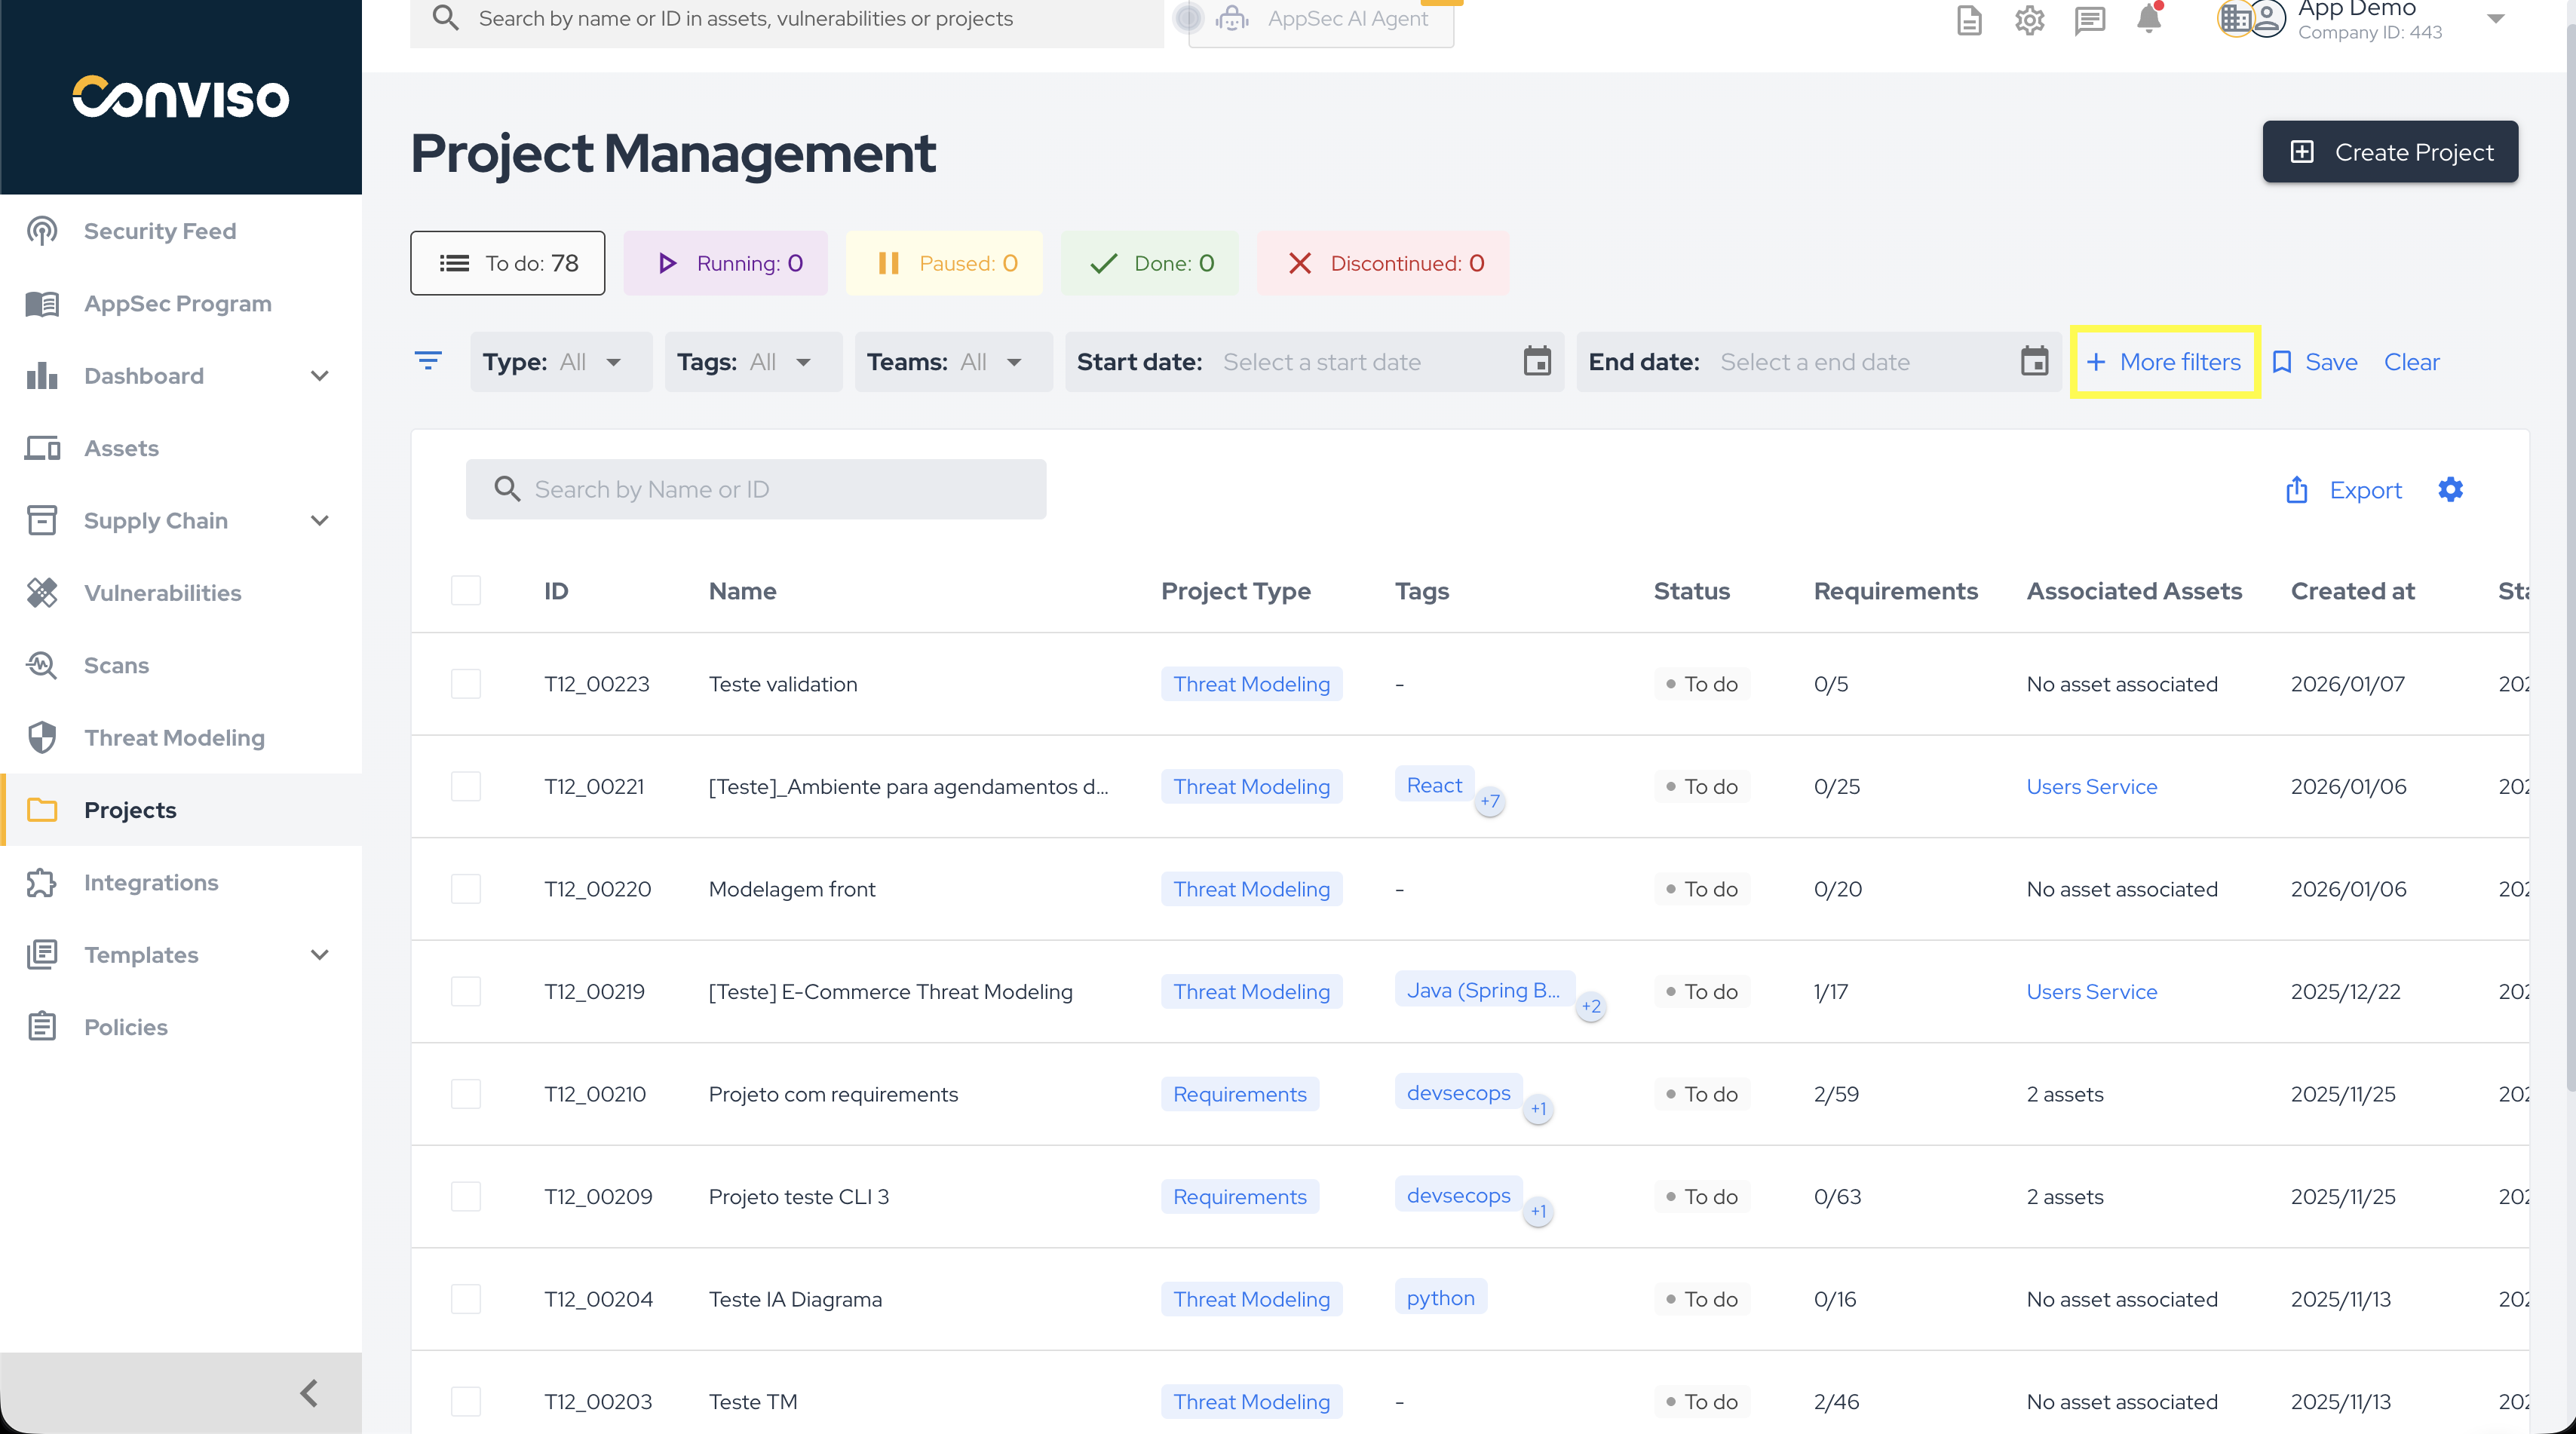
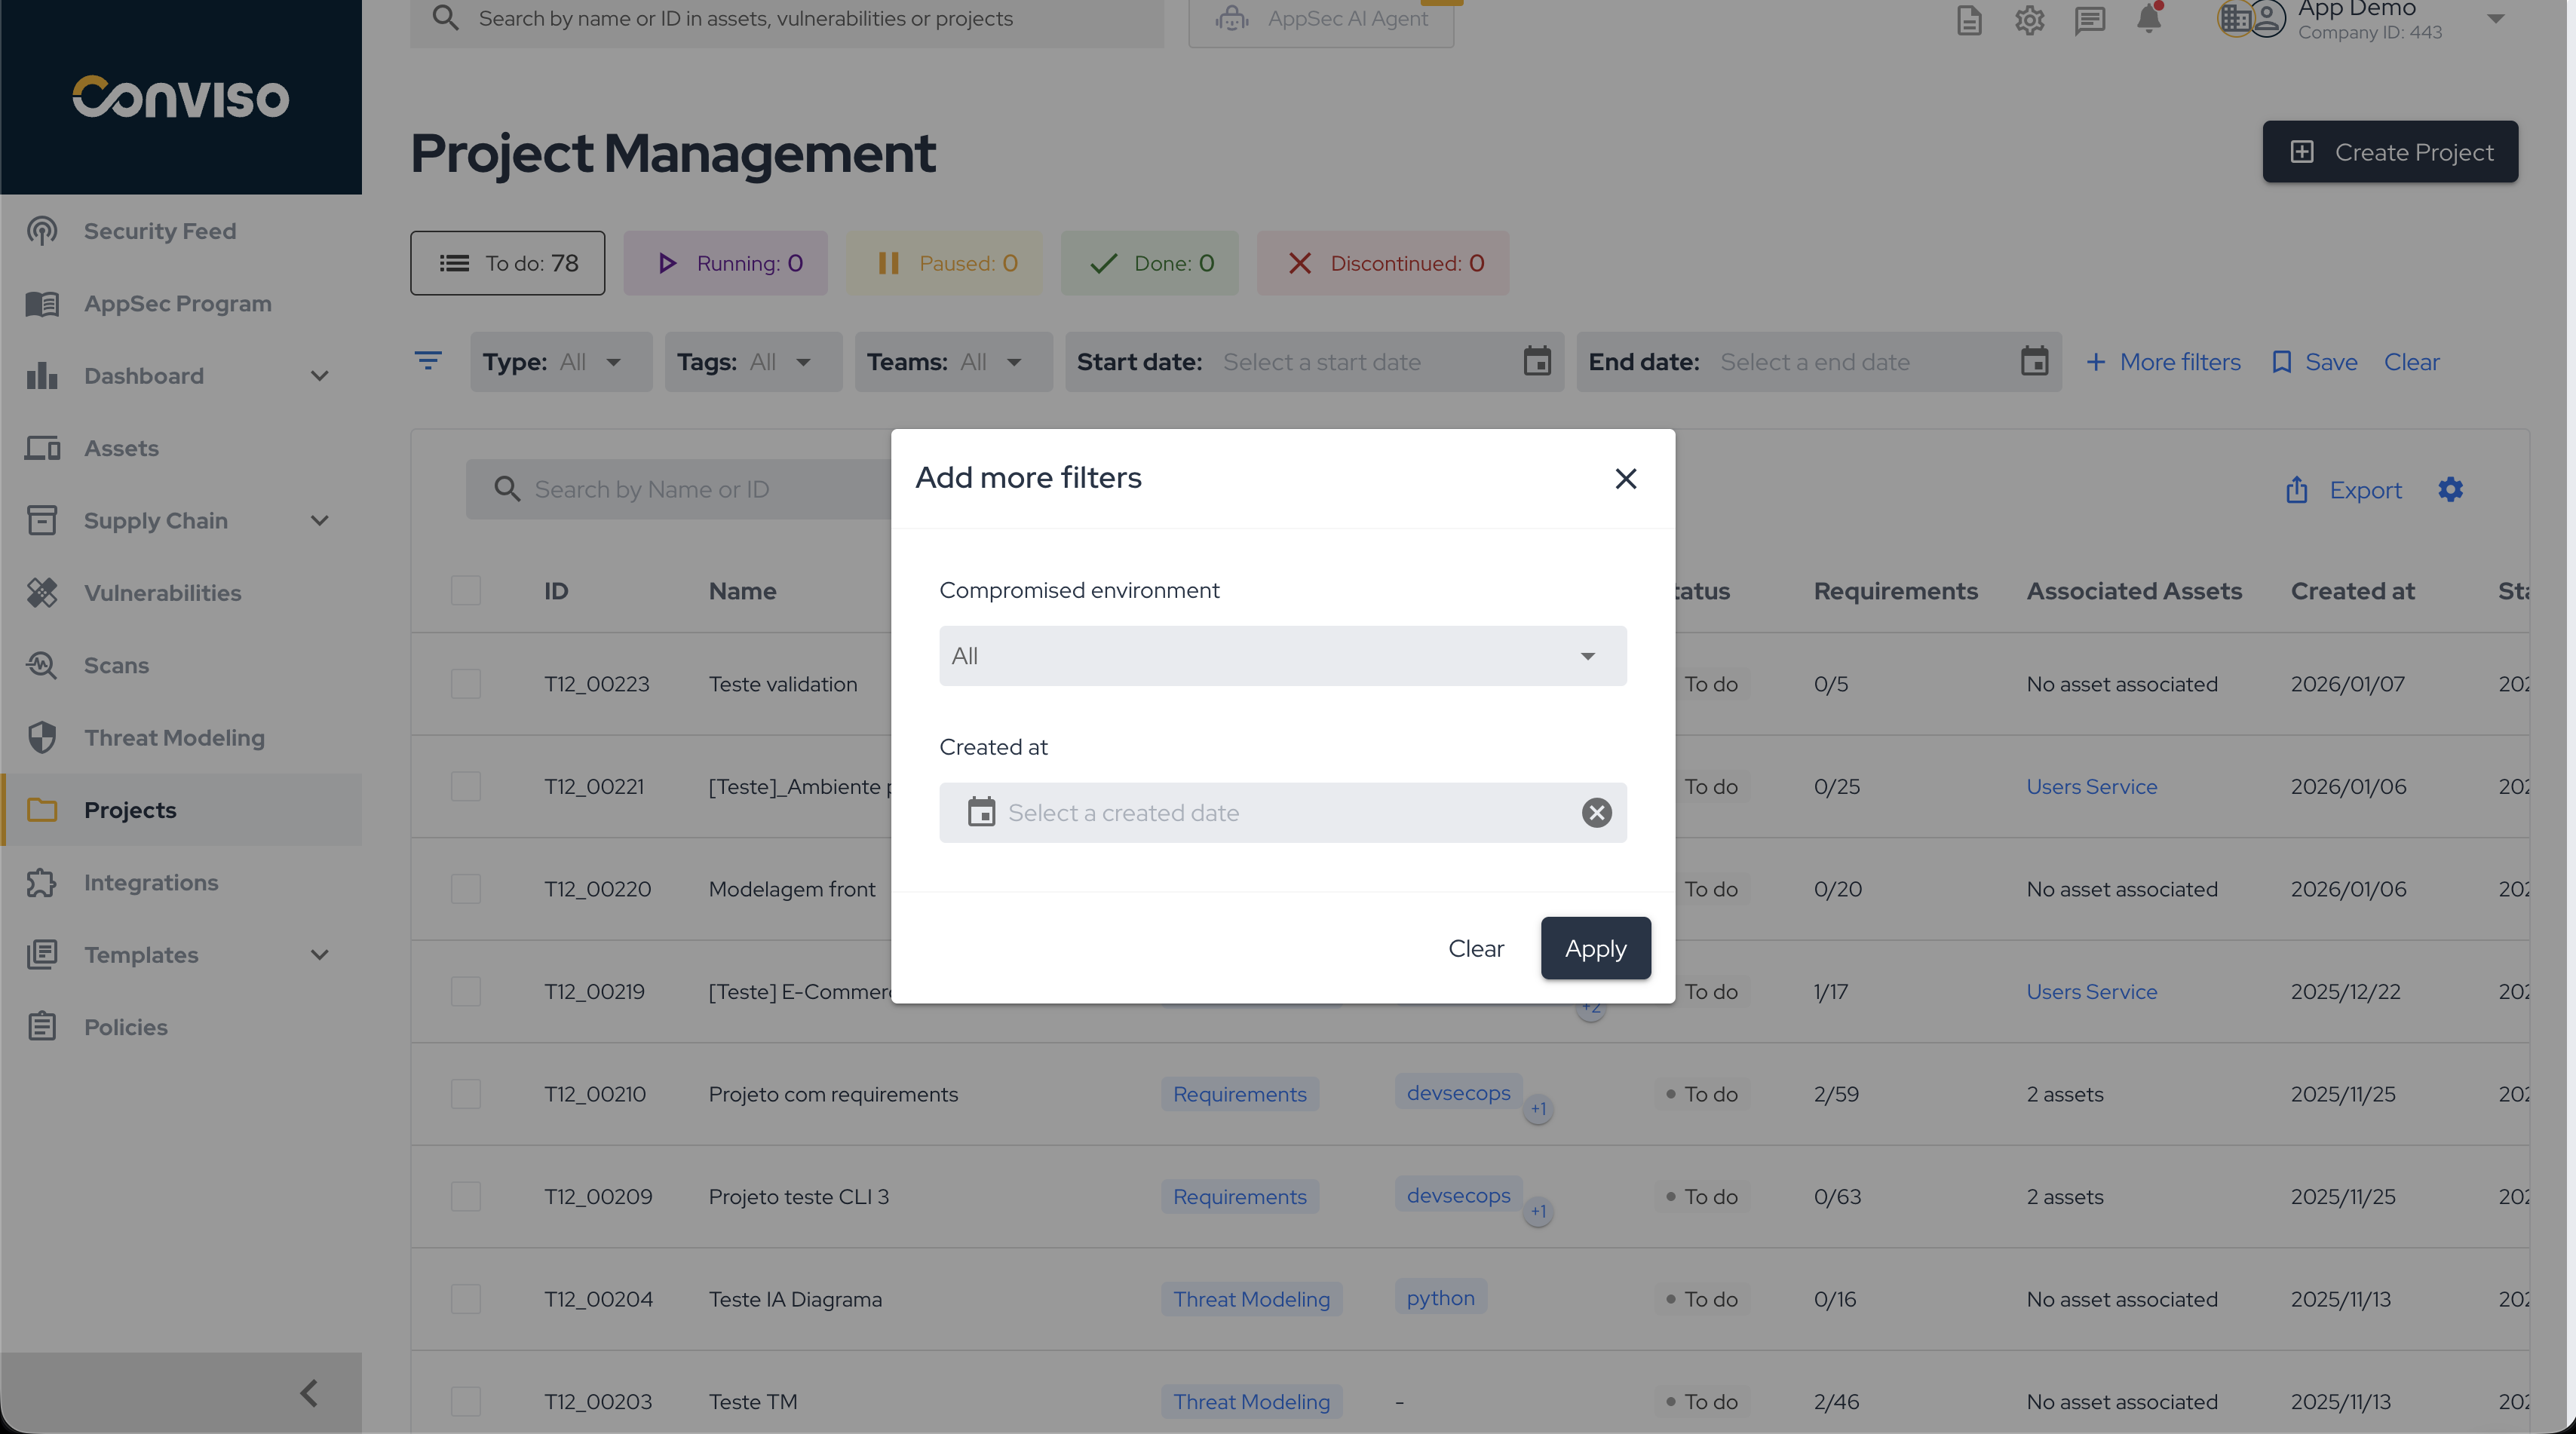
For more advanced filtering options, click More filters to refine your search:
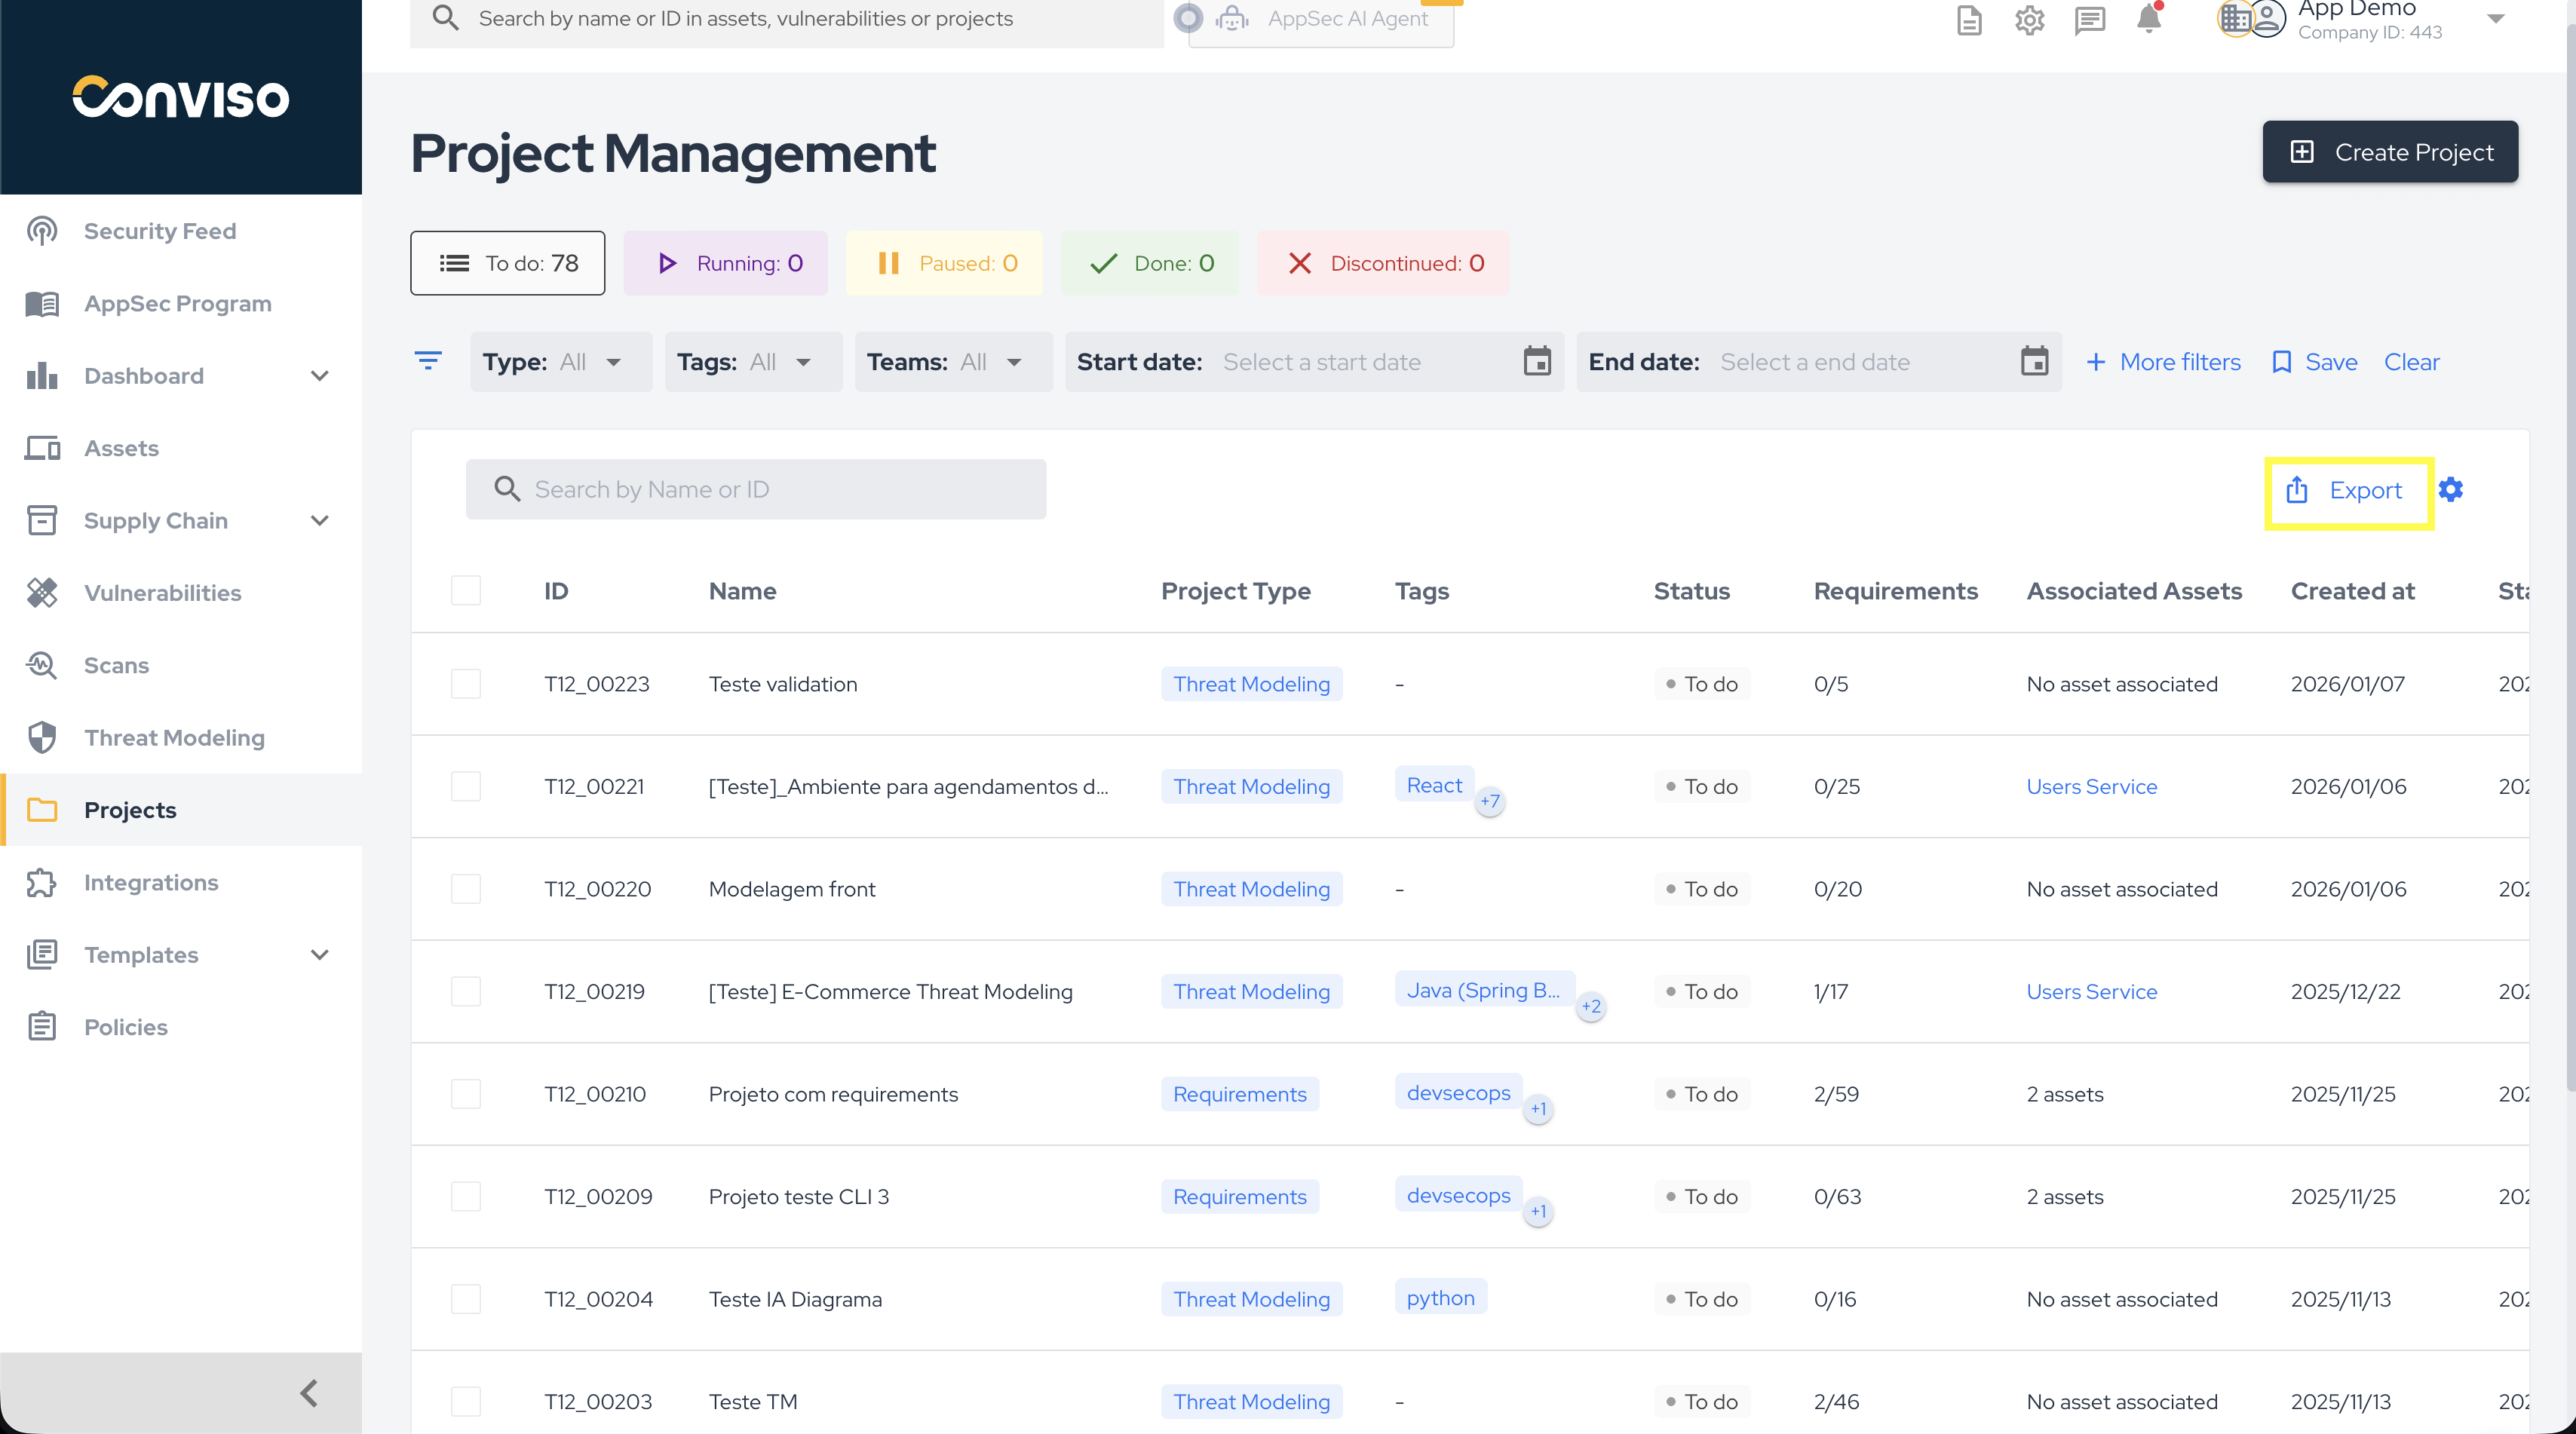
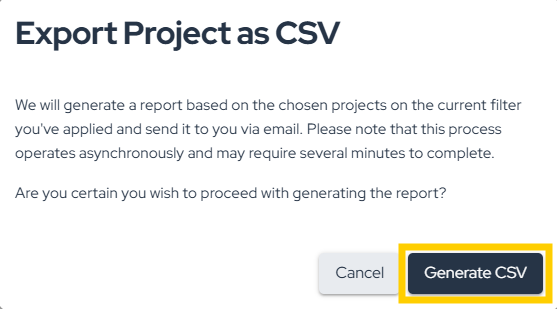
From this screen, you can export a CSV Report of your projects by clicking the Export button:
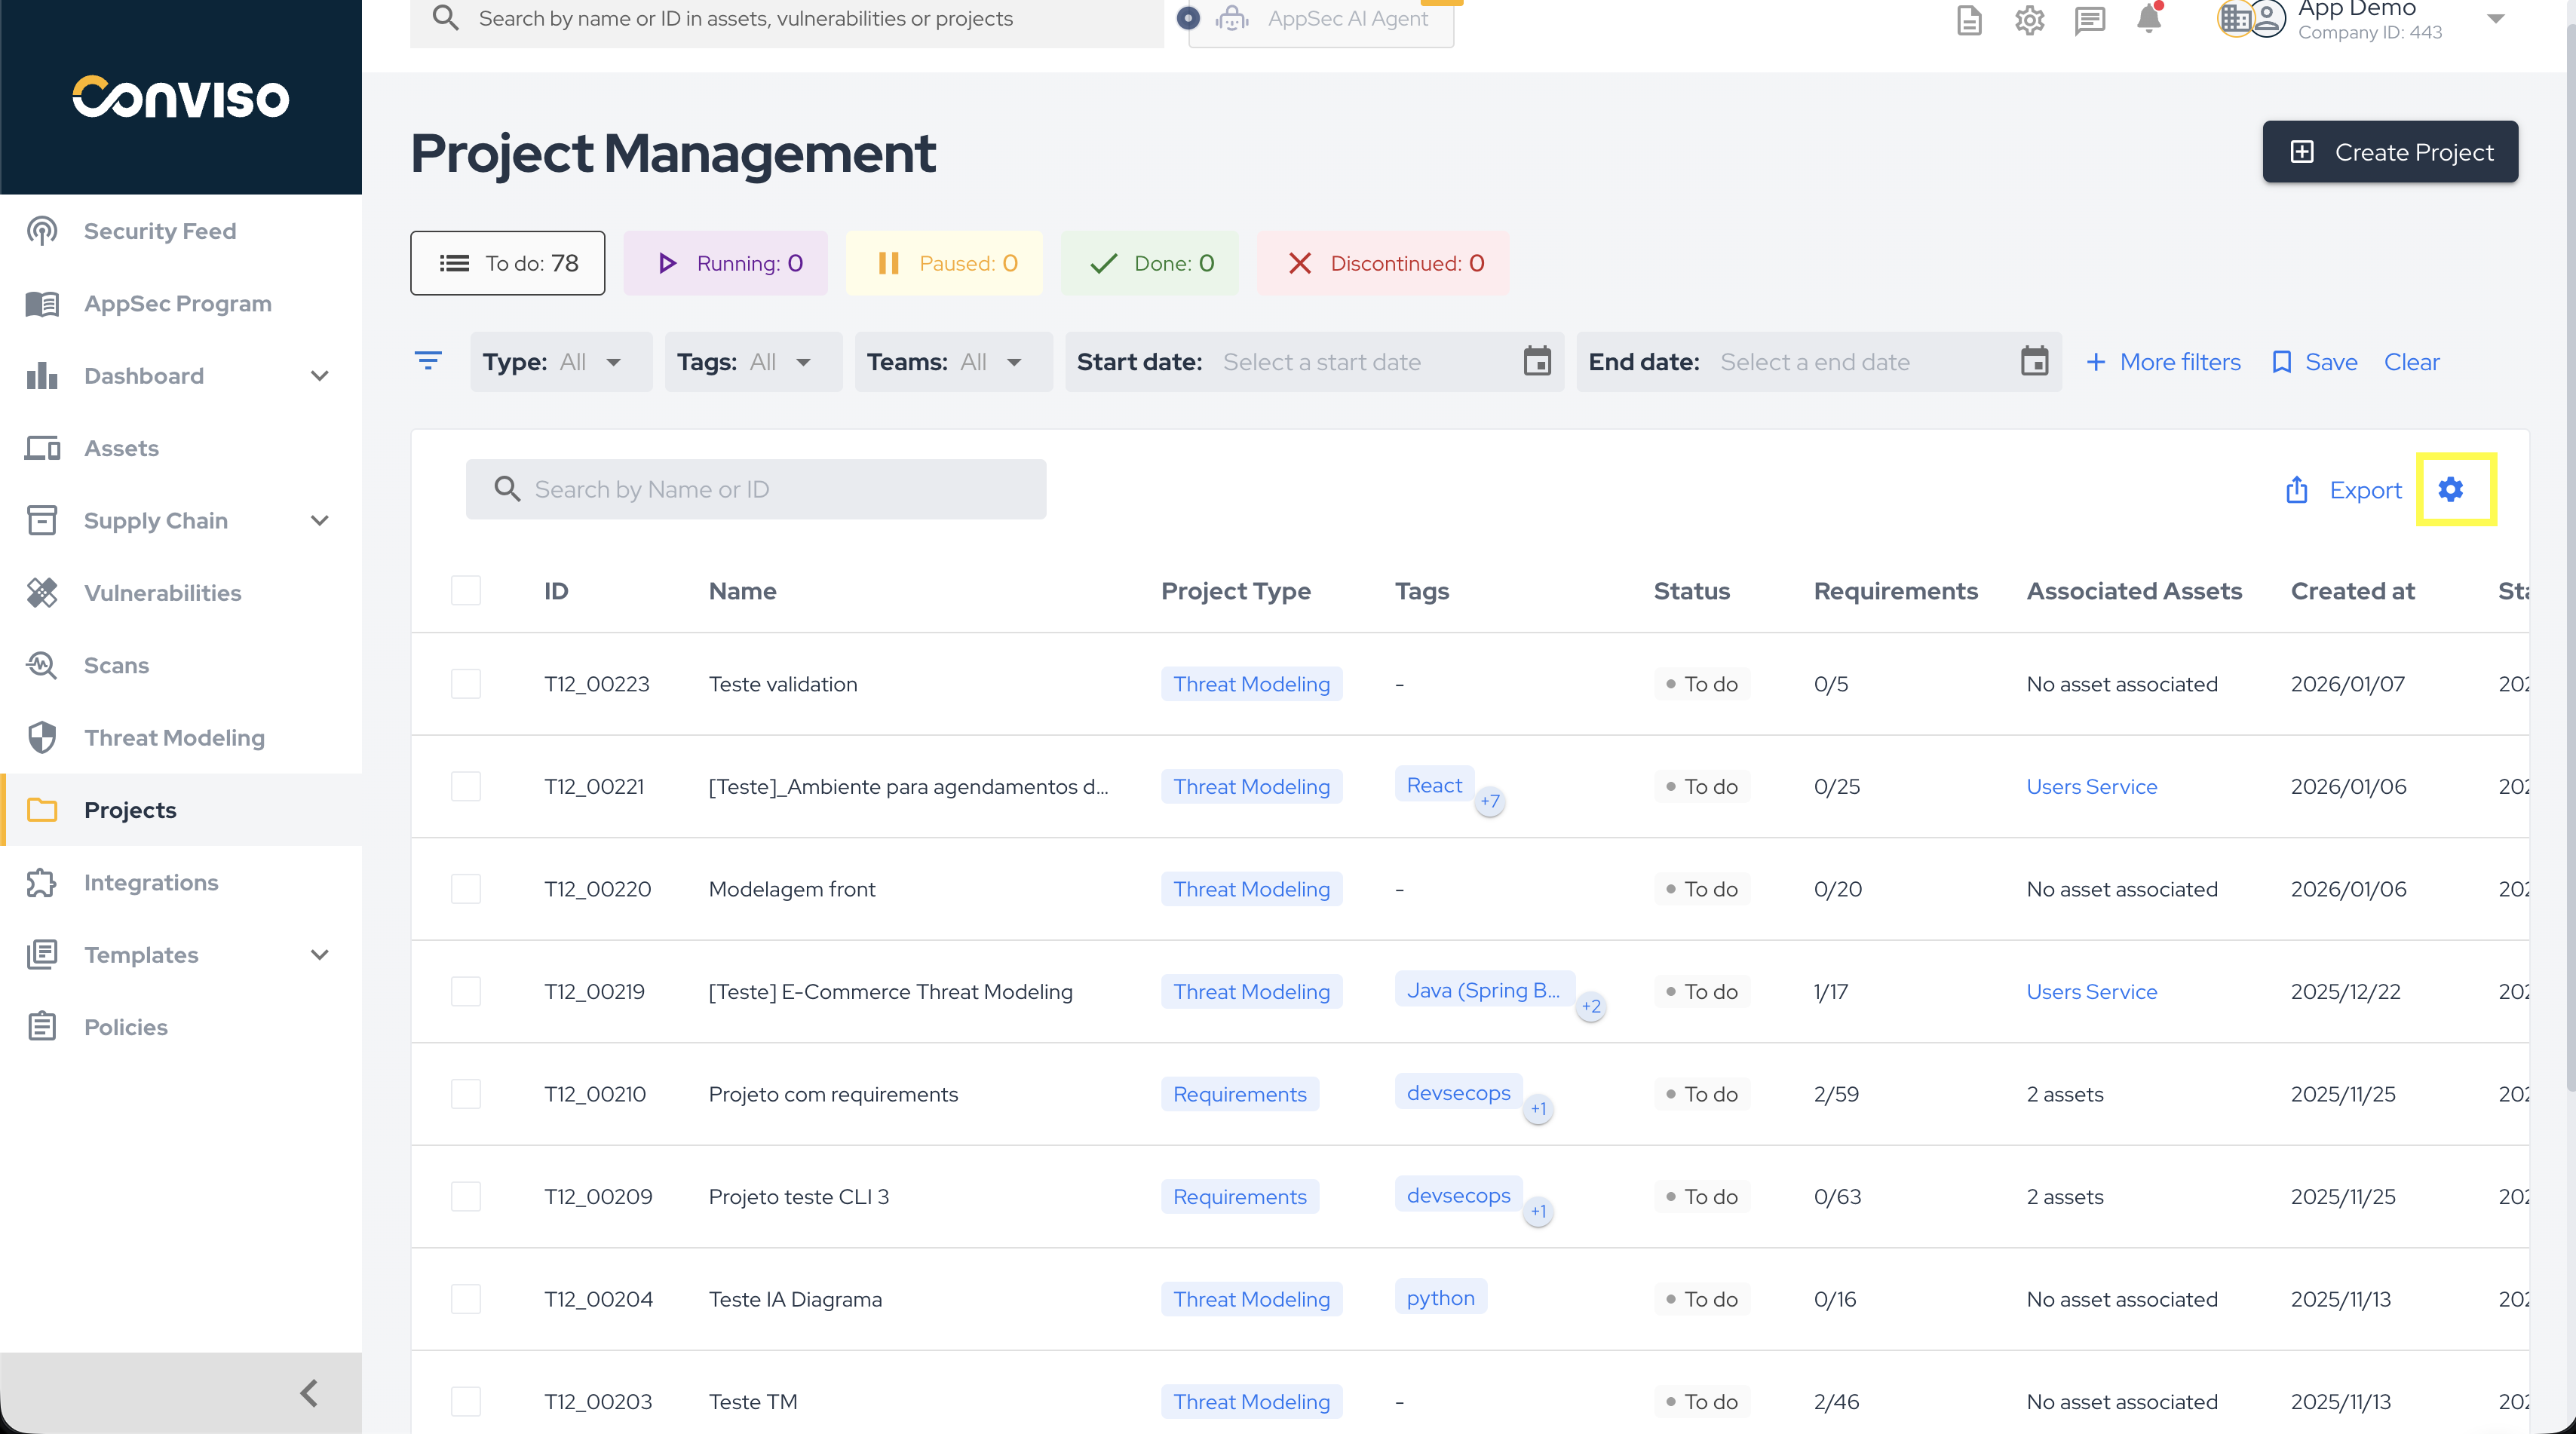
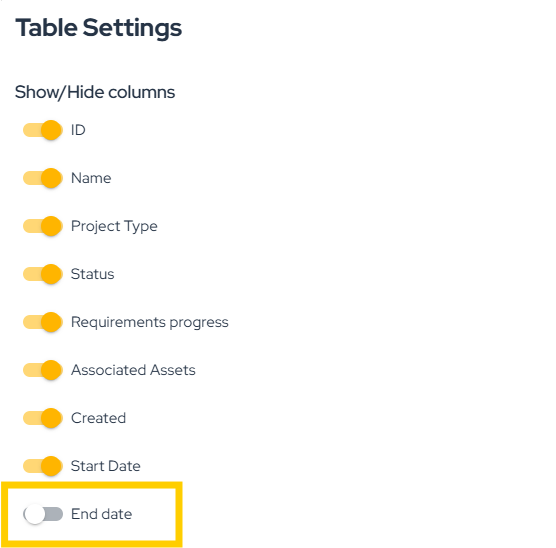
Furthermore, you can customize the project list by choosing which columns to display. To do this, click on the highlighted icon below and disable any columns you don't want to see:
Creating New Projects
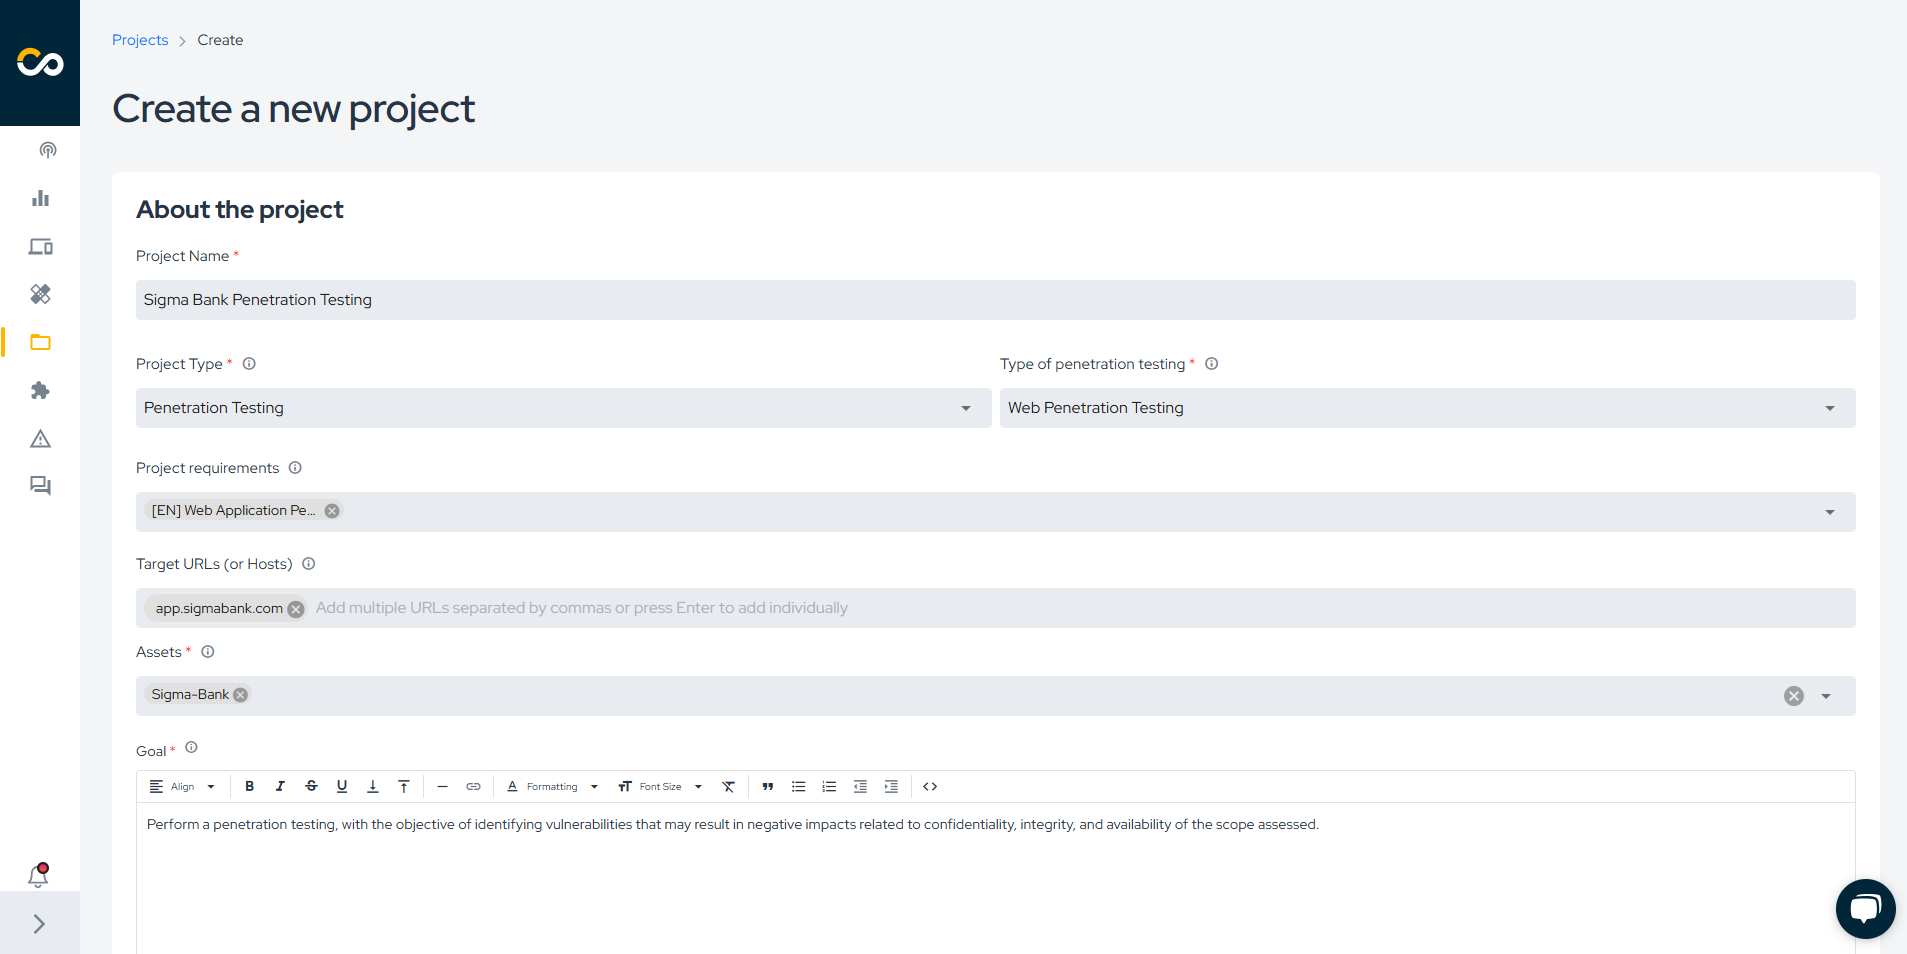
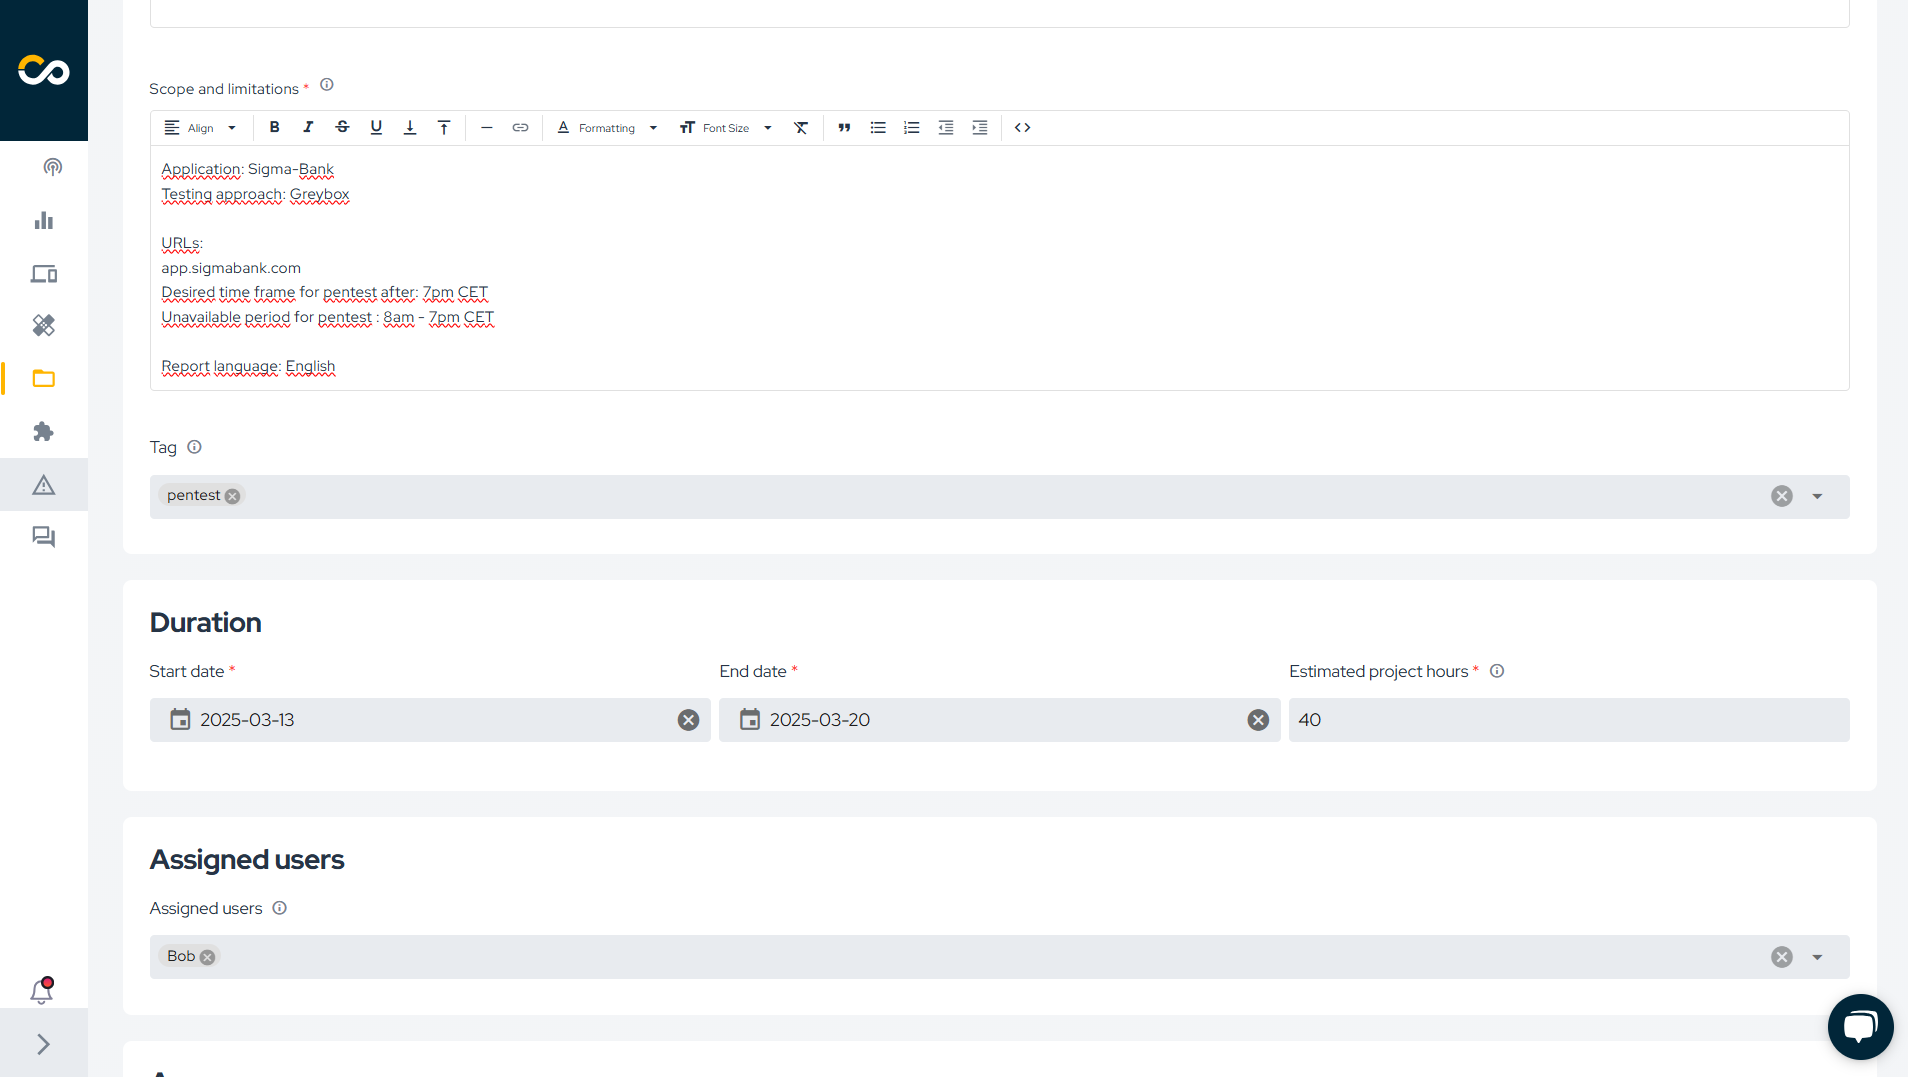
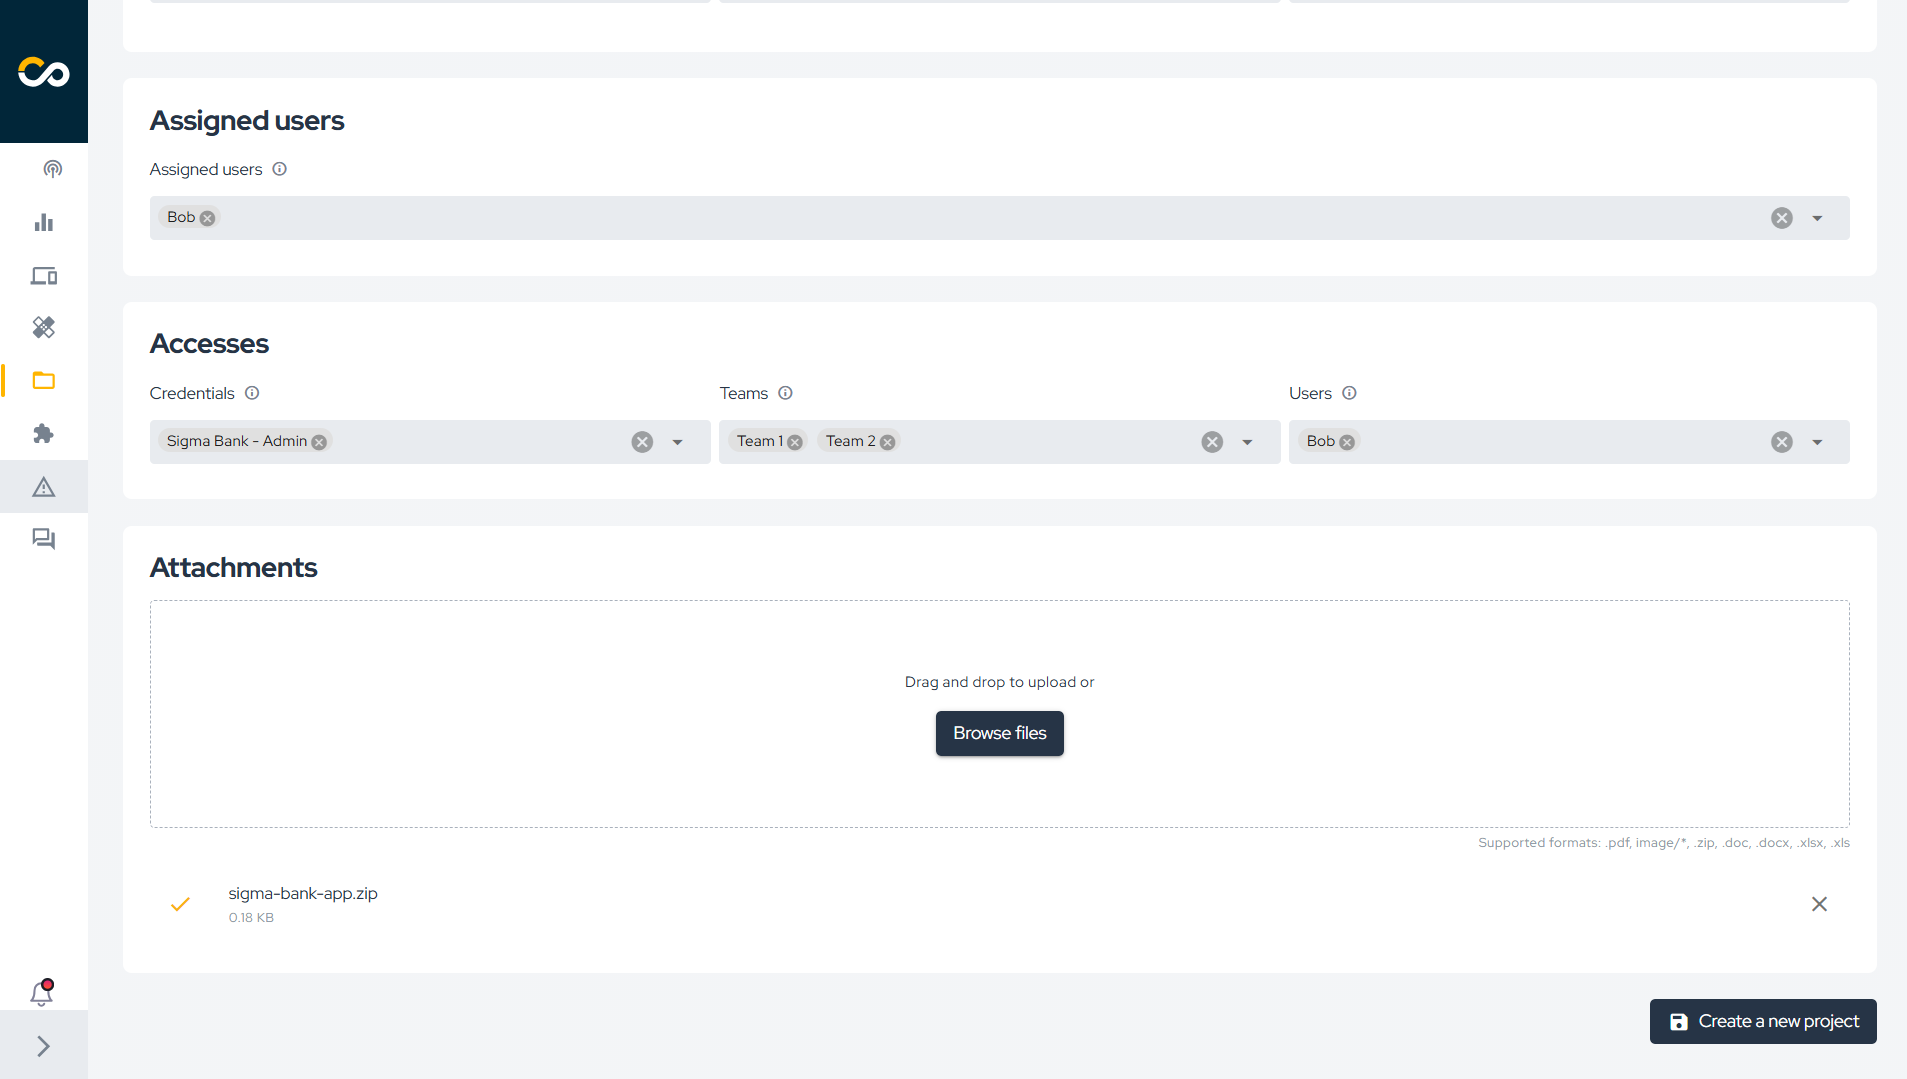
To create a new project, click Create project, fill in the required details, and then click Create a new project:
Editing Projects
To edit an existing project, locate it in the list and click the corresponding edit button:
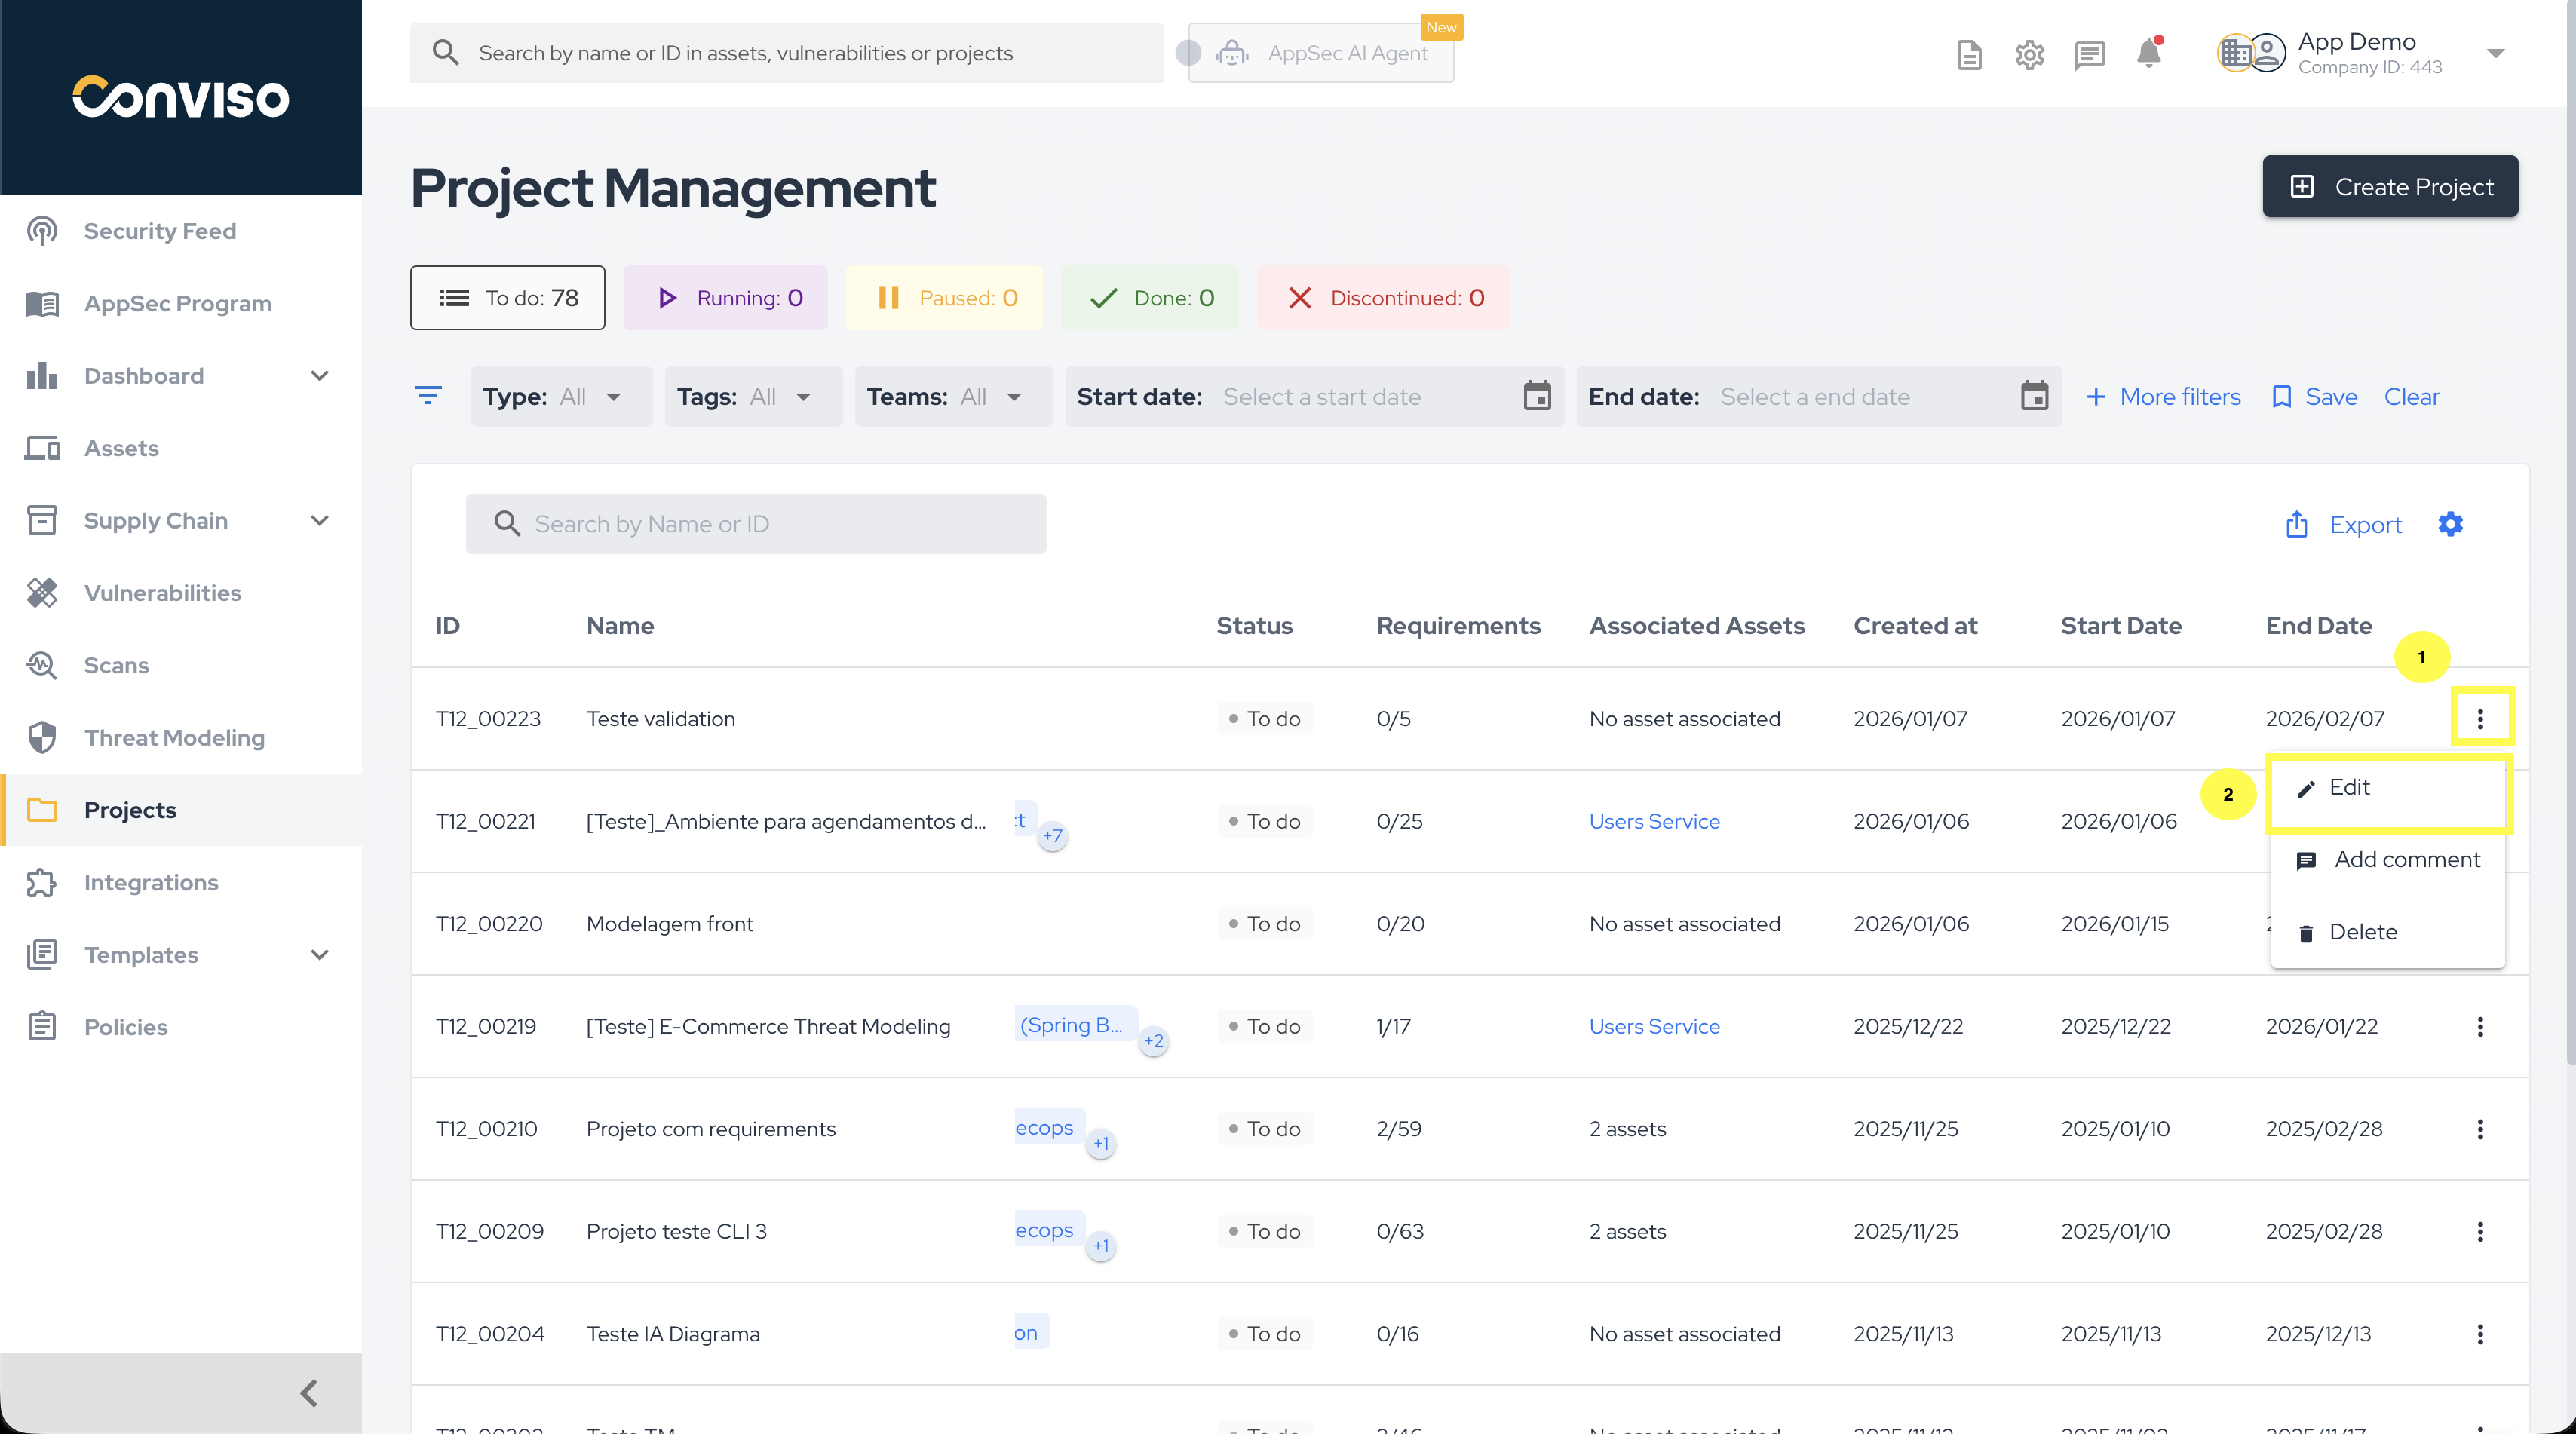
Next, update the necessary information and click Save.
Deleting Projects
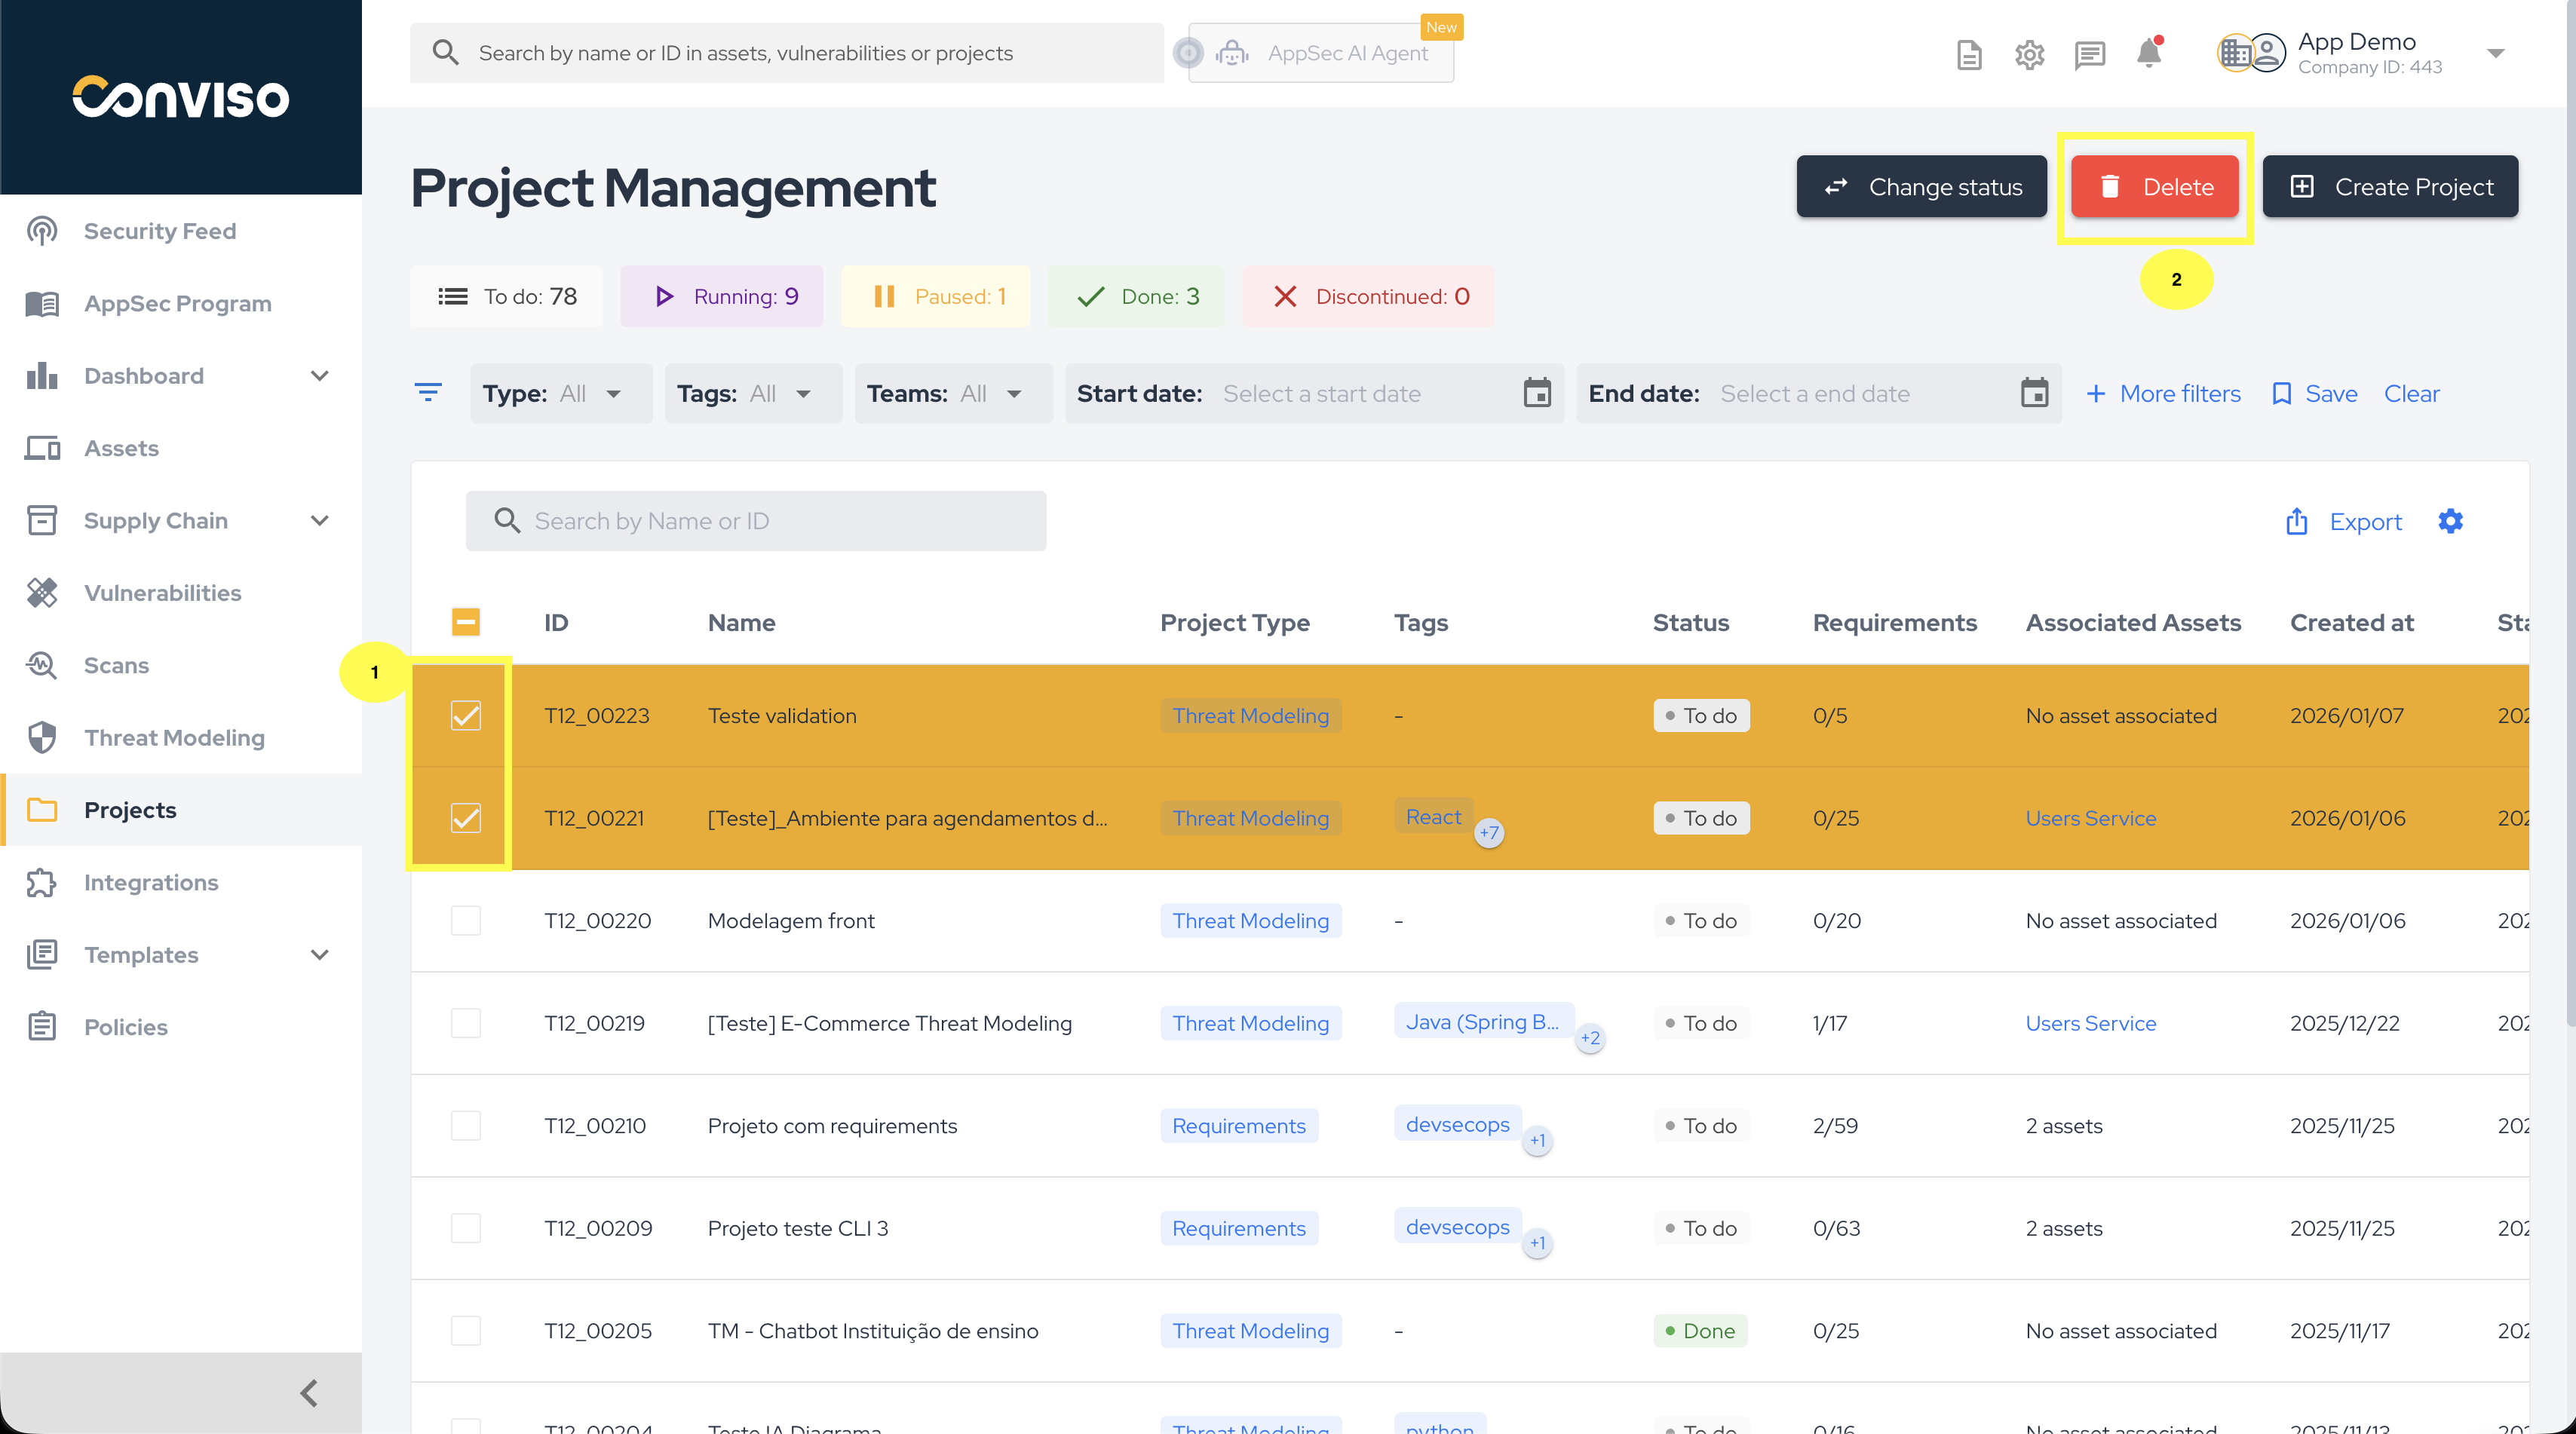
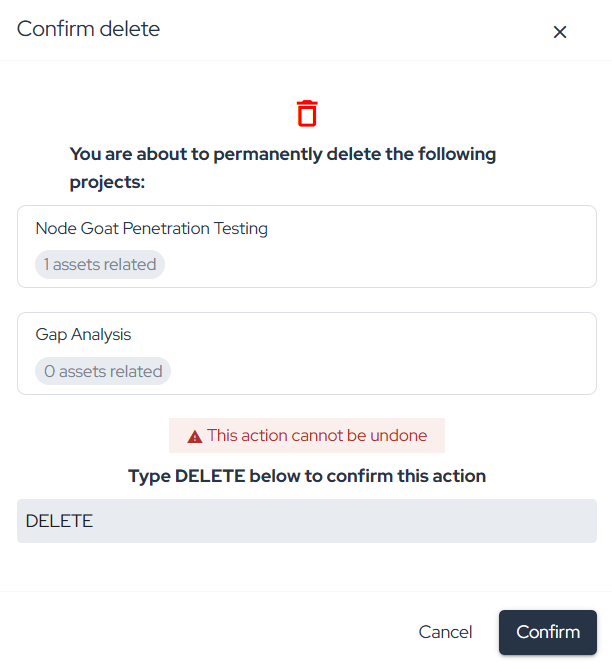
To delete one or multiple projects, locate them in the list and click on the highlighted buttons below:
Details and Properties
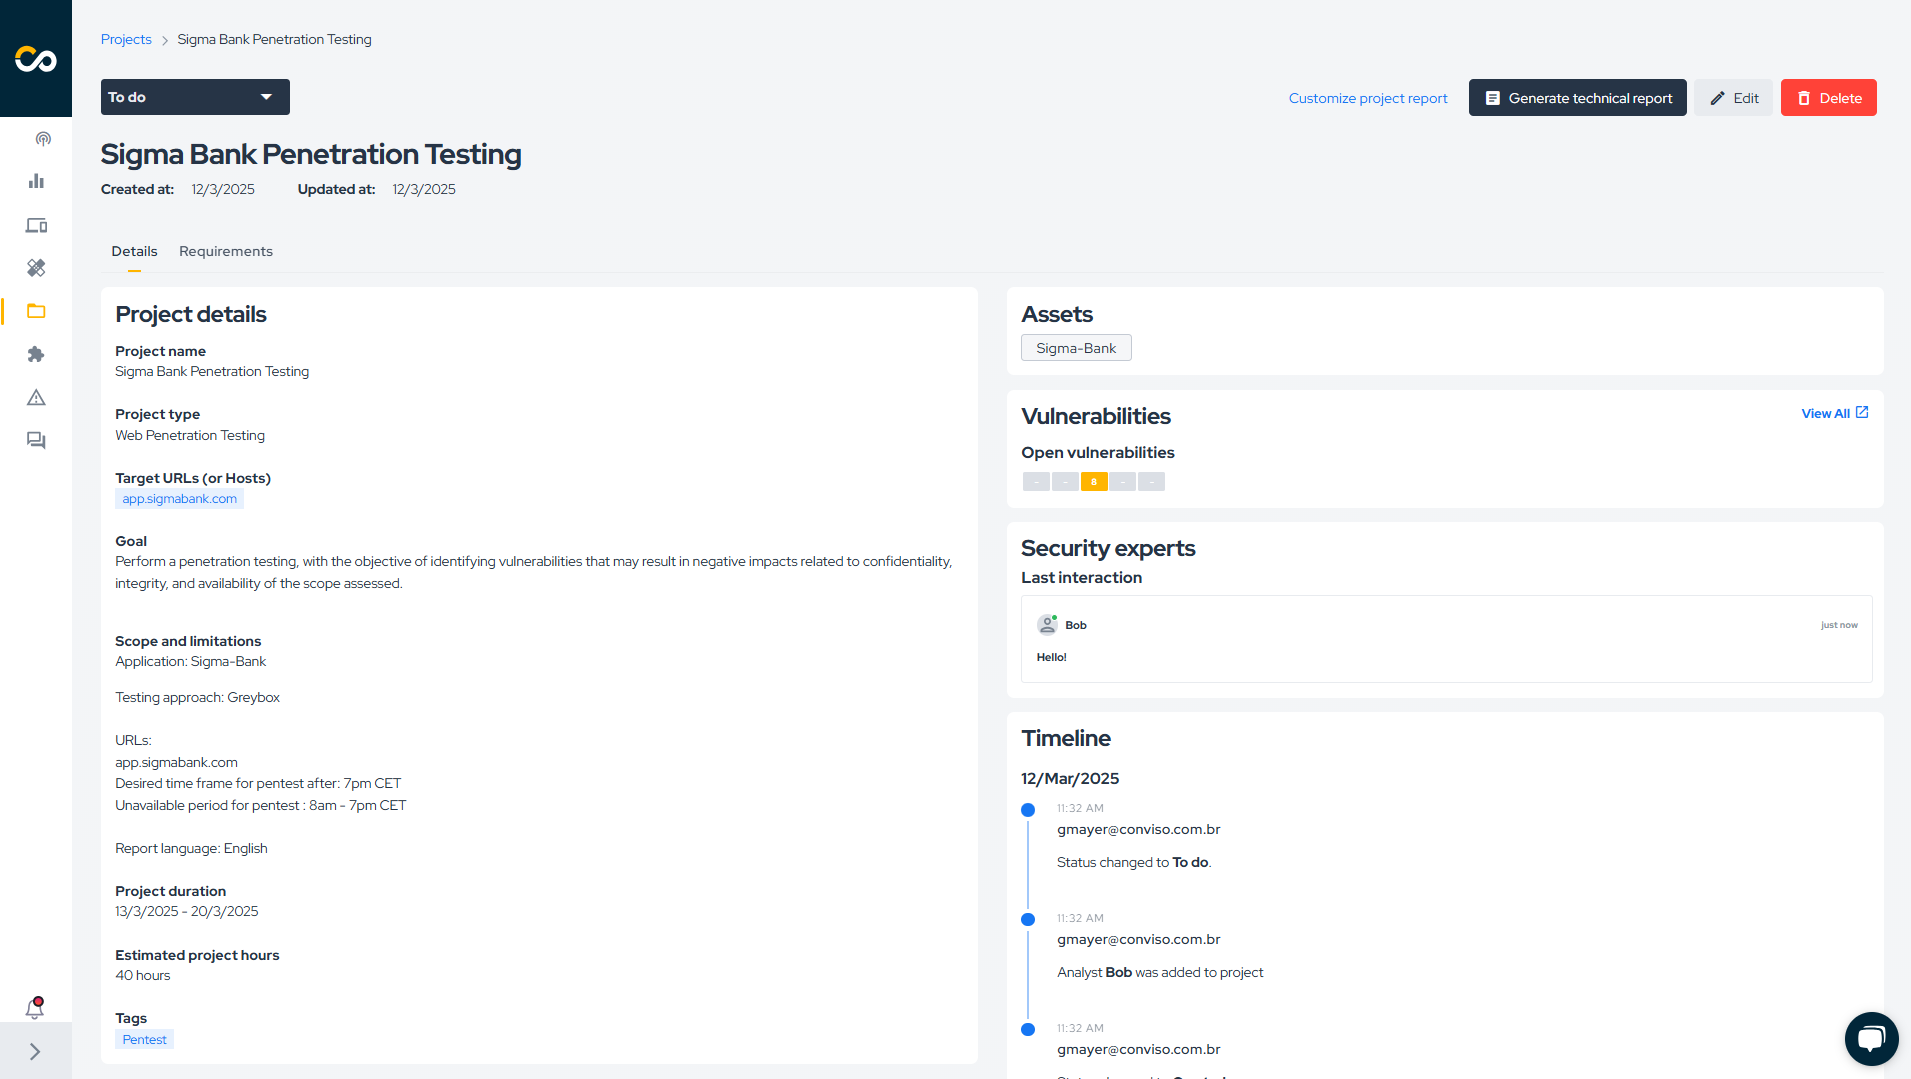
After selecting a project, the default Details screen will be displayed. Here, you can review the project's properties or edit them by clicking the Edit button. You can also delete the project by clicking the Delete button:
Projects Status
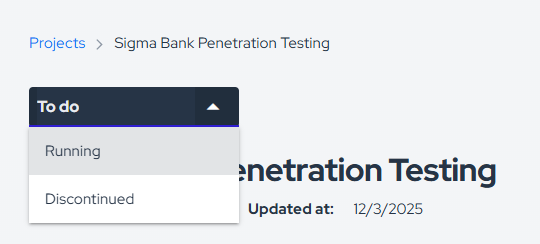
You can update the project status by clicking on its current status and selecting a new one:

Bulk Status Change
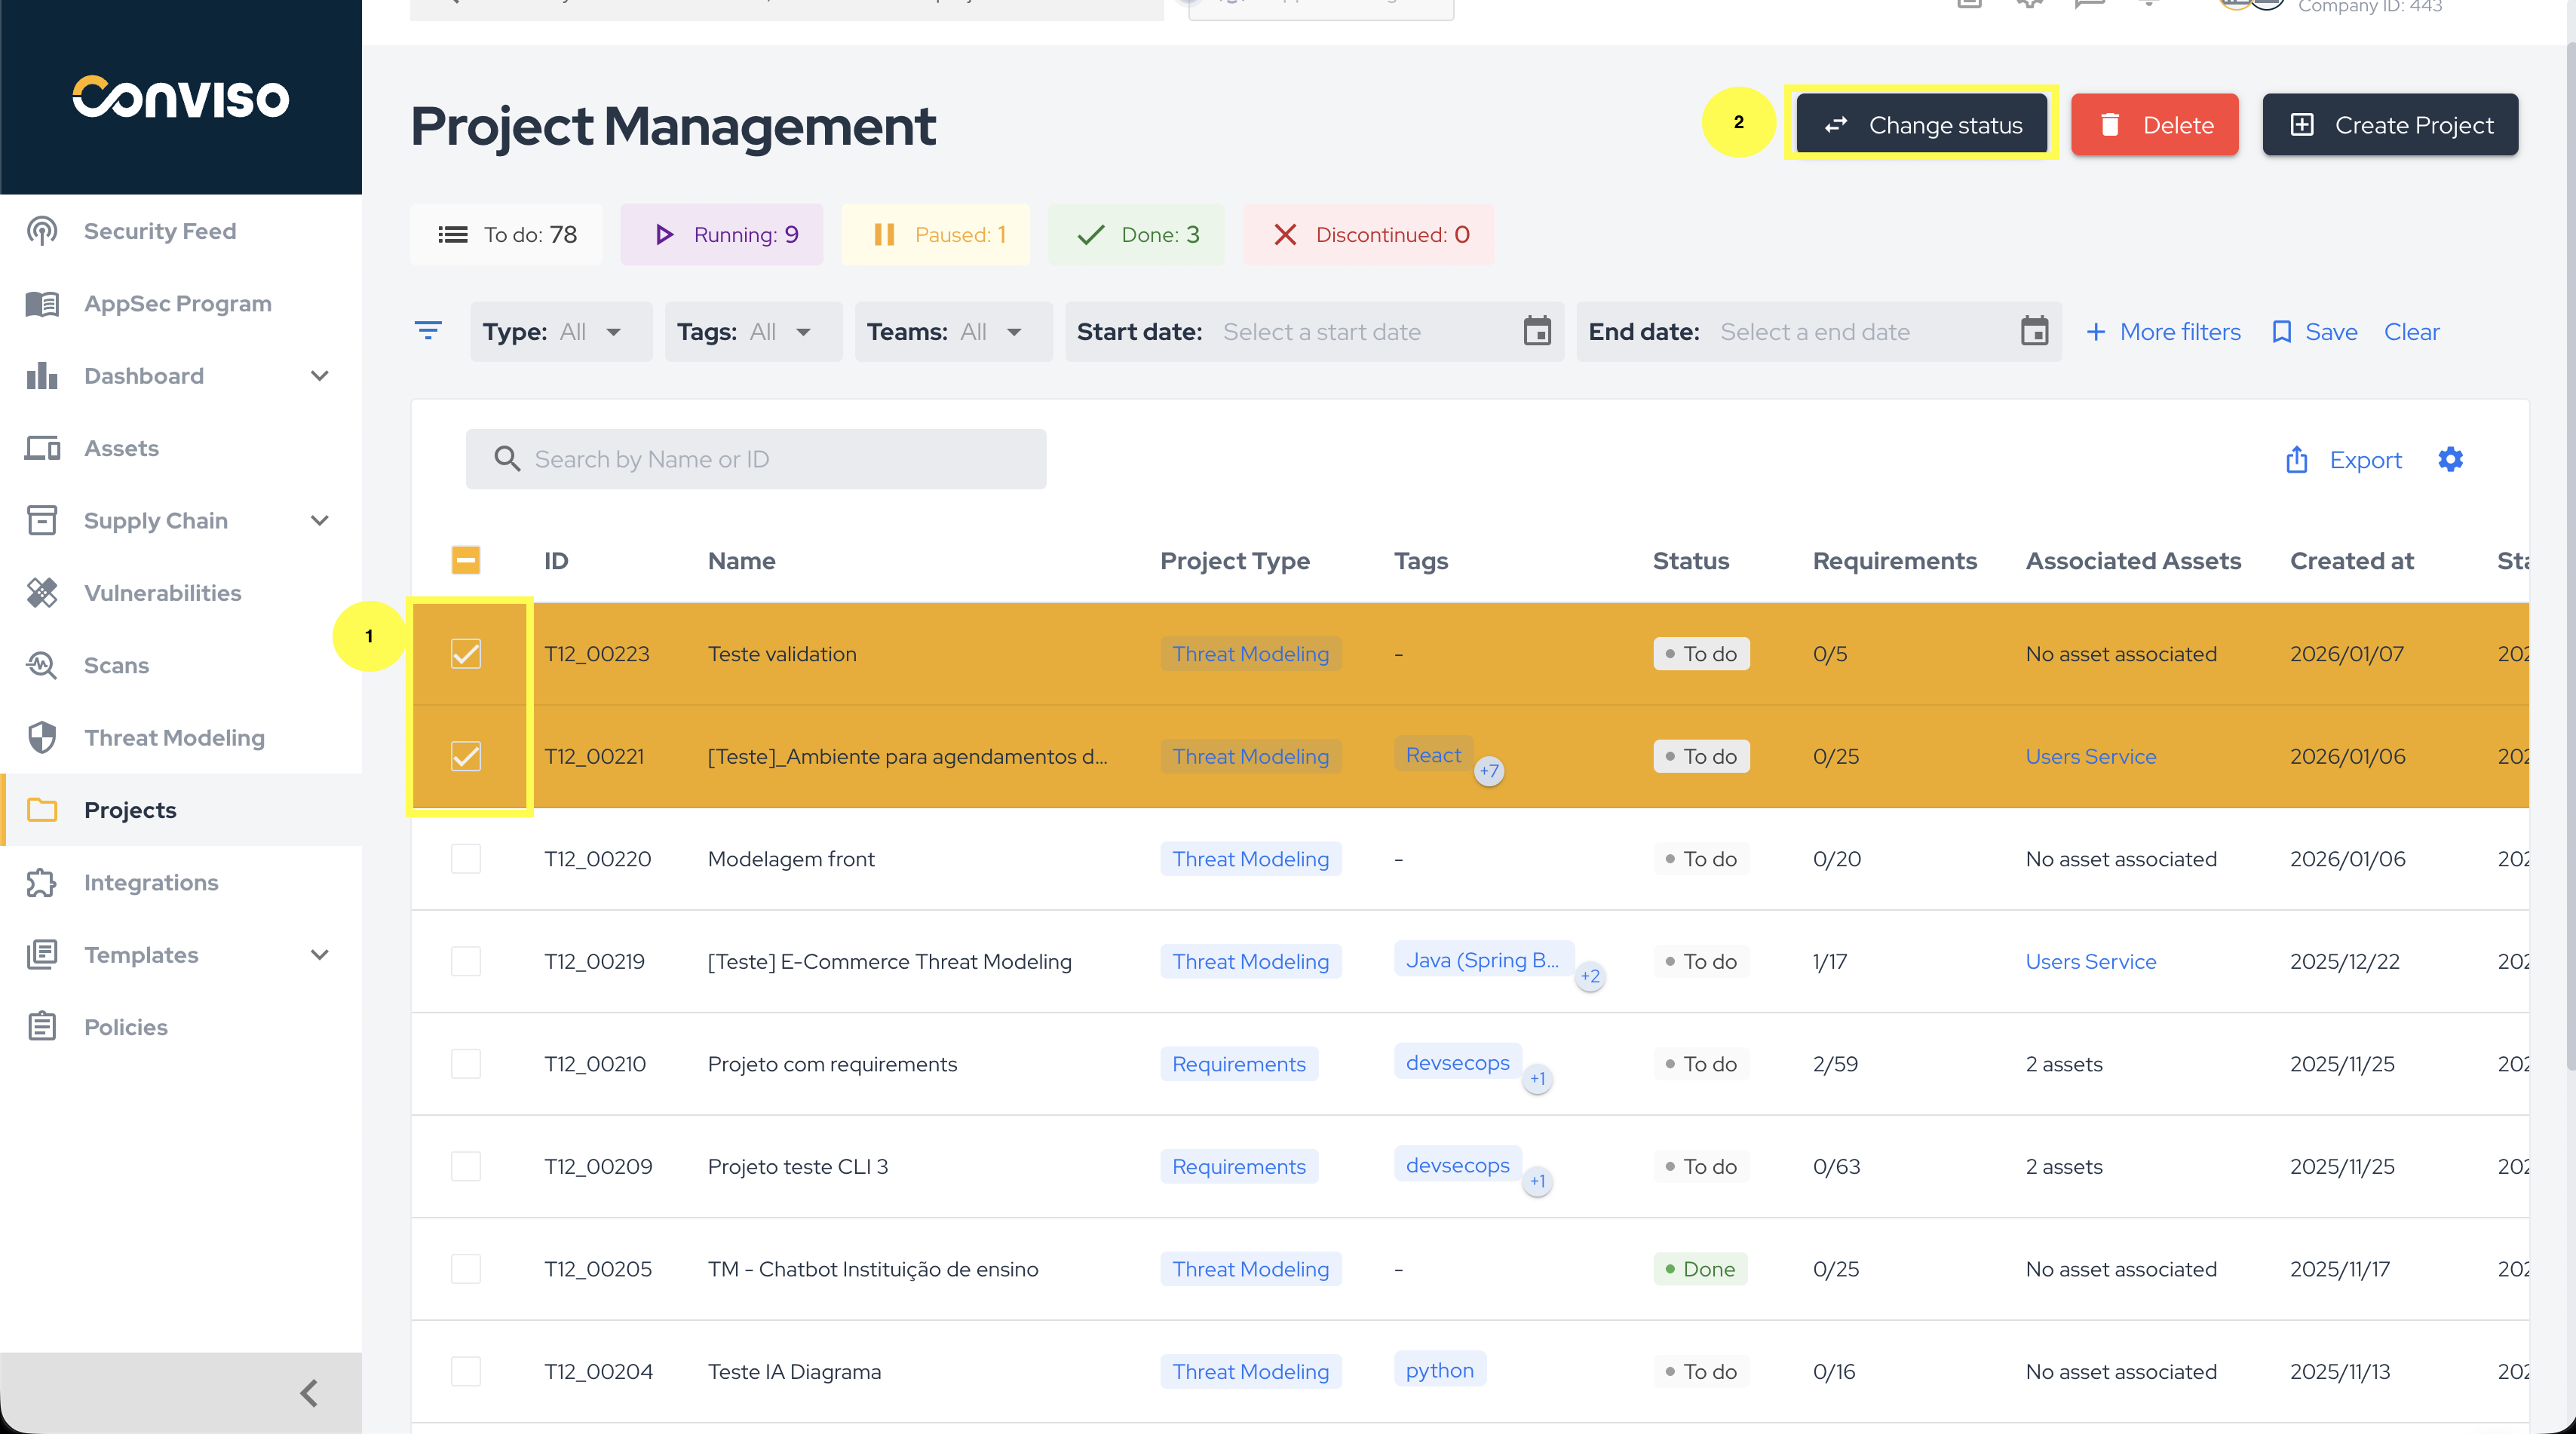
To update the status of multiple projects at once, select the checkboxes of the projects you want to update, as shown in the image below:
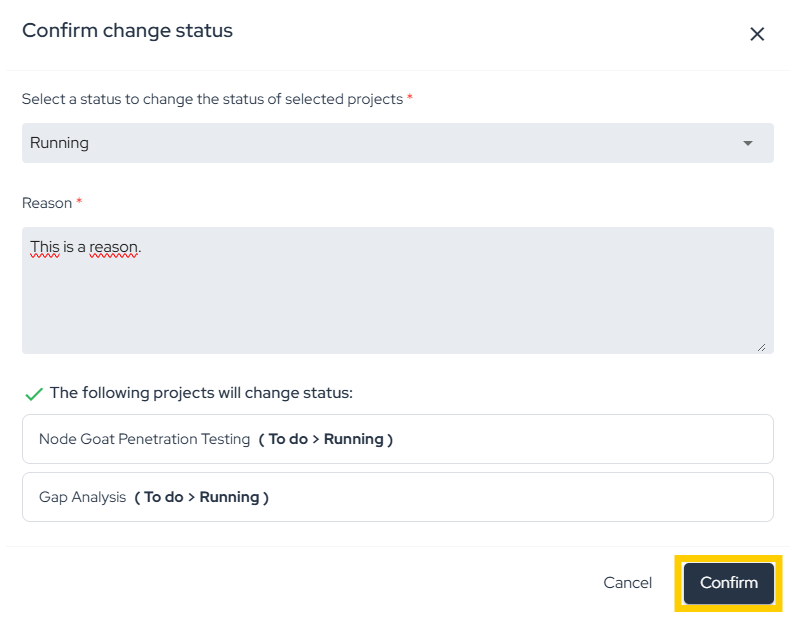
Next, choose the new status, provide a reason, and click Confirm:
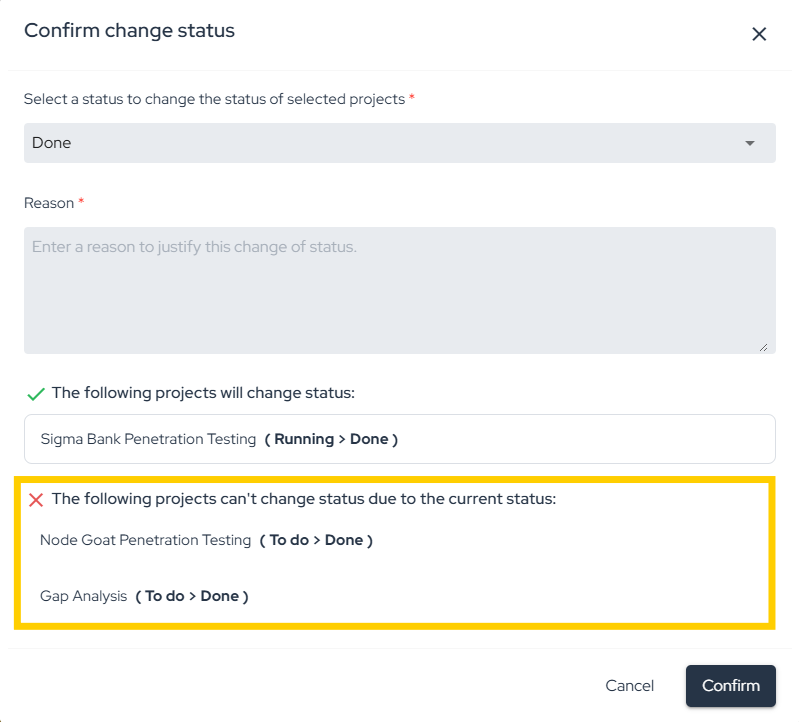
If any of the selected projects cannot be transitioned to the chosen status, a notification will be displayed:
Projects Status Meaning
Below is a list of project statuses and their meanings:
- To do: indicates that the project has not yet started
- Running: indicates that the project is in progress.
- Done: Indicates that the project has been completed and the objectives have been accomplished.
- Paused: indicates that the project has been temporarily suspended. This may be due to a change in priority, lack of resources, or any other reason.
- Discontinued: indicates that the project has been suspended.
Projects Status Mapping
The Conviso Platform allows the following status transitions for projects:
| Current Status | Allowed Statuses |
|---|---|
| To Do | Running, Discontinued |
| Running | To Do, Paused, Discontinued, Done |
| Paused | Running, Discontinued |
| Discontinued | To Do, Running |
| Done | Running |
Timeline
Monitor the entire progress of the project through the Timeline section. The history provides a complete record of each action taken within the project:

Accesses
In the Accesses section, it is possible to manage access by project, allowing the project manager or responsible team to invite new users to access it:
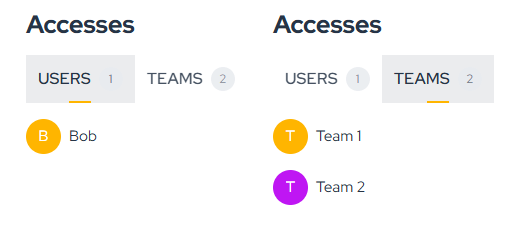
For more information, refer to the User Mangement guide.
Assigned Users
Assigned Users are those responsible for executing the project. To associate a user with the project, ensure they have the necessary access permissions:
Technical Report
The Technical Report feature allows you to generate a report for projects conducted within the platform.
Its purpose is to document the technical aspects of the project, highlight any detected security risks, and include relevant project information provided by the assigned users.
By clicking Customize project report, you can add an Executive Summary and Final Considerations according to your needs:

Once customization is complete, click Save:
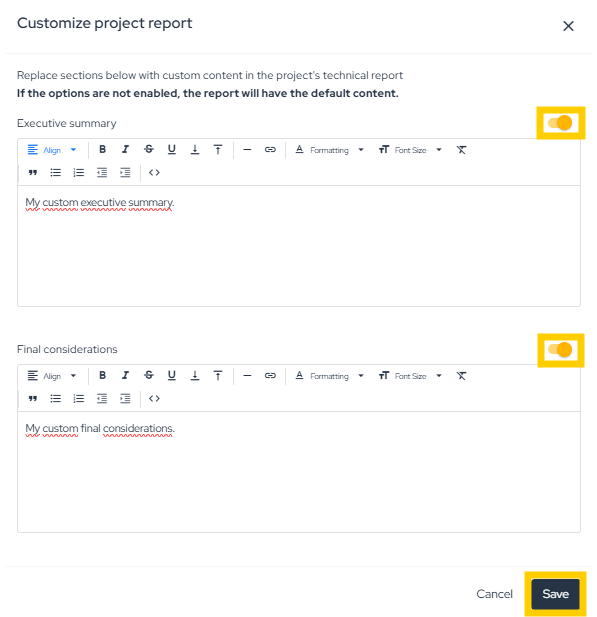
To generate the Technical Report, click Generate Technical Report, fill in the required details, and click Save:
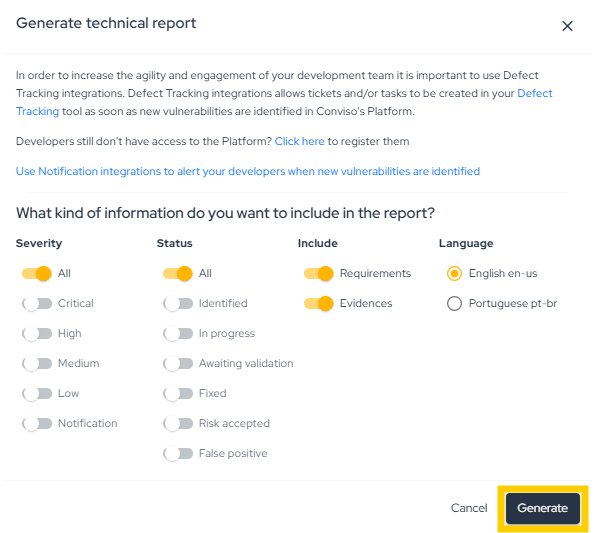
Only projects of the following types can have a Technical Report: Assessment, Code Review, Penetration Testing, Reverse Engineering, Social Engineering, and Vulnerability Retest.
Assets
Projects represent a set of activities carried out over a specific period on one or more assets to achieve a defined objective. In this section, you can view the assets associated with the project:
Only the following project types support association with Assets: Code Review, Reverse Engineering, AI Penetration Testing, API Penetration Testing, IoT Penetration Testing, Mobile Penetration Testing, Network Penetration Testing, Web Penetration Testing, Threat Modeling, and Consulting.
Vulnerabilities
Certain types of projects lead to the identification and creation of vulnerabilities within the Conviso Platform. In this section, you can easily create a new vulnerability by clicking New Vulnerability or filter existing vulnerabilities within the project by clicking View All:

To add a new vulnerability using the New Vulnerability button, ensure that your user is assigned to the project (under Assigned Users) and that the project status is set to Running.
Attachments
The Conviso Platform allows you to associate attachments with projects, enabling file sharing. In the section below, you can download the attachments linked to the project:
To add an attachment to the project, you can edit the project.
Requirements
In the Requirements tab, you can create an action plan based on the tasks that need to be completed. They are categorized by status according to their progress: To do, Running, Not According, Not Applicable and Done.
Each Requirement can have multiple activities, which must be completed (or dismissed) for the project to be finalized.
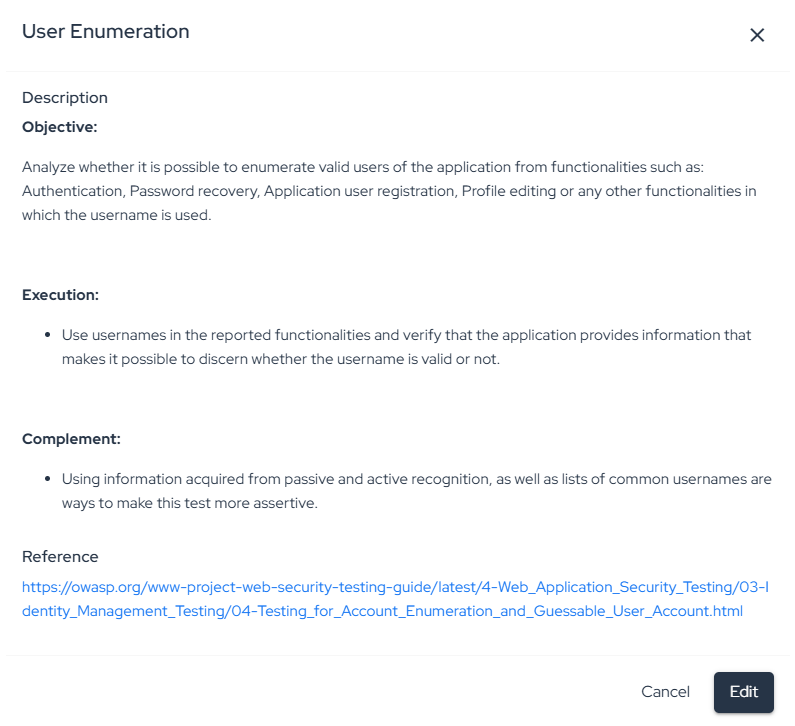
To view the tasks associated with each activity, simply click on its title:
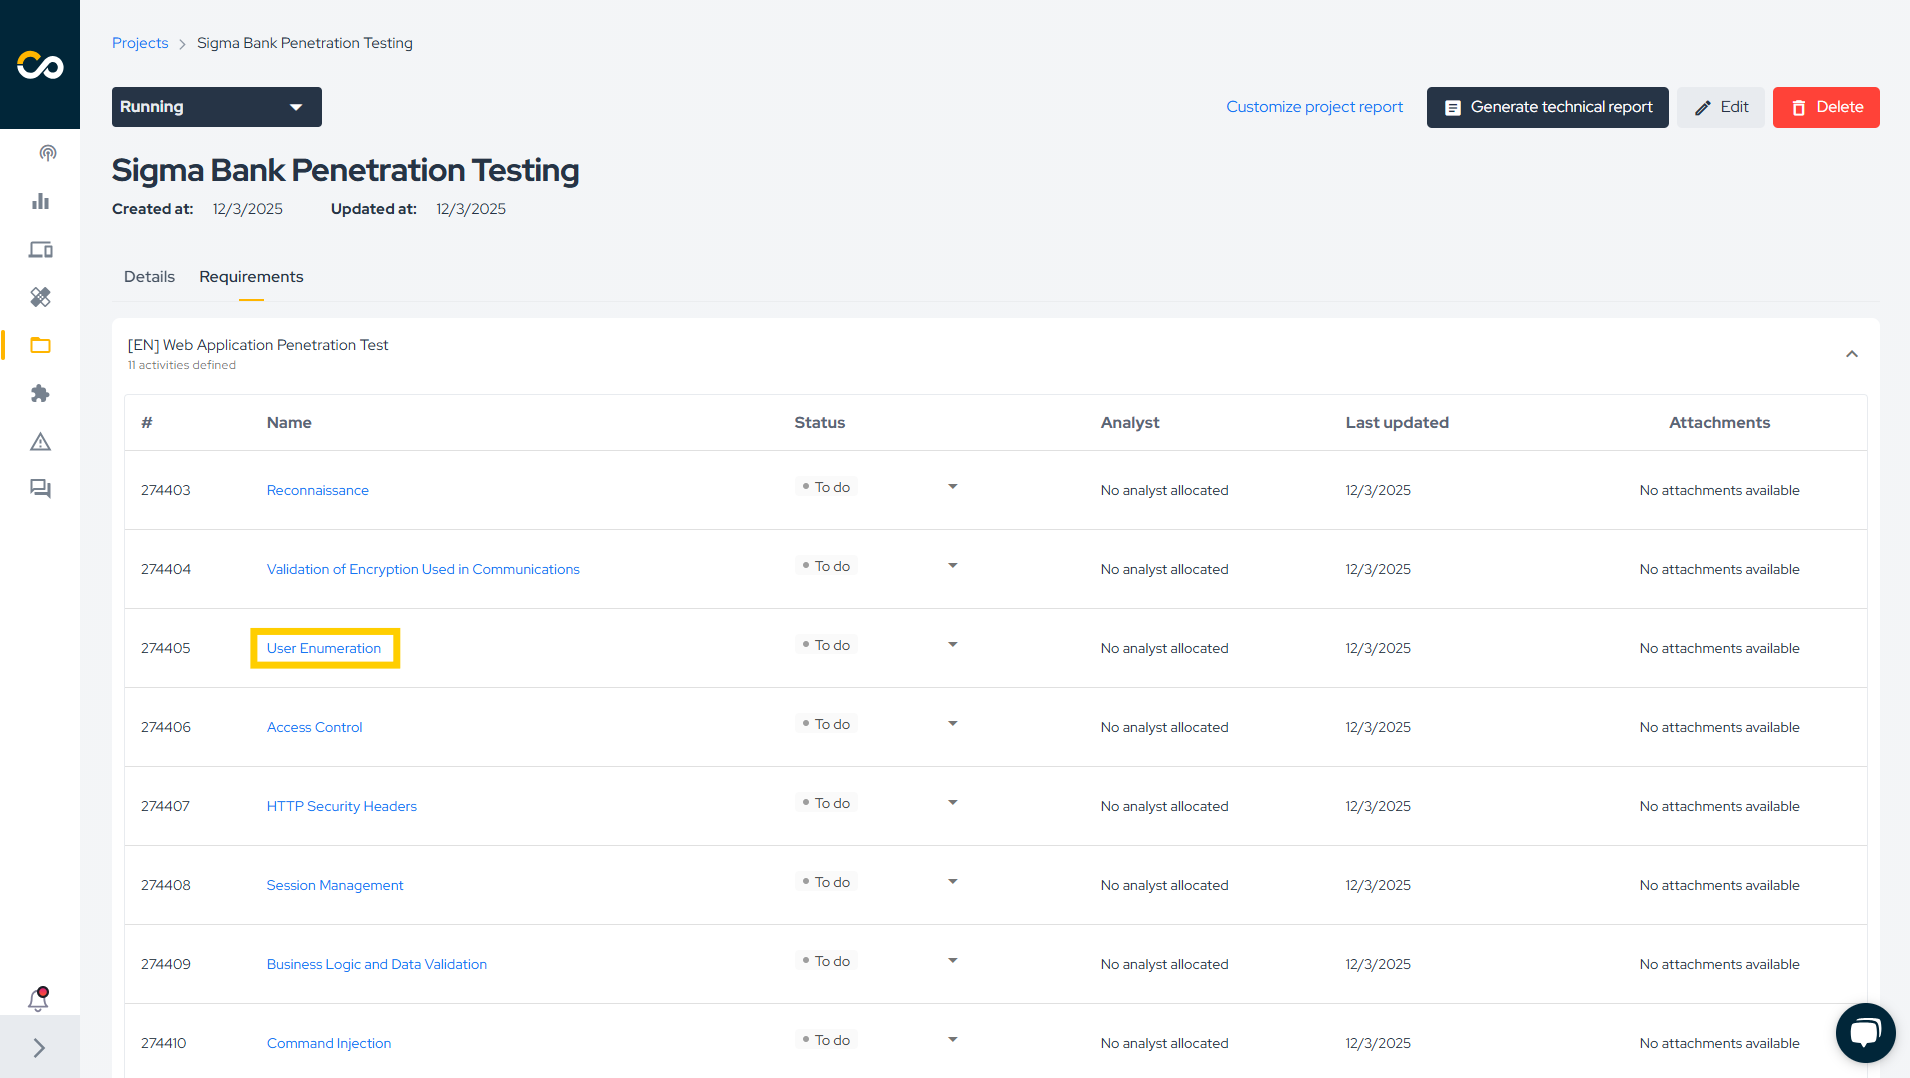
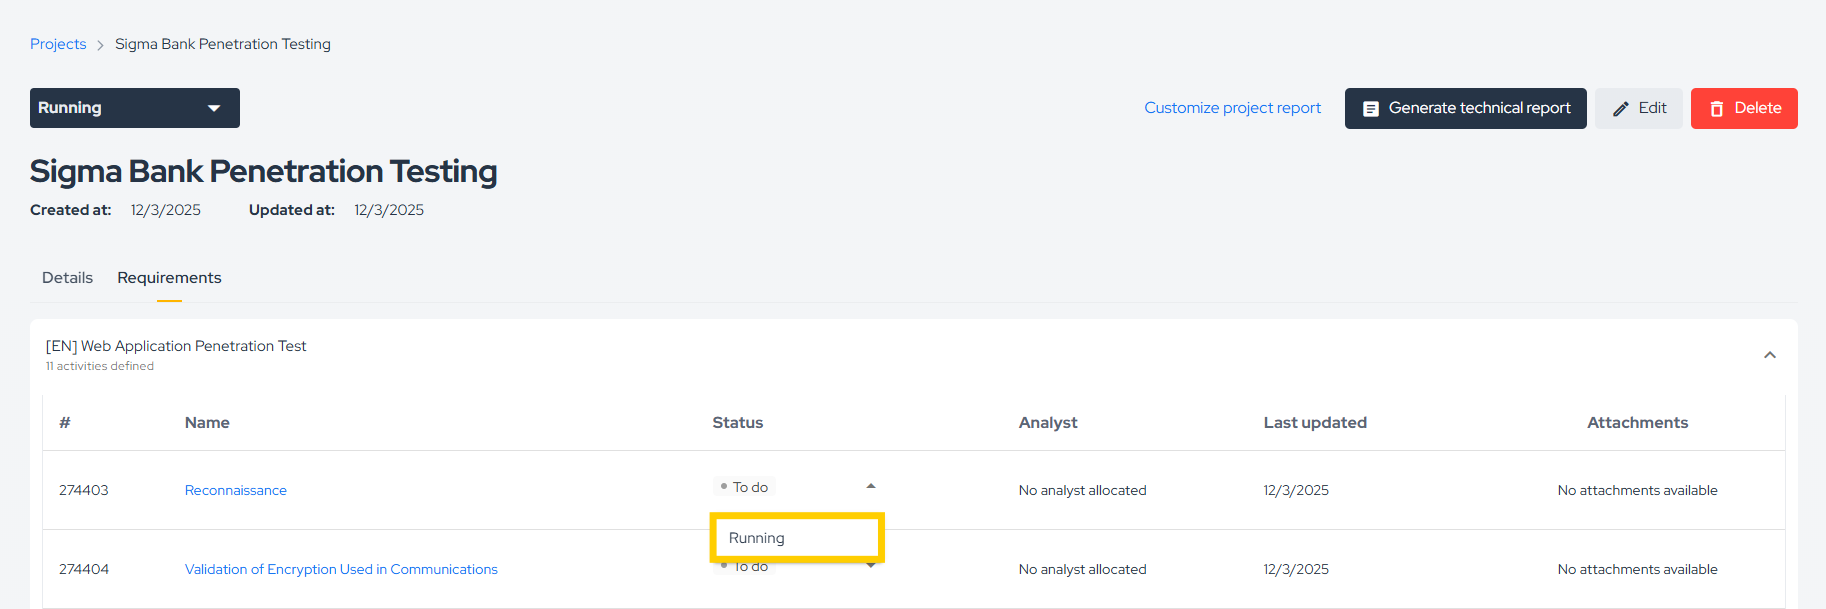
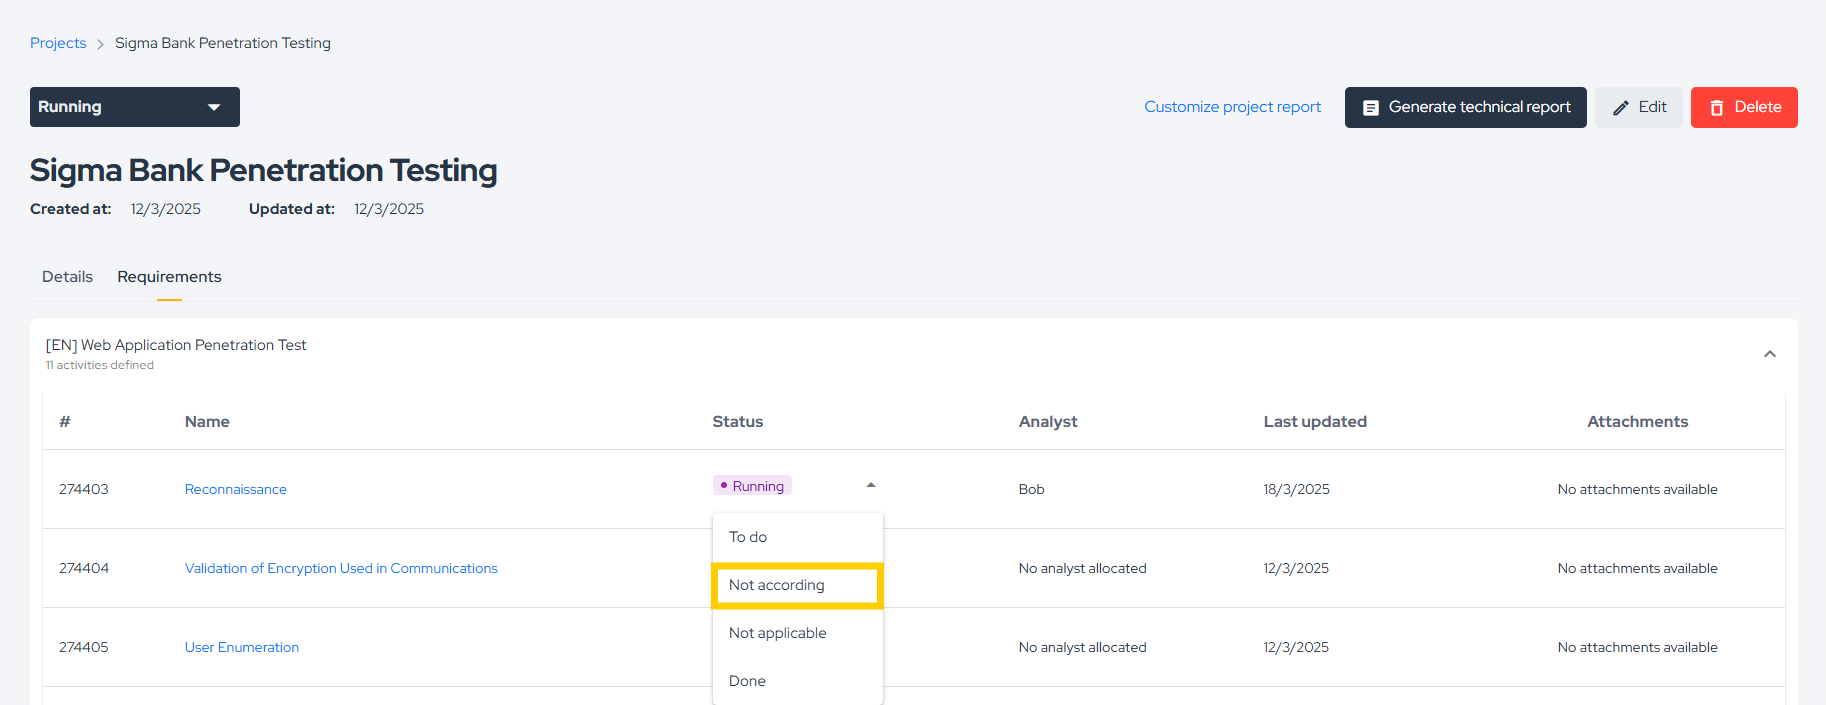
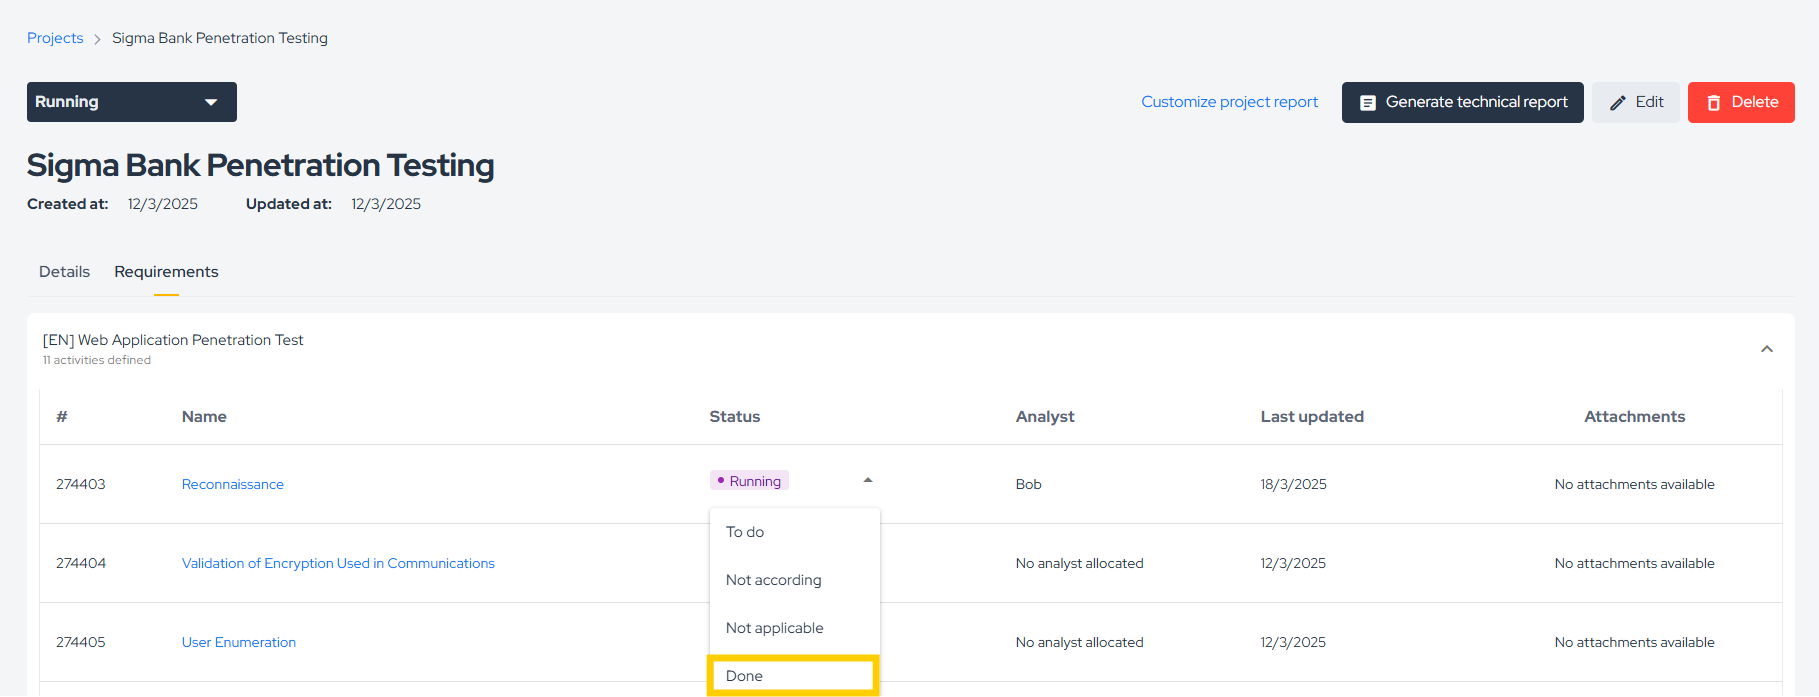
To change an activity's status, click on its current status and select the desired one:


When updating an activity’s status to Not according, a reason and/or evidence must be added:
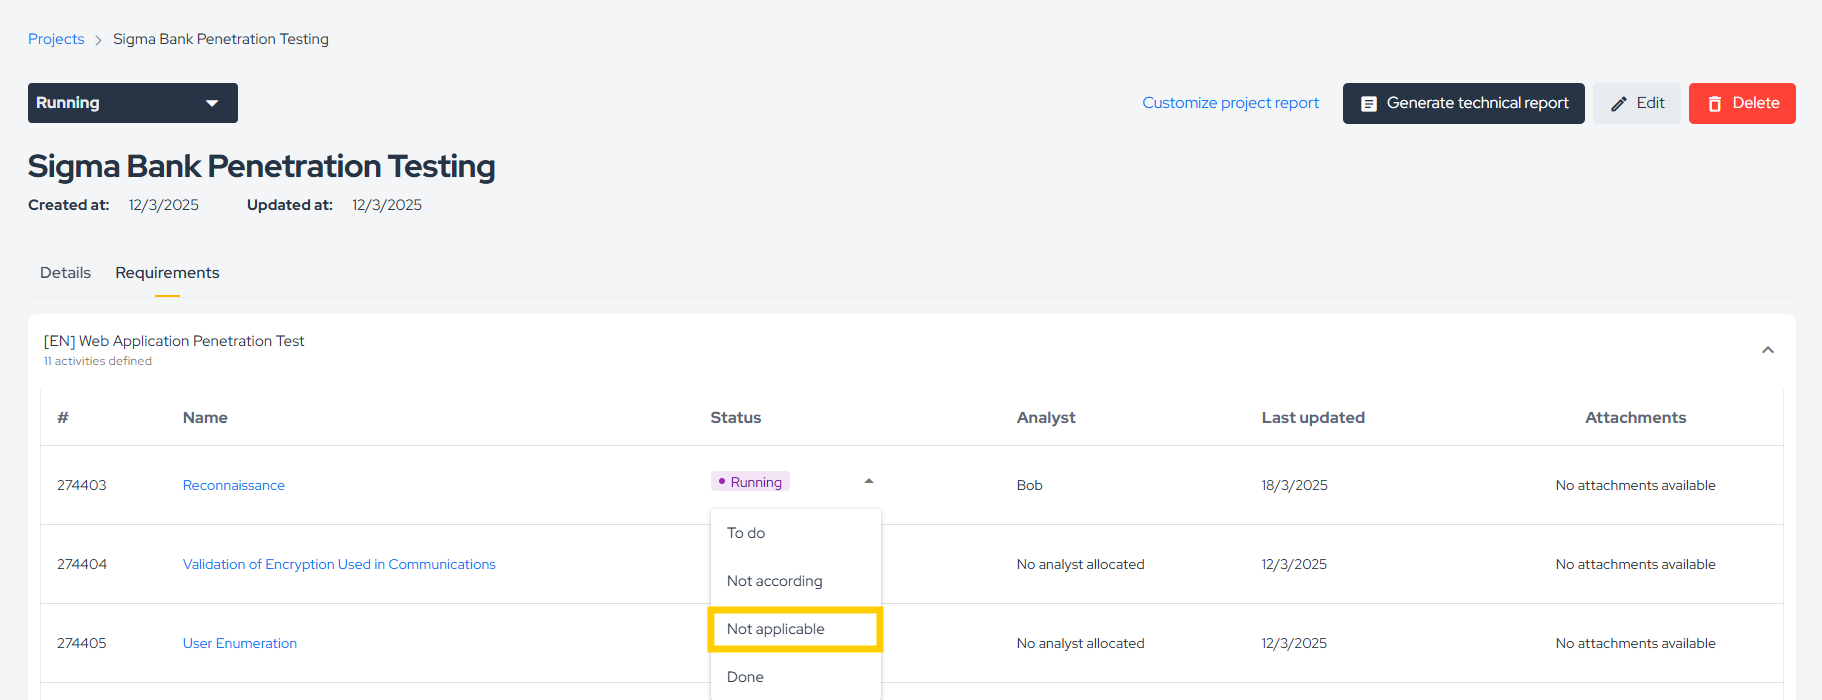
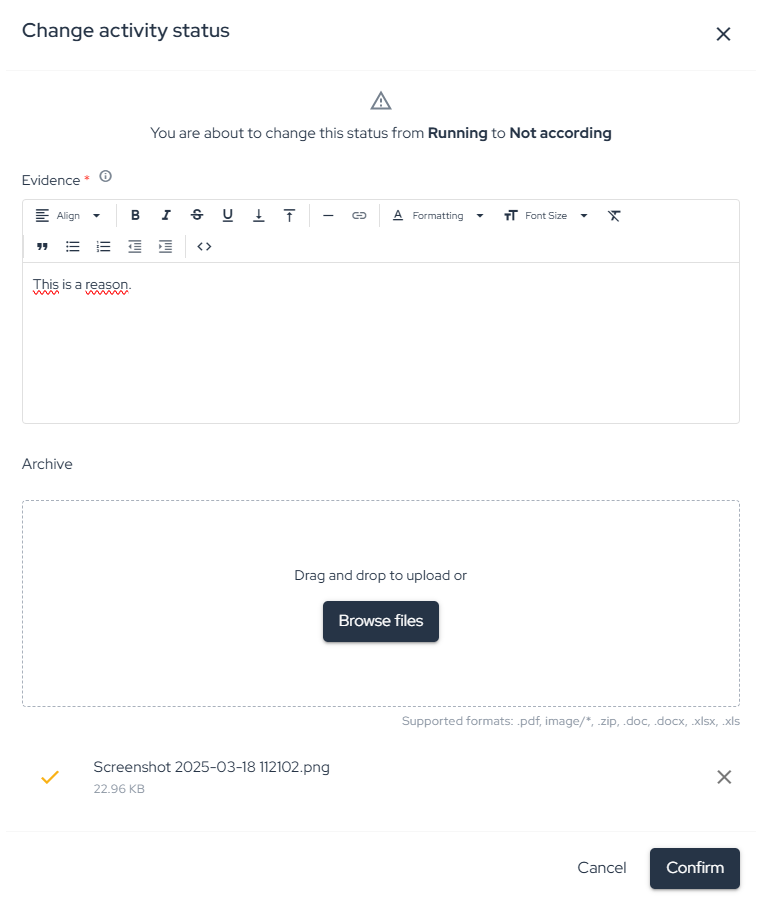
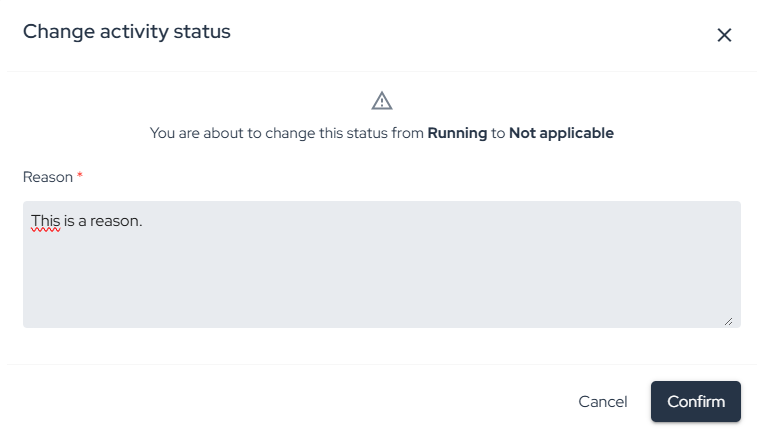
When updating an activity’s status to Not applicable, a reason must be provided:
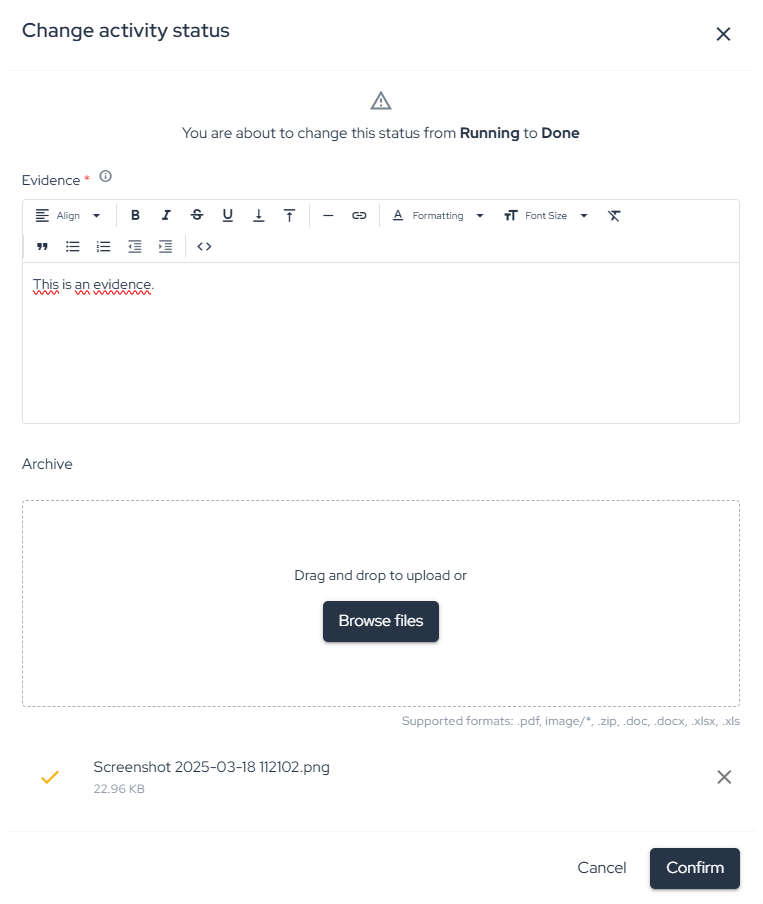
When updating an activity’s status to Done, a reason and/or evidence must be added:
After an activity's status has been updated, you can see who made the change in the Analyst column, as well as the date of the update in the Last updated column.
If an activity is completed and has an attachment linked to it, you can download it by clicking the Download icon in the rightmost column:

Enhance your development lifecycle's security with the Conviso Platform. Join us today and foster a security-first culture!
Support
Should you have any questions or require assistance while using the Conviso Platform, feel free to reach out to our dedicated support team.
Contribute to the Docs
Found something outdated or missing? Help us improve the documentation with a quick suggestion or edit.
How to contributeResources
By exploring our content, you'll find resources that will enhance your understanding of the importance of a Security Application Program.
Conviso Blog: Explore our blog, which offers a collection of articles and posts covering a wide range of AppSec topics. The content on the blog is primarily in English.
Conviso's YouTube Channel: Access a wealth of informative videos covering various topics related to AppSec. Please note that the content is primarily in Portuguese.